SysAid Copilot is a comprehensive AI suite designed and built to enhance the ITSM experience. It incorporates generative AI into every aspect of service management, offering various modules that work together to improve efficiency, empower employees, and provide valuable insights.
Requirements:
SysAid Spaces edition (Agent Assist & Chatbot for Agents only)
SysAid Copilot license
SysAdmin or AI Admin permissions
SysAid Copilot’s Agent Assist features are active on your account as soon as you get the SysAid Copilot. All the additional settings can be enabled and edited in the General Settings area for Copilot.
View and update general settings
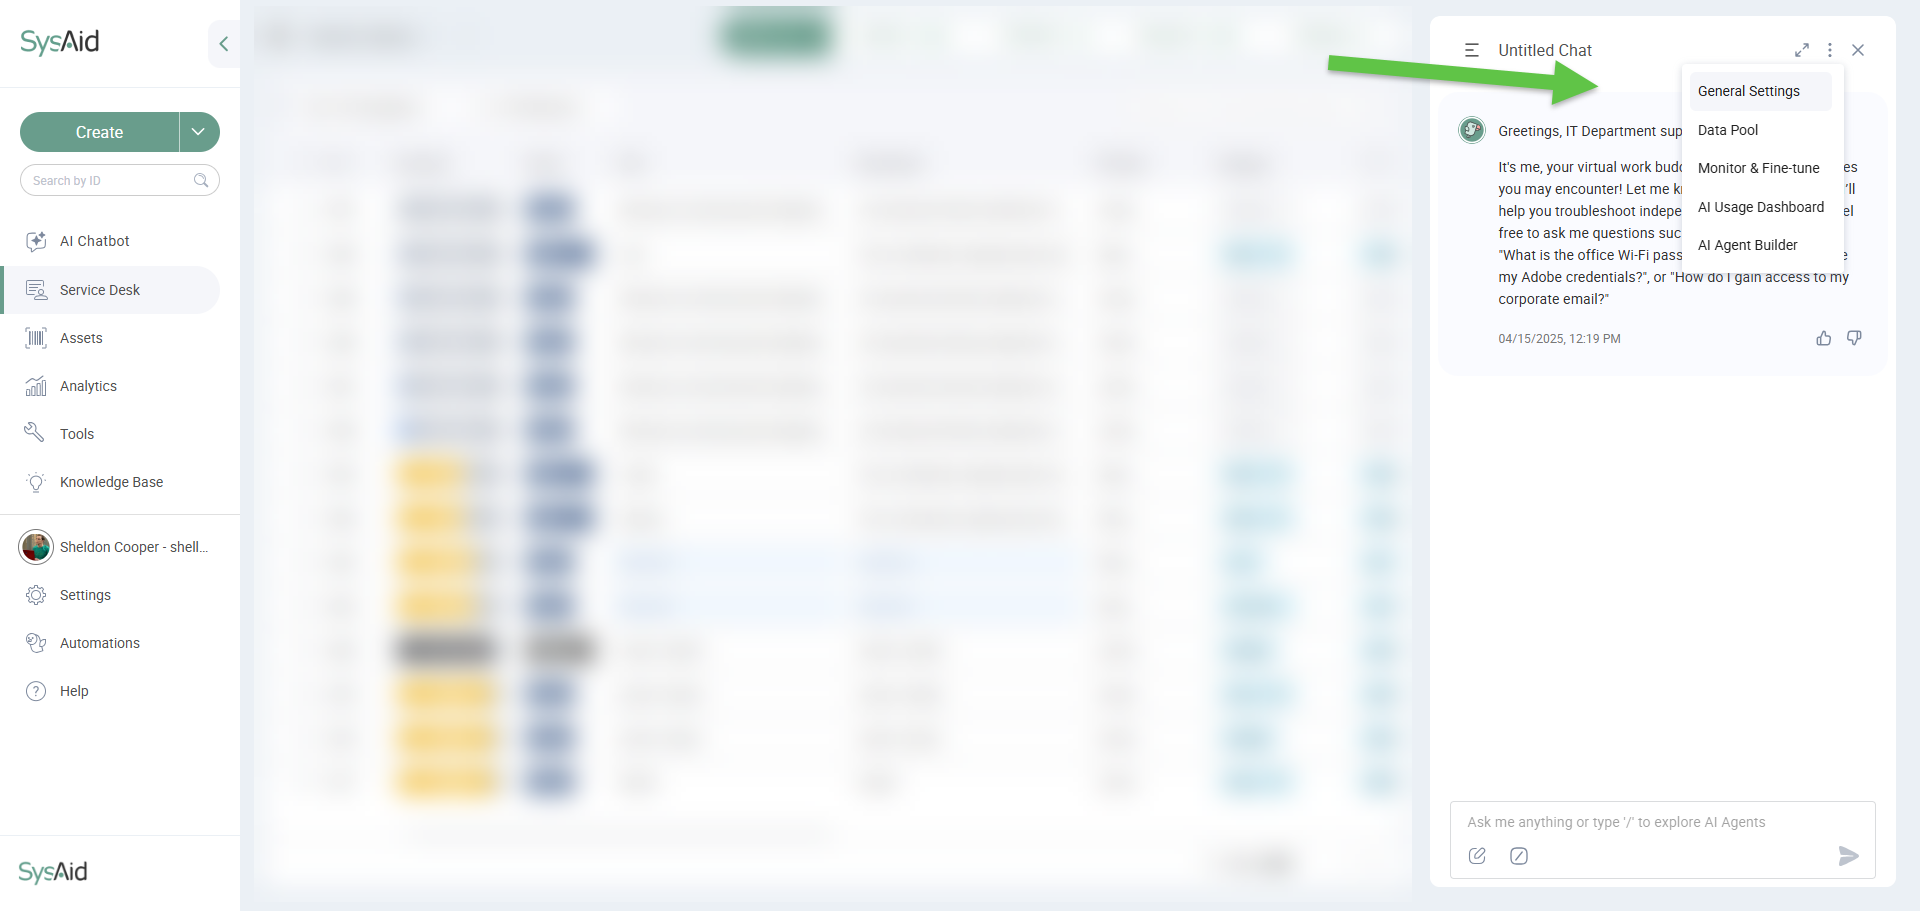
AI Admins can view and edit the SysAid Copilot capabilities in your account by clicking the 3-dot menu at the top right corner of the chat.

SysAid Copilot includes 3 main capabilities that can be enabled and configured:
1. AI Agent Assist (Spaces only)
Assistive AI
Turn on the toggle next to Assistive AI to make it available in your account. You can then choose which Assistive AI features you’d like to have available in your account. The settings include:
AI Insights Email
As a SysAdmin, you can choose whether to enable the AI Insights email for all your agents across your account.
Once enabled, each agent can configure their AI Insights email to include only group data relevant to their needs. They can also add recipients so they receive the same customized email.
To learn more about the email and how to configure it, see AI Insights.
AI Emailbot
Let users receive an AI Chatbot response when they create a Service Record via email to solve issues faster and save both the Agents’ and End Users’ time.
The AI Emailbot allows End Users to contact IT support via email as they normally would. Upon receiving the email, the AI Emailbot automatically creates a Service Record and provides an immediate, context-aware response, guiding users through solutions and enhancing the overall support experience.
To learn about the Emailbot and its capabilities, see AI Emailbot.
2. AI Chatbot for End Users
AI Chatbot for End Users enables employees to promptly report issues and receive real-time support from their organization's ITSM resources and personnel.
Instead of relying solely on IT teams for questions and problem-solving, users can directly ask the AI Chatbot questions or use it to quickly submit Service Records, avoiding the time-consuming task of manually filling in individual fields in the Service Record form.
To learn more about the End User Chatbot, see AI Chatbot for End Users.
3. AI Chatbot for Agents
Extend conversational AI assistance to the Agents themselves - Agents can ask the AI chatbot questions and get answers conversationally, right from the Service Desk and active Service Records.
To learn more about the Agent Chatbot, see AI Chatbot for Agents.
Additional SysAid Copilot settings
To learn more about the different Copilot settings, go to the relevant link:
Grant AI Admin permissions
SysAdmins and Agents with “AI Admin” permissions can change and update all SysAid Copilot AI configurations. This includes:
General Settings
Data Pool
Monitor & Fine-tune
AI Usage Dashboard
To give an Agent AI Admin permissions:
In SysAid Spaces
From your SysAid main menu, go to Settings > Administration > User Management > Service Pros (Admins).
Select the relevant person.
Go to the Permissions tab.
Check the AI Admin checkbox.
Click OK.
In SysAid Classic
From your SysAid main menu, go to Tools > User Management > Administrators.
Select the relevant person.
Check off the AI Admin checkbox at the bottom of the page.
Click OK.
Please note:
To learn more about our AI usage guidance, see SysAid AI Security & Trust Overview.