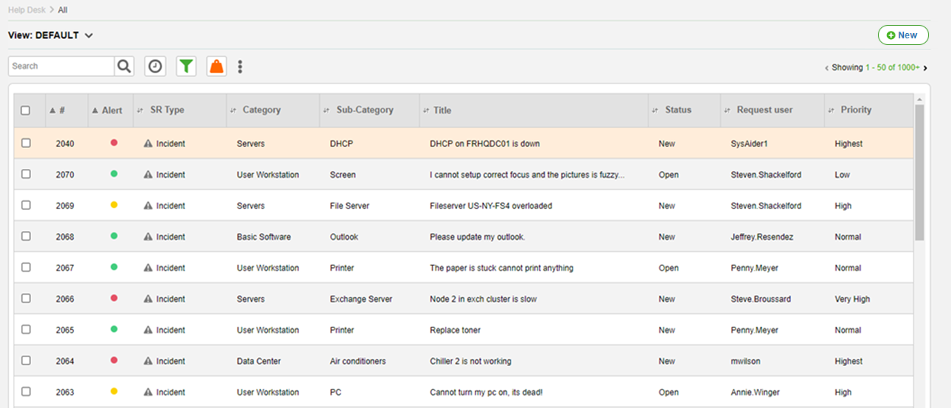
This is the Help Desk list. This list allows you to filter and view the different service records that are registered in your helpdesk. You can also create new service records here. You an change the width of any column by clicking and dragging at the right edge of that column's header. To open an existing service record, click on it's row.
In SysAid Full Edition, this list shows Incidents, Changes, Problems, and requests.
For general instructions for using list pages in SysAid, see Using SysAid Lists.
Service Desk list options
The following list options are specific to the Service Desk lists:
Date Search
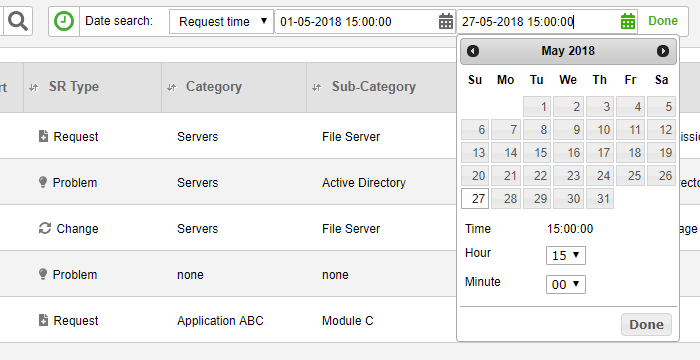
Click  to further filter by date range, either for the Request time or for the Modify time. After you select the time type and date range, click Done in the search box.
Export to Excel
Click  and click Export to Excel to export the list to a .csv file in Excel.
Export to PDF
Click  and click Export to PDF to export the list to a .pdf file.
SR Weight When this functionality is enabled, and a button appears on the top of the SR list, allowing you to push all of your weighted SRs to the top of the list, sorted in descending order. The button toggles between the Active and Inactive positions, indicating whether the weighted SRs are sorted separately or not.
Active | Inactive | |
|  |
If you do not have any weighted SRs this button does not appear, even if it has been enabled in Service Desk settings.
To push all weighted SRs to the top of your list, click . The button changes to the On position.
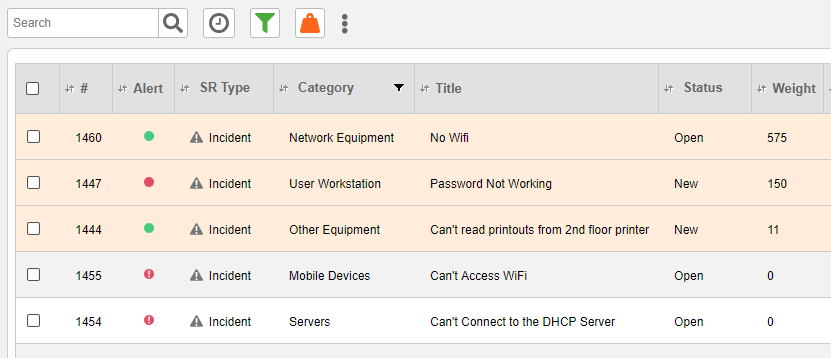
To sort the weighted SRs according to the same sorting criteria as the other SRs in your list, click  The button changes to the Off position.
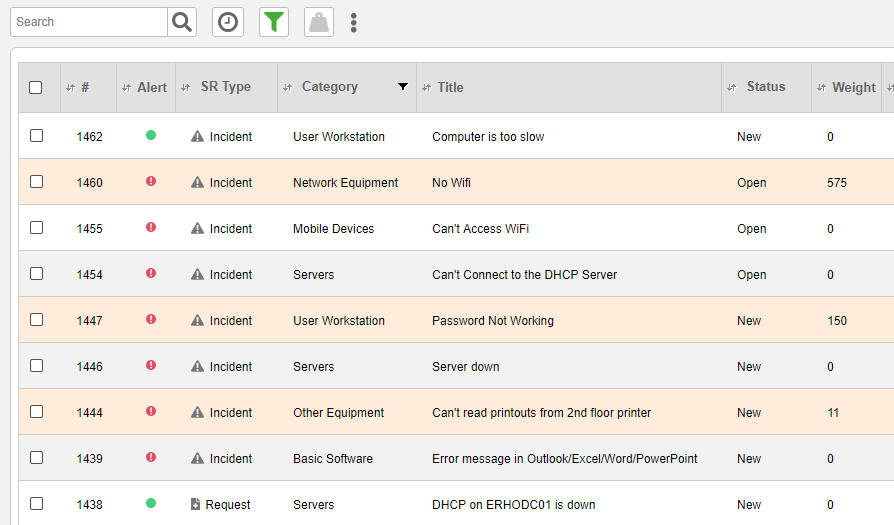
If you activate the float weighted SR function, all weighted SRs are displayed irrespective of any filters you may have applied.
For more information on Weighted SRs, see SR Weight.
Create a new service record
To create a new service record, click  . This opens a new incident in the SR form. For further instructions, see SR Form. If you would like to create a new change, problem, or request, go to Service Desk > Help Desk > Changes, or Service Desk > Help Desk > Problems, or Service Desk > Help Desk > Requests.
Unique reference number
Each SR, whether of type incident, change, problem, or request, includes a unique reference number. This number is never reused, even by a different SR type. For example, if you create new incident #15 and immediately afterwards create a new problem, the problem receives #16.
In Cloud accounts, the reference numbers skip from one SR to the next. For example, if you submit an SR and SysAid assigns it the ID #6, the next SR opened in the account may be #9 instead of #7. This is due to the configuration of SysAid's cloud databases.
List actions
There are a number of actions you can perform on your service records right from the list. To open the SR actions list, select one or more service records using their corresponding check boxes at the left end of each row. This opens the SR actions list:
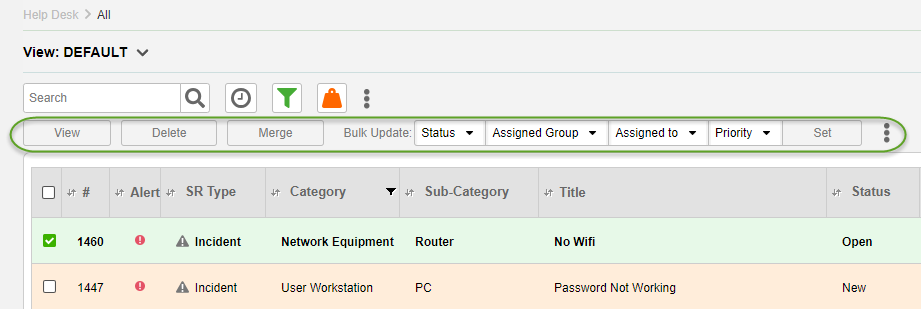
View
Click here to view the service records you've selected. The SR form will open to the first SR you've highlighted, and the Previous/Next SR arrow buttons at the top of the form will allow you to cycle through the rest of the SRs you've selected. (By contrast, if you click on a single service record from the list, the previous/next arrow buttons will move through all SRs in the list.)
Delete
Delete the selected service records. You must have the correct permissions in order to delete service records.
Merge
Merge the selected service records. You must have Merge permission to access this option.
Merging tickets
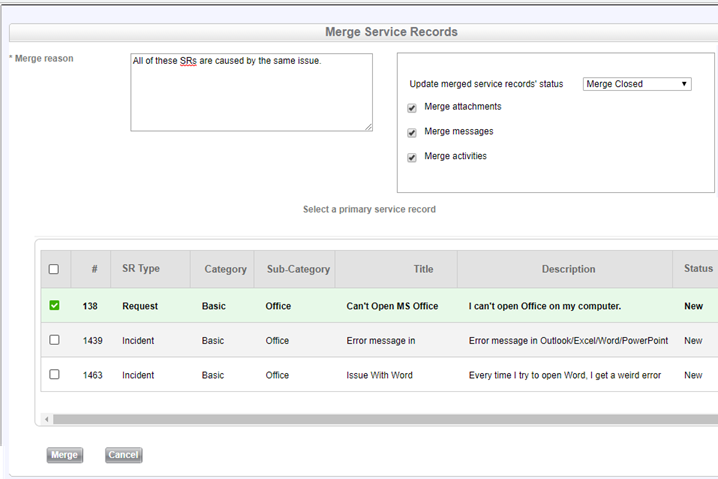
When you select this option, the Merge Service Records dialog appears.
- Depending on your permissions, you can change the default merge settings or you may be limited to the defaults displayed in the Merge Service Records Default Settings
- Enter a reason for the merge.
- Select a primary service record for the other service records to be merged into.
- Click Merge.
Status, Assigned Group, Assigned to, Priority
Select a Status, Assigned group, Assigned to administrator, or Priority from one or more of these drop-down lists, and then click Set. The appropriate field(s) will then be updated for all of the service records you've selected. For example, select three SRs, choose David from the Assigned to list, and then click Set. These three SRs are now assigned to David.
Export Selected to PDF
Click  and select this option to export the selected SRs to .pdf. You can then easily print them.
Export Selected to Excel
Click  and select this option to export the selected SRs to .csv. You can then print them, or use the data for further calculations.
More Actions
Click  and select More Actions to open a window with the following SR options: Urgency, Archive, Convert *, SR Custom List 1, SR Custom List 2 ,Weight, and Admin Group, Set Parent SR . Select one of these options, and then choose or enter the desired value from the adjoining drop-down list or text box. Click Save to update each of the selected SRs with the new value.
- The option to convert service records from incidents to requests and from requests to incidents is only visible if it is enabled in the Service Desk settings.
Adding hidden columns to the list
SysAid allows you to add hidden columns to the Help Desk list that you can easily view with the click of a button. This is useful if you have certain fields that you might need to see only occasionally, such as Source or Reopen counter.
To add hidden columns to the list:
- Open the View drop-down.
- On the top of the drop-down, click Customize View.
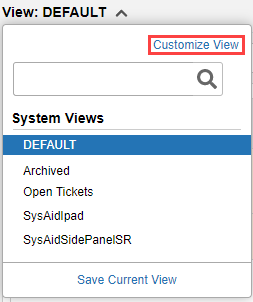
- Move the field === Hide/Show Divider ==== from Available Columns to Visible Columns.
- Position the divider in your desired location. All fields above the divider are hidden. All fields below are visible.
For more information about customizing lists, go here.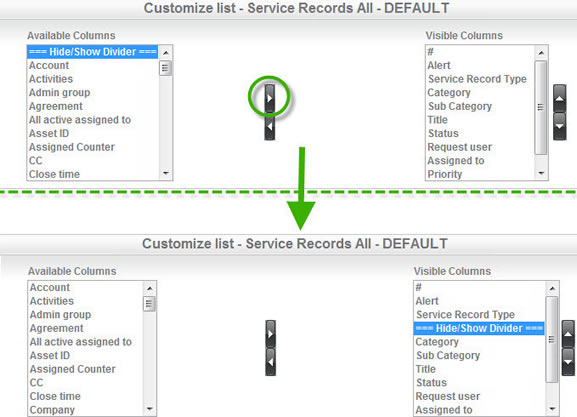
- Click Save. This closes the Customize list screen and updates your view.
After adding the divider to the list, you can click the > button to show the hidden fields. You can click the < button to hide these fields again.
Show/Hide hidden columns
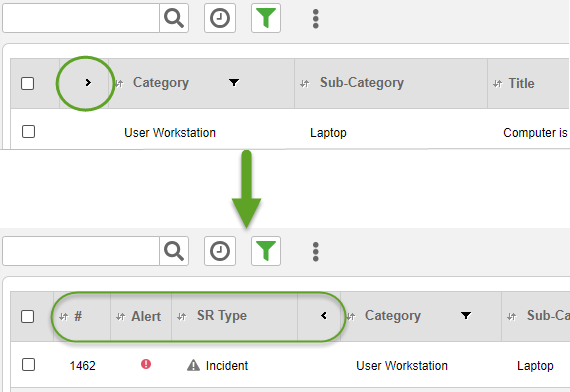
Important: If you are filtering or sorting by hidden columns, the filters and sort are still in effect even when the columns are hidden.
Predefined list views
The SysAid Help Desk Incident list includes several predefined views that correspond to lists in other SysAid locations (note that these views do not appear from Service Desk > Help Desk > All):
Archived
This view shows only SRs that have been archived. Note that unlike the other predefined list views, this view doesn't correspond to any other SysAid lists.
Asset Dashboard
Controls the Incident, Request, Change, and Problem tabs in the asset details section of the Asset Management Dashboard.
EndUser
Controls the Service History list on the Self-Service Portal.
Supervisor
Controls the Supervised Users' SRs list on the Self-Service Portal.
SysAidMobile
Controls the Service Desk list and advanced SR filter for the SysAid Mobile solution.
Save current filters as personal view
You can preserve the column and advanced filters applied to a list as a separate view for your own personal account. Only you will be able to access these views.
- Once the column and advanced filters are set on the list, open the View drop-down.
- Select Save Current View.
- Enter the name of your new view.
- Click Save.
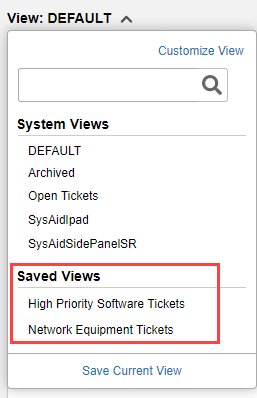
Your views are displayed in a separate section on the bottom of the Views drop-down.