The Calendar Settings page controls which calendar items are synchronized with Exchange/Office 365 and how far back in time the calendar syncs. Syncing exports calendar items from the SysAid calendar and importing them into an administrator's Outlook calendar. Items are not imported from Outlook to the SysAid calendar.
Ensure that you save any changes you make to this page.
Important:
All of the settings on this page are per administrator, so any changes made to this page only affect the currently logged-in administrator. To change system-wide Exchange settings, navigate to:
In SysAid Classic, Settings > Integration > Calendar Sync.
In SysAid Spaces, Settings > Setup > Calendar Sync.
Enable Synchronization with the Exchange server - This controls whether or not SysAid will import calendar items into the Outlook of the currently logged-in administrator.
Export the following events to your Outlook Calendar - You can choose individually for each type of calendar item if you would like to import to Outlook or not. (SysAid Events include Group Events.)
Show Calendar Items starting X Days Ago- This field has two functions:
Determines how far back in time data will appear on the SysAid calendar.
Determines how far back in time calendar items will be imported into Outlook.
For example, if the number is 30, then you will not see anything older than 30 days on your SysAid calendar, and any changes to due dates, activities, etc., more than 30 days old will not be imported into your Outlook calendar.
Show events relating to service records with "Closed" status class: Check this if you would like activities and due dates from SRs with a closed status class to appear on the SysAid Calendar and in your Outlook (requires Exchange sync). Uncheck this if only open status class items should appear.
Sync the calendar with OAuth 2.0 protocol
You can set up calendar sync with the OAuth 2.0 protocol with Microsoft 365 or Google.

Microsoft 365
To set up calendar sync with the OAuth 2.0 protocol with Microsoft 365
From the Protocol drop-down, select OAuth 2.0.
Select Microsoft 365.
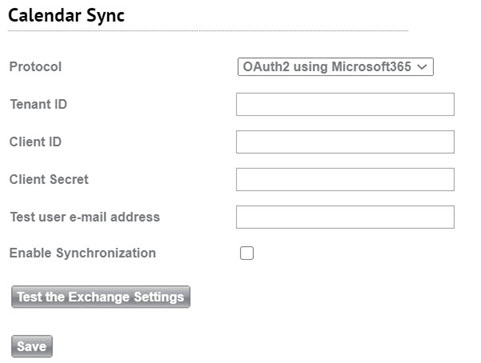
Register your application in Azure:
In your Microsoft 365 account, navigate to Azure Active Directory > App registrations.
Click New registration.
Enter a name for your application.
In the supported account types, select the single tenant option.
(optional) Select a platform configuration.
Click Register.
Client secret:
In App registrations, navigate to Certificates & secrets.
Click New Client secret.
Enter a description.
In the Expires area, select Never.
Click Add.
Copy the generated secret from the Value column.
Back in the calendar sync form, paste the secret in the Client secret field.
Set up API permission:
Back in Azure, navigate to API permissions and click Add a permission.
Choose Microsoft Graph.
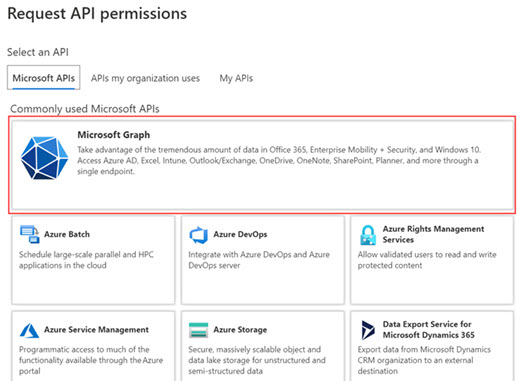
Click Delegated Permissions.
Check the
User.Readpermission.
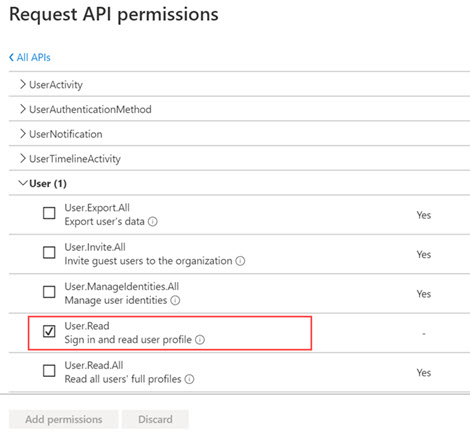
Click Add Permissions.
Click Application Permissions.
Check the following permission.
Calendars.ReadWriteMail.ReadWriteMail.SendUser.Read.All
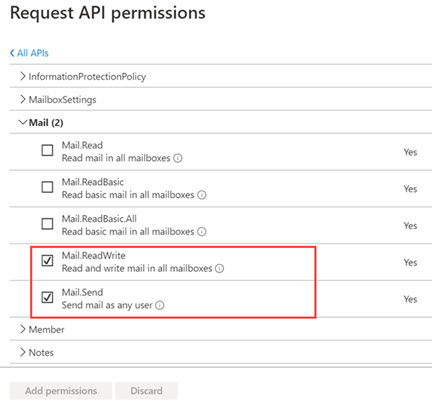
Click Application Permissions.
Click Grant admin consent for <domain name>.
Click Yes to confirm.
Copy the Tenant ID and Client ID:
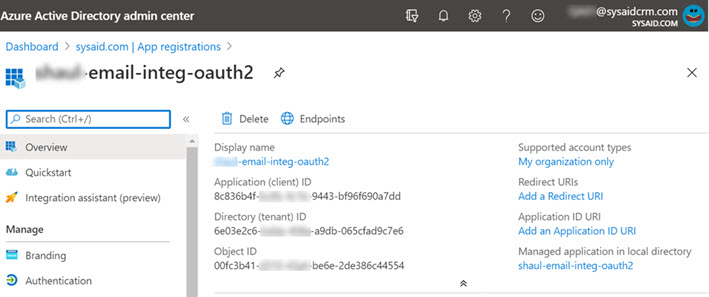
In Azure Active Directory, navigate to App registrations and select the app you just set up.
Copy the Application (client) ID and paste it into the Client id field in the SysAid calendar sync form.
Copy the Directory (tenant) ID and paste it into the Tenant id field in the SysAid calendar sync form.
Follow the instructions above for configuring the rest of the calendar sync form.
To set up calendar sync with the OAuth 2.0 protocol with Google
From the Protocol drop-down, select OAuth 2.0.
Select Google.
Create a project in Google:
Navigate to Google Cloud Platform Console. If you haven't used this Google Cloud Platform Console yet, agree to their terms and conditions.
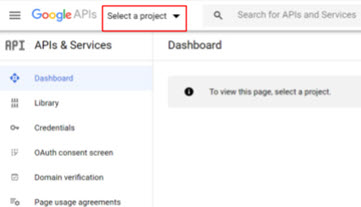
Click Select a project.
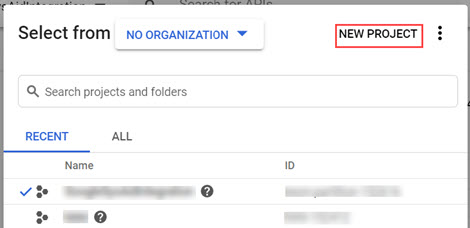
Click New Project.
Add Gmail API and Google Calendar API scopes:
From the Navigation menu, select APIs & Services > Library.
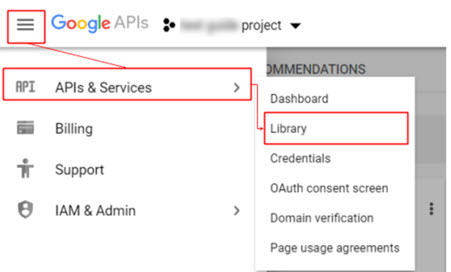
Search for Gmail API and select it from the search results.
Click Enable.
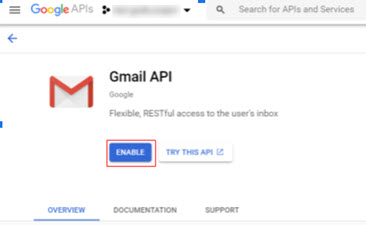
Search for Google Calendar API and select it from the search results.
Click Enable.
Create a service account
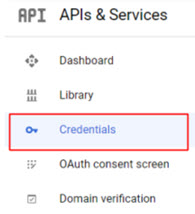
From the side menu, click Credentials.
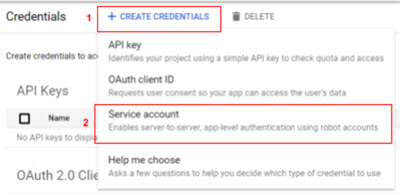
Click Create Credentials.
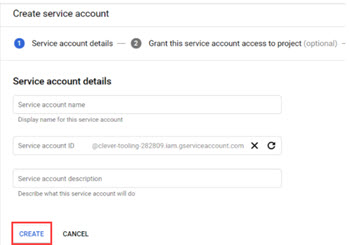
Click Service Account.
Enter any name for your service account.
Click Create.
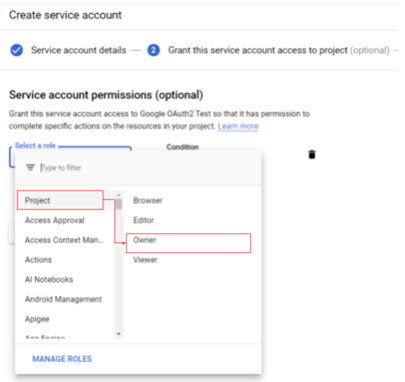
In the service account permission page, click Project , and select Owner.
Configure the OAuth consent screen:
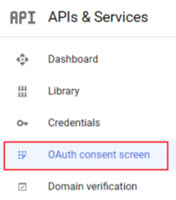
From the side menu, click OAuth consent screen.
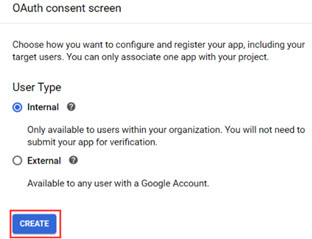
Select Internal.
Click Create.
Enter an application name (e.g SysAid).
Click Add Scope.
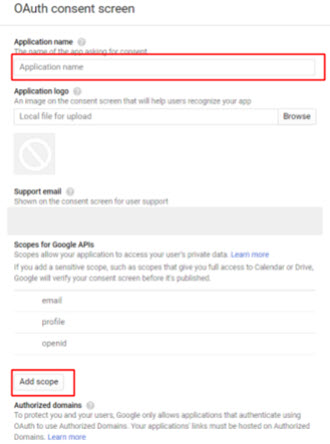
Enter https://mail.google.com/.
Click Add.
Repeat the Add Scope process and add https://www.googleapis.com/auth/calendar.
Generate a JSON credentials file:
Click your new Service account.
Select the check box for Enable G-Suite Domain-wide Delegation.
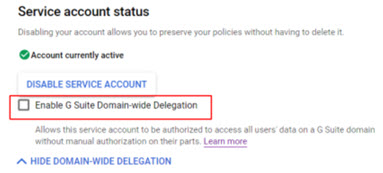
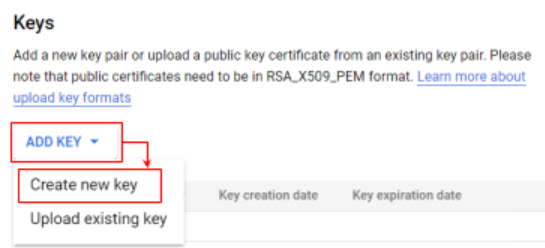
Click Add Key.
Click Create new key.
Select JSON.
Click Create.
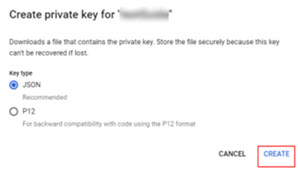
Save the downloaded JSON file to a location on your PC where you can access it later.
Click Save.
Configure the Google admin console**:**
Navigate to the Google admin console (https://admin.google.com/ ):
Click Security.
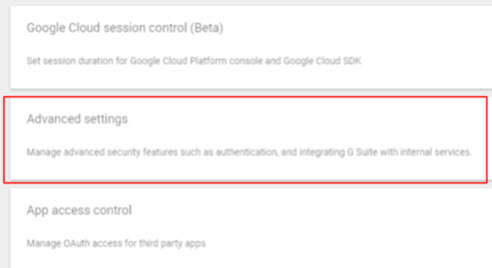
Select Advanced settings.
Click on Manage Google Services.
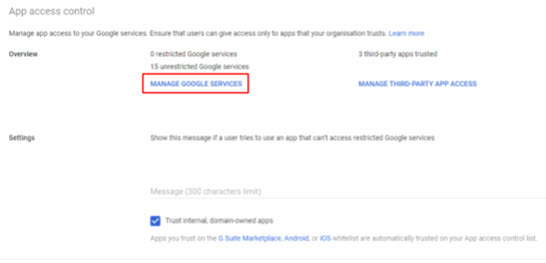
Make sure Gmail and Calendar are marked as unrestricted.

Return to the Advanced Settings screen and select Manage Third-Party App Access.

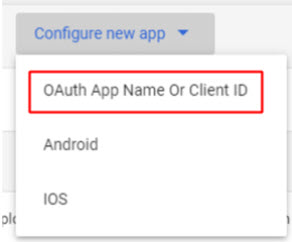
Click Configure new app.
Select OAuth App Name Or Client ID.
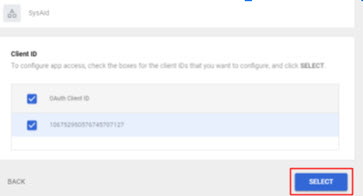
In the search box, enter the value of the 'client_id' parameter from your JSON file.
Select the application you created.

Select both Client ID check boxes and click Continue.
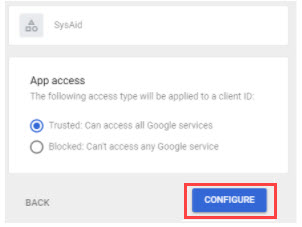
Under App Access, select Trusted Can Access All Google Services.
Click Configure.
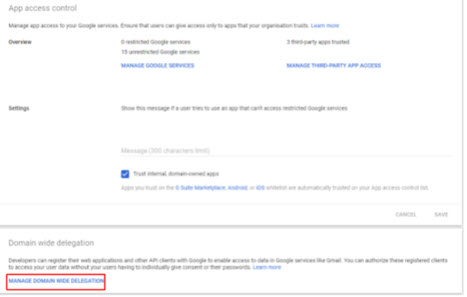
Return to the Advanced Settings screen and select Manage Domain Wide Delegation.
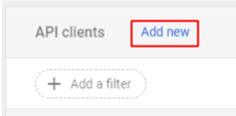
Click Add New.
In the client ID field, enter the value of the 'client_id' parameter from your JSON file.
In the OAuth scopes field, enter https://mail.google.com/ and https://www.googleapis.com/auth/calendar.
Click Authorize.
Enter the generated values in SysAid:
1. Open the JSON file you generated.
2. Copy the value of the "client_id" parameter.
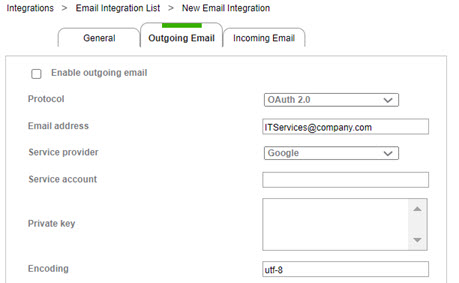
3. Paste the value into the Service Account field in SysAid.
4. Copy the value of the "private_key" parameter.
5. Paste the value into the Private Key field in SysAid.Follow the instructions above for configuring the rest of the calendar sync form.