A category is an entity attribute that enables admins to properly classify service records and configuration items in SysAid. Such classifications allow admins to organize records and assign them appropriately. Categories also help admins in sorting, searching, reporting, and other operations. In the Categories list, you can view, edit, and create categories for use by your SRs and CIs.
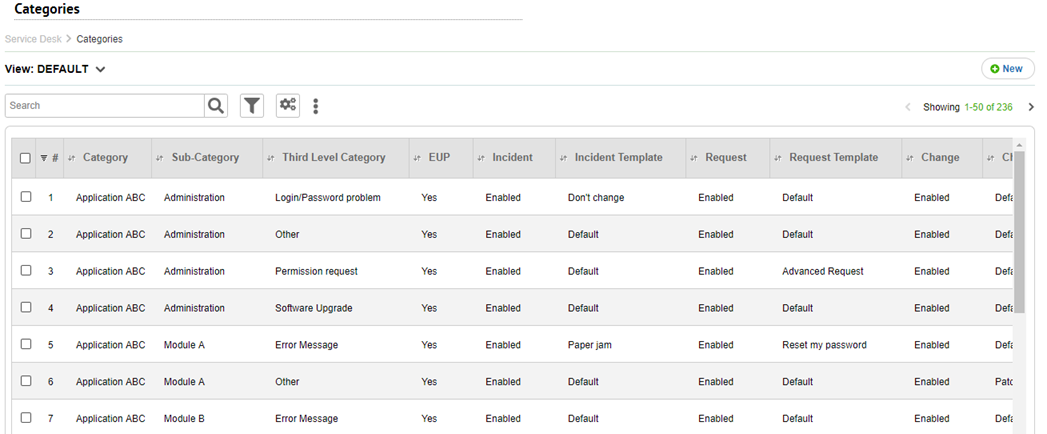
For general instructions for using list pages in SysAid, see Using SysAid Lists.
Create or modify categories
To create a new category, click  .
.
To modify an existing category, click the category you want to modify.
For more information, see Category Form.
Set Default templates
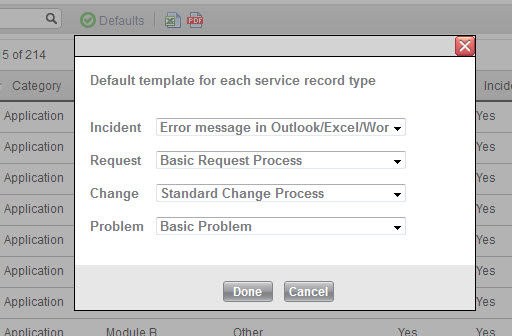
Each SR type (incident, request, change, and problem) has a default template for use in multiple places throughout the system and on this page (see below for more information).
To set the default template for an SR type
- On the top of the page, click
 .
. - Select a template from each SR type drop-down.
- Click Done.
List actions
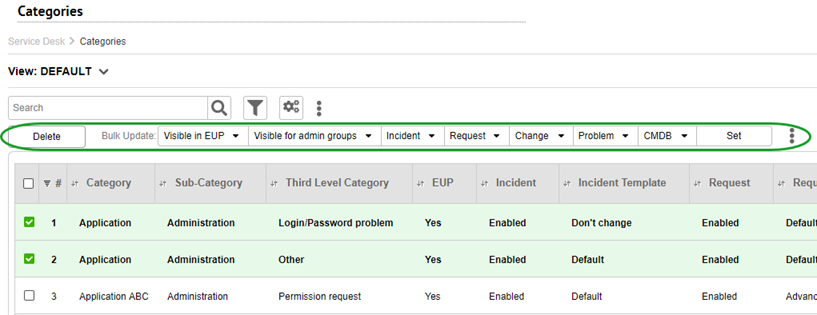
There are a number of actions you can perform on your categories right from the list. To open the Category list actions, select one or more categories using their corresponding check boxes at the left end of each row. This opens the Category list actions:
Delete
Delete the selected categories. If there are no service records using those categories, SysAid prompts you to confirm your deletion. Click OK.
If there are any service records using that category, the following prompt appears:
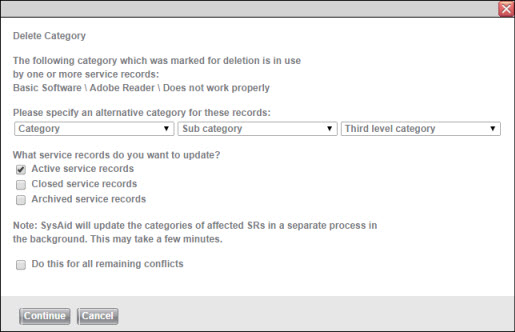
- Use the drop-downs to designate a category to replace the one you are deleting.
- Select if your replacement category should apply to active, closed, and/or archived SRs. SysAid maintains the deleted category on any SR classes not selected, but the category is no longer available for generating new SRs.
- If you want the same preferences to apply to upcoming conflicts with the other selected categories, select the Do this for all remaining conflicts check box.
- Click Continue.
You can continue working while SysAid updates the category for the affected SRs in the background. This process may take a few minutes.
Rename first or second level categories
You can rename first or second level categories for selected category sets and apply the new name to all or some of the SRs using that category. Third level categories can only be renamed individually in their category forms.
To rename first or second level categories
- Select the category sets you want to rename.
- In the List Actions toolbar, click
 .
. - Click More Actions.
- From the first drop-down, selectRename Category or Rename Sub Category.
- Enter the new name in the text box.

- Click Save.
If there are any service records using that category, the following prompt appears: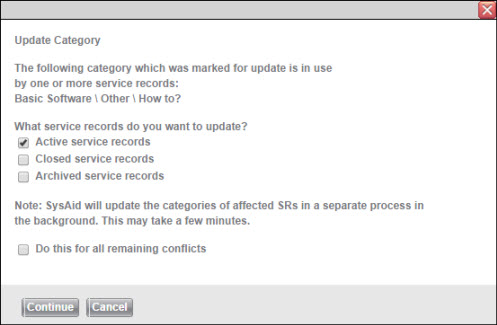
- Select if your renamed category should apply to active, closed, and/or archived SRs. SysAid maintains the previous category name for any SR classes not selected, but that version of the category set is no longer available for generating new SRs.
- If you want the same preferences to apply to upcoming conflicts with the other selected categories, select the Do this for all remaining conflicts check box.
- Click Continue.
You can continue working while SysAid updates the category for the affected SRs in the background. This process may take a few minutes.
Export to Excel
Click  and click Export to Excel to export the list to a .csv file in Excel.
Print to PDF
Click  and click Export to PDF to export the list to a .pdf file.
Group accesibility
You can add group accessibility for the selected categories to groups in the admin portal or the Self-Service Portal. You can also decide if the groups you select overrride exisiting group permissions for the marked categories or if the groups are granted access in addition to any groups that can already access the categories. The field is updated in all of the selected categories.
To set a field as visible in the Self-Service Portal or Admin portal for all groups, select a value for the Visible for admin groups field and/or the Visible in EUP field then click Set. The field is updated for all of the selected categories.
To update a categories accessibility for specific groups only
- Select the categories whose accessibility you want to update.
- In the List Actions toolbar, click
 .
. - Click More Actions.
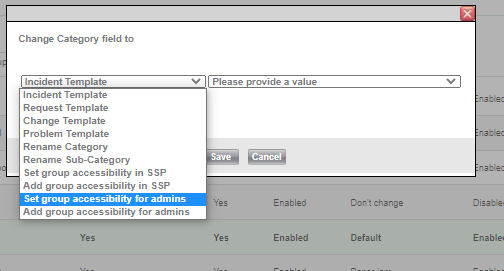
- From the first drop-down, select one of the following fields.
- Set group accessibility in SSP - Overrides the existing groups that can access the categories from the Self-Service Portal with the selected groups.
- Add group accessibility in SSP - Adds to the existing list of groups that can access the categories from the Self-Service Portal.
- Set group accessibility for admins - Overrides the existing admin groups that can access the categories with the selected groups.
- Add group accessibility for admins - Adds to the existing list of admin groups that can access the categories.
- Click within the field.
- Select a group from the drop-down.
- Repeat to add as many groups as you want.
- If you want remove a group, click the X corresponding to that group.
- Click Save.
Enable categories for specific SR types or CIs
Select a value for each SR type and CMDB fields and click Set. These fields are updated for all of the selected categories.
For example, you would only enable the Servers: Active Directory: Unlock Account category set for requests, since this category is not relevant to incidents, changes, or problems. When creating a new incident, change, or problem, you would not see the Unlock Account category.

Configure Dynamic Forms
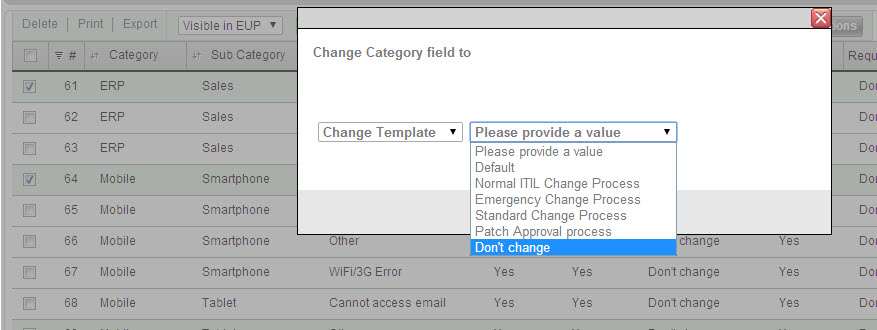
You can set the appropriate template to dynamically load in the SR form when a category is selected. To do so, you must designate a specific template to load for each SR type for each category. This could be helpful when you want to associate a specific template with a defined process for SRs in a given category.
Example: You have a Network Printer template that includes a drop-down menu of available network printers. You can specify this template to dynamically load in an incident form the moment the category Other Equipment > Network Printer. Similarly, if you have a simple template for password reset requests, you can set this template to dynamically load only in request forms when the designated Password-related category is selected.
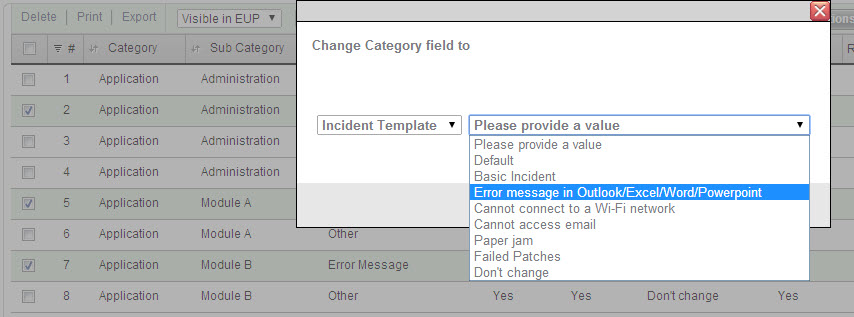
You also have the option of setting a default template to dynamically load for multiple categories. This allows you to change the template for multiple categories by simply changing the SR type's default dynamic template. If the designated default template is appropriate for a category, then select Default.
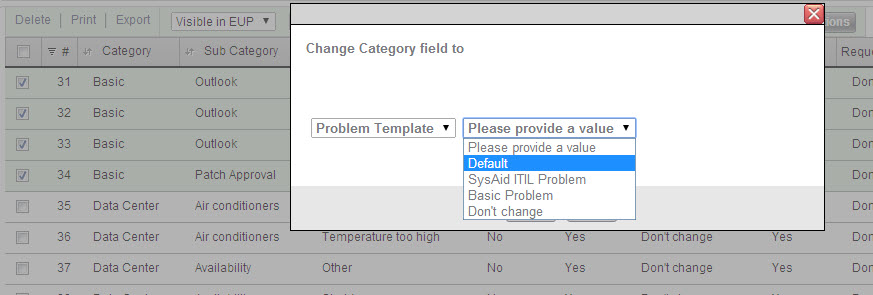
When an end user submits a new incident with the default incident template selected, the Title field is blank even if you entered a title for that template.
If you want to preserve the existing template when the selected categories are chosen in an SR, select Don't change.
For more information on creating templates, see the pages for Incident, Request, Change, and Problem templates.
To configure Dynamic Form behavior
- Select the categories you want to set Dynamic Form behavior for.
- In the List Actions toolbar, click
 .
. - Click More Actions.
- From the drop-downs, select an SR type and template value for the selected categories.
- Click Save.