This page allows you to input personal details and preferences, such as display name, chat nickname, language, date input style, and email signature. A complete list of all options on this page appears below.
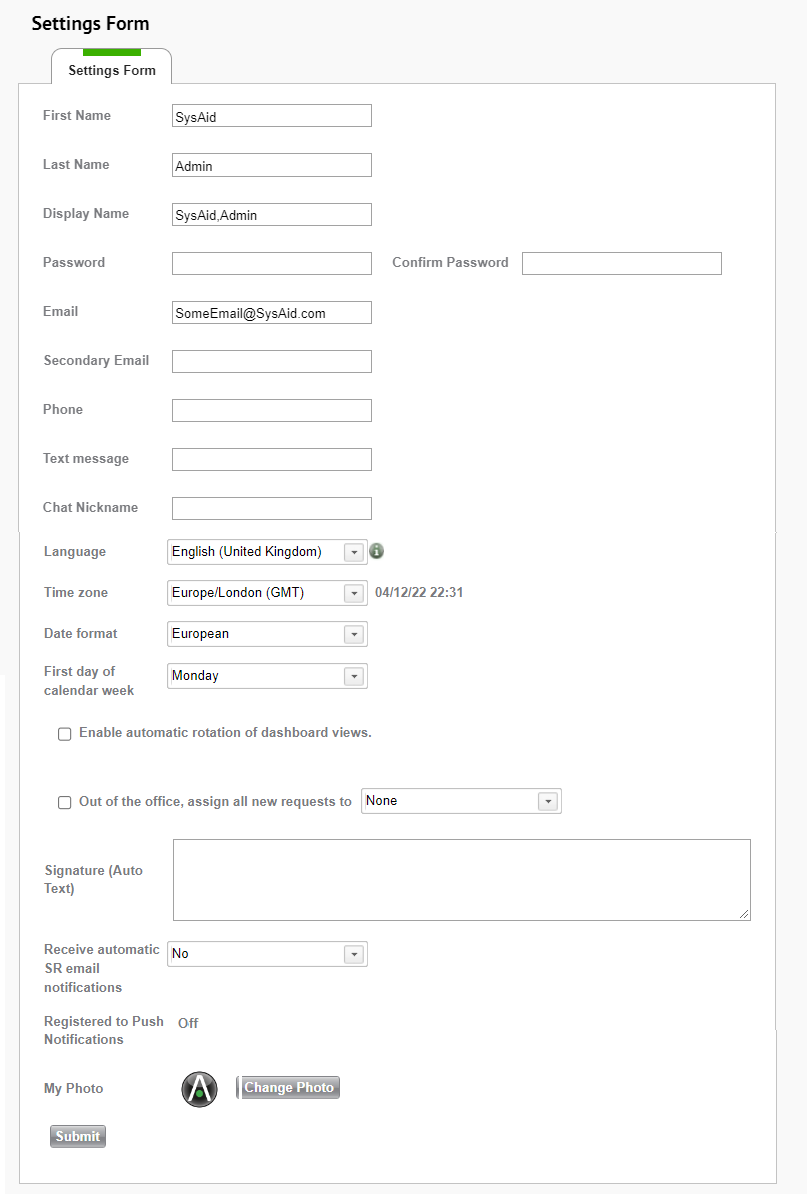
Following is a list of fields on this page and an explanation of each field:
First Name and Last Name
Enter your name here as you would like it displayed throughout SysAid.
Display Name
If username display method is set to display name under Customize > Appearance, the display name that you type here is shown any place that your username would normally appear.
Password
Change your password periodically. If the Enforce password complexity for local users option is checked, SysAid forces users to use passwords that meet certain complexity requirements. For more information, see Account Defaults.
If your user profile was imported from LDAP, you won't be able to edit this field.
Confirm Password
Retype the same password that you entered in the Password field.
Email
The email address where you receive notifications about service records, and where other users can reach you.
Secondary Email
This is the email address that receives the new, temporary password if an administrator resets their password using the Reset Password Wizard and the reset password method is set to email.
Phone
Enter your phone number here. This allows other IT technicians to call you if they have any questions.
Text Message
In order to receive these text message notifications, you must enter your mobile phone number in the following format: country code, area code, and individual number. Do not use spaces or punctuation. For example, if your number is (617) 555-1212 in the USA, type 16175551212.
Chat Nickname
The name you enter here appears whenever you chat with end users using SysAid Chat.
Language
Select the language in which you would like to view SysAid. If you choose a language for which SysAid does not yet have a translation, everything appears in English. You can also translate SysAid into any language you like from Settings > Customize > Translate .
Time Zone
Choosing the correct time zone ensures that any time displays in SysAid show your local time.
Date Input Style
Determines whether dates that you input by typing are interpreted as Month-Day-Year (American), or Day-Month-Year (European). Also determines whether activity times on service records and on tasks appear in 12 hour (American) or 24 hour (European) clock format.
First Day of Week
Determines whether the calendars and date pickers in SysAid display Sunday or Monday as the first day of the week.
Enable Automatic Rotation of Dashboard Views If this box is checked, SysAid automatically rotates through Dashboard views whenever you open the Manager Dashboard. In order for this to take effect, you must first customize your dashboard views from Settings >Dashboard > Design Dashboard.
This option is intended for a specifically defined user who is connected to a screen displaying the dashboard as it auto-rotates. If this option is selected, you will be unable to select dashboard views that are not marked for auto-rotation.
Out of office, assign all new requests to
Use this field to select an administrator to receive all the newly submitted service records that would otherwise be assigned to you. This is useful if you are out of the office on vacation or on sick leave.
Mark the checkbox and select an administrator from the list of available administrators. Once done, click Submit. You will be prompted with a popup, suggesting to move all of your currently active service records to the selected administrator as well. Click Yes or No, as desired.
Signature
You can enter the text that will automatically appear as your signature in all your outgoing email messages.
Receive Automatic SR Email Notifications
Select Yes to receive automatic service record email notifications. These are the notifications enabled under Service Desk > Service Desk Settings > General Settings (tab) (e.g. Notify assigned administrator when a Service Record changes). If you choose not to receive automatic notifications, be sure to check SysAid frequently for new activity.
Using the Filter button, you can create a filter so that you receive only automatic SR notifications that meet specific criteria. For example, if you set a filter Location = Headquarters, you only receive notifications for SRs where the location is "Headquarters". If no location is selected or a different location is selected, you won't receive any automatic notifications from that service record.
For instructions for building a filter, please read about the Expression builder.
Security Questions for Password Services Administrators imported from LDAP may use the Reset Password and Unlock Account Wizards if they need to. In order to use the wizards, administrators must first answer supply answers to security questions. Select questions from the list and give answers that you are sure to remember. Click Submit when you are done (you are prompted to retype your password). Once these security questions are completed, the administrator is registered for Password Self Service. To read more about the Password Services module, please go here.
My Photo
This is the photo that is displayed on the My Menu for the logged-in user. It is also displayed in the Announcements List next to any Instant Messages sent to other Administrators. Click the Change Photo button to upload a new photo or change the current photo. Click here for more information.
When you finish making changes, click Submit.
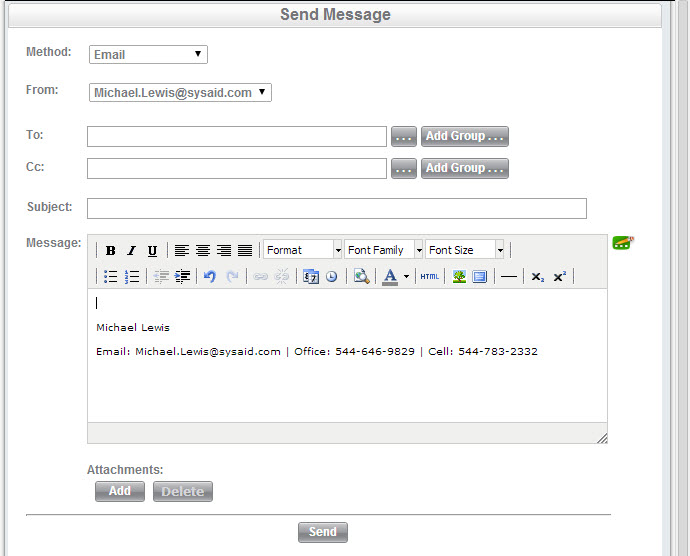
Signature tags
You can add variable tags to your signature to display your relevant information at the bottom of any email you send from SysAid.

You must be the logged-in user when the email is sent for your information to appear.
List of all user variable tags
The table below contains the full list of user variable tags and their meaning in SysAid.
| Tag ID | Description |
|---|---|
| ${UserObj.accountID} | The Account ID of your SysAid server |
| ${UserObj.userName} | User name |
| ${UserObj.displayName} | Display name |
| ${UserObj.firstName} | First name |
| ${UserObj.lastName} | Last name |
| ${UserObj.loginUser} | User ID |
| ${UserObj.calculatedUserName} | First and last name |
| ${UserObj.locale} | Language |
| ${UserObj.timezone} | Time zone |
| ${UserObj.email} | Primary email address |
| ${UserObj.secondaryEmail} | Secondary email address |
| ${UserObj.myPhotoUrl} | The URL for your profile image file |
| ${UserObj.phone} | Phone number |
| ${UserObj.cellphone} | Cellphone number |
| ${UserObj.notes} | The contents of the Notes field in your User form |
| ${UserObj.sms} | The phone number at which you receive SMS messages |
| ${UserObj.building} | Building name |
| ${UserObj.floor} | Floor number |
| ${UserObj.cubic} | Cubicle number |
| ${UserObj.custText1} | The contents of the Custom Text 1 field in your User form |
| ${UserObj.custText2} | The contents of the Custom Text 2 field in your User form |
| ${UserObj.custNotes} | The contents of the Custom Notes field in your User form |
| ${UserObj.version} | The number of times your User entity was modified (including the time it was created) |
| ${UserObj.disable} | Is your User entity disabled (true/false) |
| ${UserObj.expired} | Has your User entity's set expiration date passed (true/false) |
| ${UserObj.historyVersion} | The number of entries in the History tab in your User form |
| ${UserObj.emailNotifications} | Does the user receive email notifications (true/false) |
| ${UserObj.emailNotificationsCondition} | The contents of email notifications filters |
When you finish making changes, click Submit.
My Photo
To change or add My Photo click  . This opens the My Photo Edit screen.
My Photo Edit 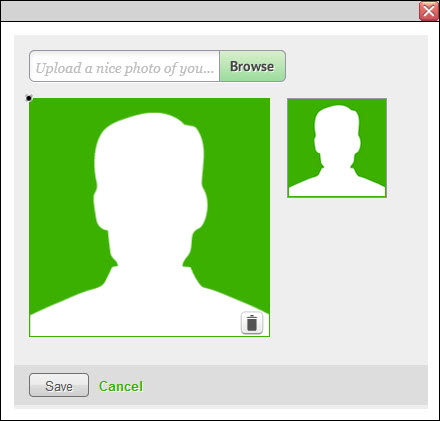
Click browse and choose the photo you would like to use (maximum size of 500KB).
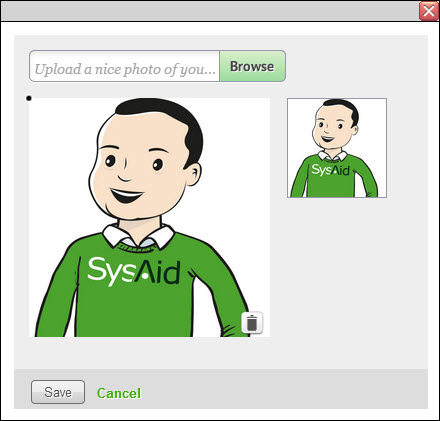
Once the photo is uploaded you can crop the picture by dragging a box around the area you would like to use for your photo. A preview of your photo is displayed next to the main photo. You can adjust the photo by dragging or resizing the box.
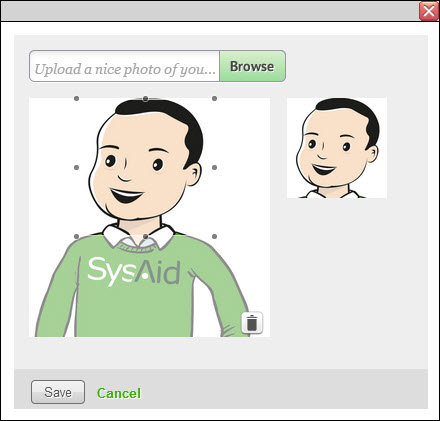
You can also click ![]() on the bottom right of the main photo to clear the current photo if necessary.
on the bottom right of the main photo to clear the current photo if necessary.
When you are done making changes, click Save.