The Expression Builder*, referred to in some places as the Query Builder, appears throughout SysAid in many different places. On the various list pages, you can open it using the filter icon ![]() . In other places, such as reports, it's accessible using the Expression Builder icon
. In other places, such as reports, it's accessible using the Expression Builder icon ![]() . The purpose of the Expression Builder is to filter results, such as list results and report results.
. The purpose of the Expression Builder is to filter results, such as list results and report results.
*When creating an escalation rule, the Expression Builder is referred to as the Action Builder and has a different function. Please see escalation rules for further details.
SysAid Expression Builder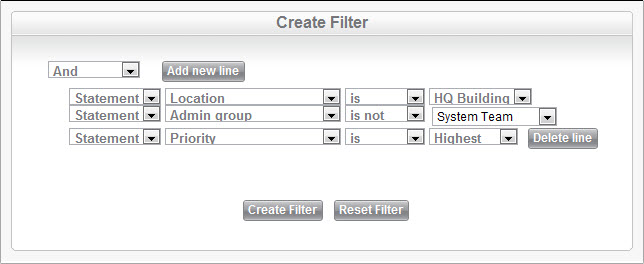
Components of the Expression Builder
A filter is composed of four parts:
Statement: Can be "and" or "or."
The field to filter: The fields that show up here will vary depending on what page you're on when you access the Expression Builder.
The expression: This is determined by the field to filter. A simple example could be "Location is not..." Certain fields have additional options for the expression, such as the Due Date field, which includes expressions such as "Next seven days" and "Previous seven days."
The desired value for the field: The field type will determine your options here. Lists will allow you to choose an entry from the drop-down list, date fields include the calendar icon
 , and integer and text fields are free-form entry.
Creating a filter
To create a filter using the Expression Builder :
Decide how many filter lines you will need. If you only need one line, leave the first drop-down on "Statement" and go to step 5.
To add another filter line, first choose a statement, either "and" or "or." This will automatically add another line connected by the chosen statement.
If you need to add more lines connected by the same statement (i.e., this and that and the other thing), click Add new line. If you would like to delete a line, click Delete line.
For each filter line, choose the field, expression, and desired value for the field (e.g., Location + is + HQ Building).
When you have set up all of the filter lines you need, click Create Filter to apply your filter. This will automatically close the window.
In the event that you have set up a filter and you would like to erase it, click Reset Filter.
Important!
If you create a custom field with the same name as a default field (such as Title or Description), the query builder in emails or escalation rules will prioritizes the custom field. This means the default field cannot be selected or updated correctly in the query.
Relational Fields
When you set up a filter for Relational List fields, the values you enter in the filter depend on the entity that the field represents.
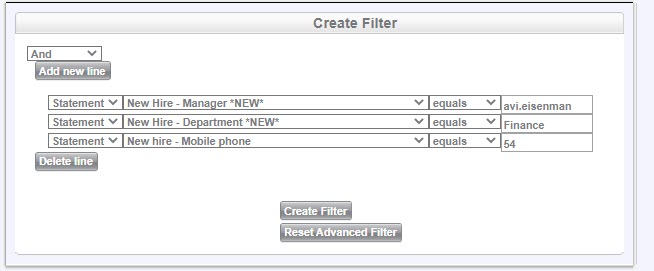
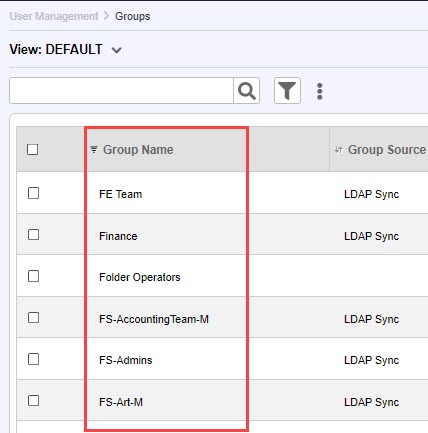
For fields that represent Assets, Groups, or Companies, enter the caption name of the entity you want to filter for.
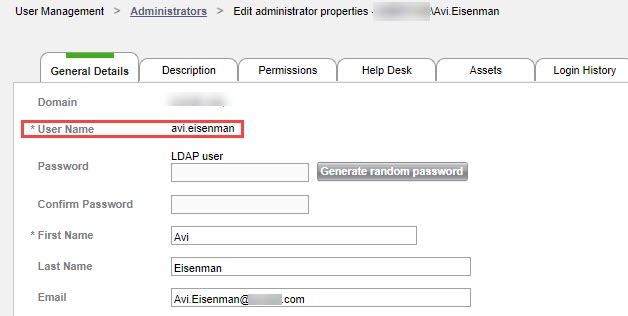
For fields that represent Users, enter the value of the Username field of the user(s) you want to filter for.
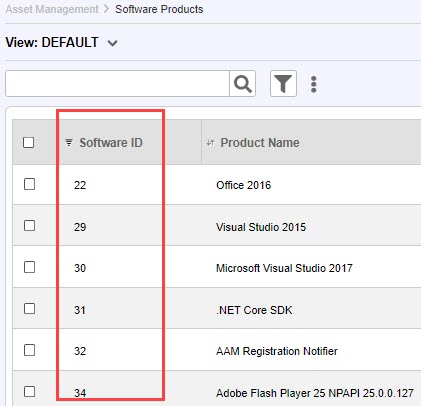
For fields that represent CIs or Software Products, enter the ID number for the CI(s) or Software Products that you want to filter for.
