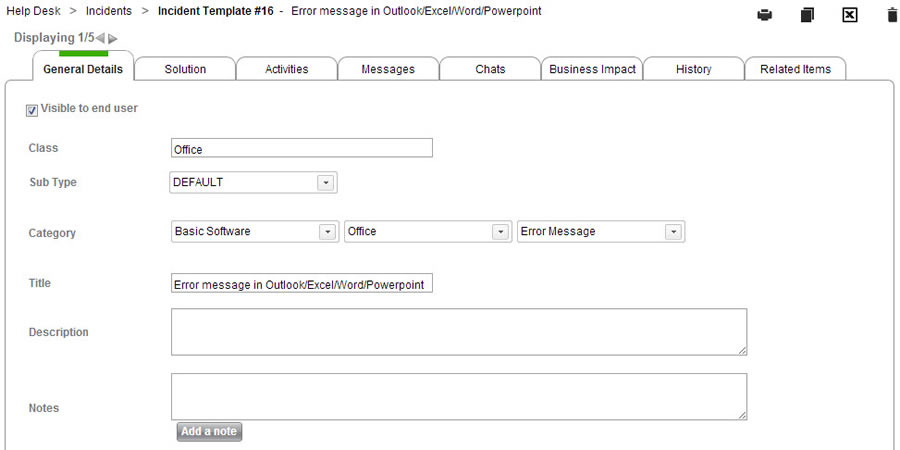
This page allows you to edit an incident template. When you select an incident template for a new incident, all fields in the incident form update to match the template that you design here.

Fill out all of the fields on this form exactly as you would like them to appear when you select this incident template (when you create a new incident). All but the first two fields on this page are identical to the fields on the incident form. You can read about the fields on the SR form here.
If the default incident template (as defined in Category Settings) is selected, the title text is not loaded when the template is manually selected.
When you create an incident template, you must fill in three additional fields:
Visible to end user
If this is checked, the incident template will be available both to users from the End-User Portal and to admins from the admin portion of SysAid. If this is unchecked, the incident template will only be available in the admin portion of SysAid.
Class
This is the category of the incident template as it appears in the list of incident templates. In the above screenshot, Office and Passwords are classes:
Incident template classes and descriptions

Add linked items
You can use the Linked Items table, located in the Related Items tab, to link a variety of items to SRs that use the template. The table displays a list of all items related to the template. Click on any item to open a new window with details for that item.
Items added to this table also appear in the Linked Items table for the related item. For example, if you add a Knowledge Base article to the Linked Items table on a template, you will see the template in the Linked Items table for that article.
To add linked items:
- Select the type of item you would like to add using the Add a new link, of type drop-down list.
- Choose whether the linked item caused the SR, was caused by the SR, or neither.
- Click Add. This opens a list of items of the selected type.
- From the list, select one or more items using the check boxes at the left end of the rows.
- Click Select to save the selected items. This closes the list and attaches the items.
To remove linked items:
- Select one or more linked items using the check boxes.
- Click Delete from the list actions.
When you are finished creating the incident template, click OK/Apply.
Create different forms for different templates
Each incident template can have its own form. What this means is that whenever a template is selected, either by an end user or by an admin, the incident form updates itself to show only fields and tabs associated with that template. The fields and tabs that display on a template are controlled by the template's sub type. When you create the template, select whichever sub type is appropriate for the template.
You can edit incident sub types for administrators from Settings > Service Desk Templates> Sub Types. Click here for more details.
You can edit incident sub types for end users from Settings > End-User Portal > Incident Submission Form. Click here for more details.