The SysAid Cloud Migration tool allows you to migrate your SysAid on-premise environment to the cloud. First try out the migration on a cloud sandbox environment and then speak to your account manager to schedule a migration to a production environment.
Prerequisites
To perform this process you must be running the latest version of SysAid and using one of the following versions of MS SQL database:
- MS SQL 2008 R2
- MS SQL 2012
- MS SQL 2014
- MS SQL 2016
- MS SQL 2017
If you use an authenticated proxy to connect to the internet, please contact SysAid Support before beginning this procedure.
Before running the migration tool:
- Ensure that your agents have network access to your current on-premise SysAid server
- If you had LDAP integration configured on the SysAid server, you must reconfigure your LDAP integration to run on an RDS
- Ensure that each of your agents has an internet connection so they can reach the cloud environment and that the computer you are running the migration tool on also has internet connection
- Stop your "SysAid Server" service
- Stop the "SysAid Discovery Service" service for each RDS running on your environment
- Ensure that the following files and folders are prepared:
- Home Directory - Know where the root folder of your SysAid installation is located (for example: C:\Program Files\SysAid Server).
- Properties file - Download and extract the .properties file that is included in the email about your cloud migration that you received from SysAid. Note the location of the downloaded file.
If you are using a proxy to access the internet, open the file and enter the values for the proxy URL and port parameters so the migration tool can apply the values to the new environment and to your agents. If you are using a proxy with authentication enter values for the proxy username and proxy password as well.
Be sure to save your changes. - Database Backup file - Prepare a full backup of your SysAid database that creates a new .bak file. Note the location of the file.Warning:Do not use your existing .bak file as it contains outdated information.
Create a sandbox cloud environment
Before you migrate your data to a live production environment, migrate it to a test, or sandbox environment. This process demonstrates how to copy your SysAid data to a sandbox cloud environment, leaving your current on-premise environment intact. This allows you to simulate the experience of using SysAid on the cloud, before you move from on-premise.
- Extract the relevant migration tool .zip file that is included in the email about your cloud migration that you received from SysAid.
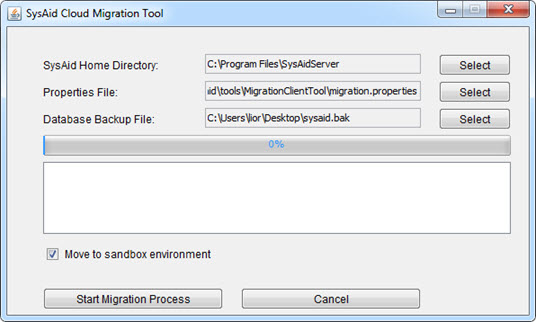
- Run the .bat file from the .zip file to open the SysAid Cloud Migration Tool.
- Select the Home directory folder, the .properties file, and the .bak file that you prepared earlier.
- Ensure that the Move to Sandbox Environment check box is checked.
- Click Start Migration Process.
 When the process is completed, the migration tool displays a confirmation message.
 - After you receive the confirmation message, start the "SysAid Server" service to provide access to your live on-premise environment.

Migrate your SysAid data to a cloud production environment
Once you have successfully tested the migration in the sandbox environment you are ready to migrate your data to the live environment. This process describes how to migrate your SysAid data from your on-premise environment to a cloud environment. If you just want to create a sandbox environment to simulate the experience of using SysAid on the cloud, see Create a sandbox cloud environment. Be sure to coordinate this process with your account manager.
- Extract the relevant migration tool .zip file that is included in the email about your cloud migration that you received from SysAid.
- Run the .bat file from the .zip file to open the SysAid Cloud Migration Tool.
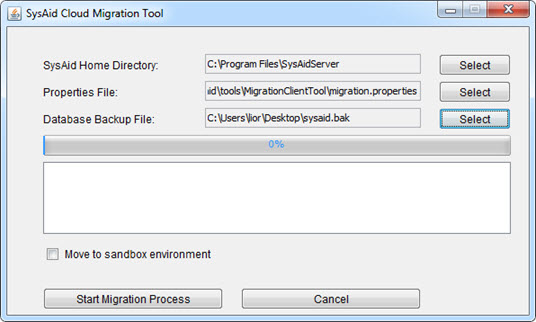
- Select the Home directory folder, the .properties file, and the .bak file that you prepared earlier.
- Clear the Move to Sandbox Environment check box.
- Click Start Migration Process.
 When the process is completed, the migration tool displays a confirmation message. The cloud environment must still be manually enabled by SysAid.
 - When you receive an email indicating that your cloud environment has been enabled, start the "SysAid Server" service to redirect agents to the cloud environment.
This process could take up to one hour.Note:Do not start the "SysAid Server" service before you receive the email confirming that your cloud account is ready. - Check that all of your SysAid agents are up and running:
- Add the Last Access Time field to your asset list.
- Export the list to Excel.
- In the exported Excel sheet, sort the list by the Last Access Time column.
- Check each agent to ensure that they have responded since you started the "SysAid Server" service.
- Perform the following procedure for each of your RDSs to ensure that they are also redirected to the cloud environment:
- In the RDS's directory navigate to root\WEB-INF\conf and open the DiscoveryService.properties file.
- Change the value of the server.url parameter to the value of the migration.url parameter, located in the .properties file you downloaded from the original email about your cloud migration.
If you use a proxy, update the proxy.host and proxy.port parameters as well. - If you requested a new account ID, enter that new ID in the account.id parameter. You can copy the new account ID from the migration.accountid parameter, located in the .properties file you downloaded from the original email about your cloud migration.
- Start the "SysAid Discovery Service" service for that RDS.
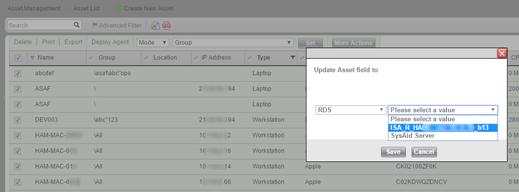
- Once the RDSs are up and running, reconnect your agents to their RDSs from the asset list.

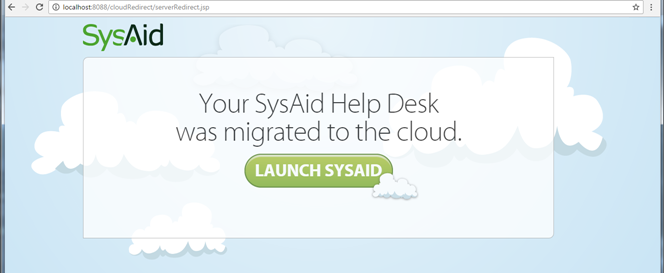
This completes your cloud migration. If any admins or end users attempt to access the on-premise environment, while the "SysAid Server" service is still running, the following screen appears:

They can click Launch SysAid to be redirected to the cloud environment.
Once your agents and RDSs are all connected to your cloud environment, you can shut down down your on-premise service.