While each list page in SysAid shows a different entity, all lists use the same basic format. Following is a description of this basic format and an explanation of the functionality it offers you. For options that vary from list to list, such as list actions, please refer to the individual help page for the desired list.
Note: You may change the width of any column by clicking and dragging at the right edge of that column's header.
The Help Desk list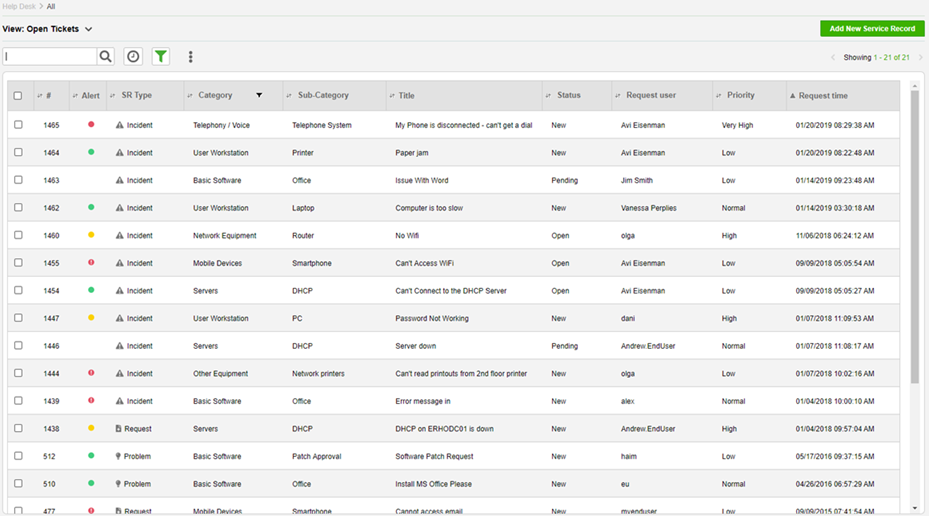
Creating a new entry in the list
Most lists allow you to create a new entry in the list, whether this is a new service record, a new asset, or a new CI. To create a new entry, click  . This creates a new entry in the list, which you can then edit. Further instructions for creating these items appear on the individual list help pages throughout SysAid.
General list options
There are several general options available to you on the list page.
Search box 
Type into the search box and press ENTER. The list will update to show only list entries that contain the text you've entered.
Export to .csv or .pdf (Not available on all lists)
- Click
 .
. - Click Export to PDF or Export to CSV.
Show All
Click the here to show all rows of the list in one page. Click Back to page view to return to the single page view. Please be warned that if there are a large number of entries in the list, the Show All view can take a long time to load.
Sort your list
Click on the sort icon  next to any column where it appears to sort the data by that column. After clicking on the icon, you will see the sorted icon
  pointing up or down, indicating in which direction the column has been sorted.
Filter your list
There are two ways to filter your lists: using a column filter, and using an advanced filter.
Create a column filter
To filter by a single value:
- Mouse over one of the column titles that is a list field. The list title turns into a drop-down list.
- Click the down arrow next to the title. This opens the contents of the list.
- To make it easier to find the list entry you are looking for, you may begin typing in the box where the column title had been. The contents of the drop-down list will update in realtime to show only results that match what you've typed.
- When you have found the item you are looking for, click on it to select it. This creates the filter.
- The list now only shows list entries that contain the value you've selected. To remind you that you are using a filter, the column title is now in bold, and there is a little filtered icon next to it (see screenshot).
Creating a helpdesk filter to show only SRs assigned to David Cohen
To filter by more than one value:
- Mouse over one of the column titles that is a list field. The list title turns into a drop-down list.
- Click the down arrow next to the title. This opens the contents of the list.
- Click Multiple selection. This adds tickboxes to the left of each list item.
- To make it easier to find the list entry you are looking for, you may begin typing in the box where the column title had been. The contents of the drop-down list will update in real-time to show only results that match what you've typed.
- Select an item for the filter using the appropriate tickbox.
- Repeat steps 4 and 5 until you've selected all appropriate items for the filter. If you typed part of the item name to find it in step 4, you may delete what you've typed and search for another item. Anything you've selected will stay selected.
- Click Save Filter to save your selection.
If you filter an SR list by SRs in for which you are the Process Manager, the text in the column appears green if you have been assigned to a workflow within that SR but not to the SR itself.
Some lists give you the option for an advanced search. Click this to open a dedicated search window where you can search for the list entry/entries you desire.
Review or delete active column filters
At any time, you can view a summary of all filters currently applied to the list.
To review and/or delete the column filters
- On top of the list, click
 . A tooltip with all the currently applied filters appears.
 - To delete all column filters, in the Selected Filters area of the tooltip, click Reset.
Viewing all filters currently applied to a list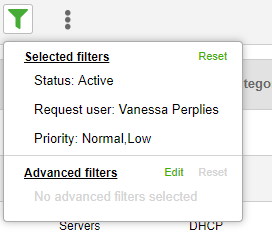
Why can't I create a column filter for a particular list field?
In order for a column filter to appear, there must be an enabled filter menu for that list. If there is no filter menu, you must create one before you can filter using that column. See customize lists section 2: Managing Dropdown Filters for more information about creating filter menus.
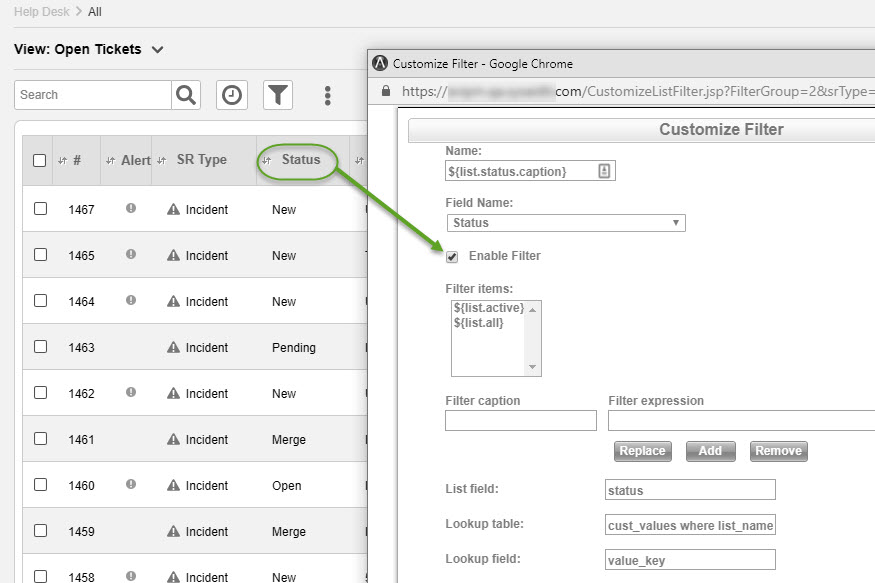
Advanced filter
To create an advanced filter
- Click
 .
. - In the Advanced Filter area, click Edit.
This opens the Expression Builder where you can filter by almost any field in the list to display exactly the entries that you want. For further instructions, see Expression Builder.
To edit an advanced filter
- Click
 .
. - In the advanced filter area, click Edit.
To edit an advanced filter
- Click
 .
. - In the advanced filter area, click Reset.
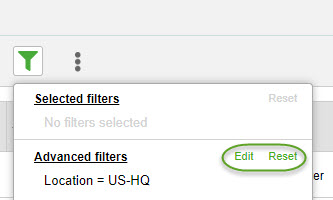
List actions
There are a number of actions you can perform on your lists using the actions list. To open the actions list, select one or more list entries using the check boxes at the left end of each row. This opens the actions list:
Actions list on the Help Desk list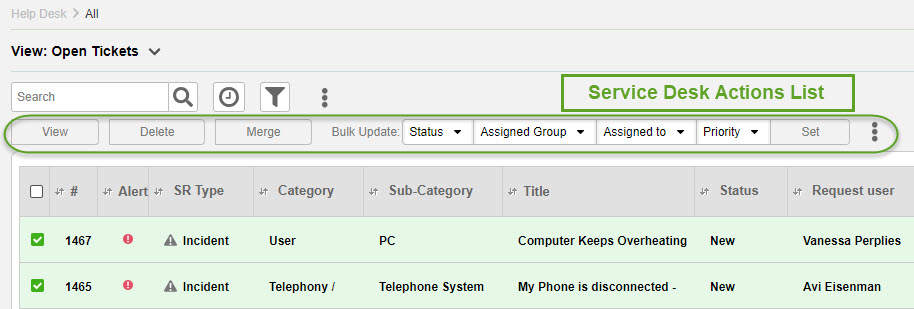
The actions list is different for each list in SysAid. Please refer to the help page for the desired list to see a full list of list actions.
List views
A View in SysAid controls which fields and filters you see on a list. Creating different views allows you to change which fields and filters appear. For example, if you are assigning new service records to the appropriate administrators from the Service Desk list, theLast Modified field is not helpful, because the service records are all new. However, if you are looking at old service records, this field is critical to help you know when a service record was last worked on. You could also create a view specifically for printing that contains only the fields you want in your printout.
Each view has a name and is easily selected from the View drop-down menu located at the top-left of the page.
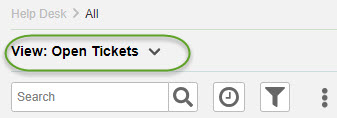
If you have a lot of views for that list, you can enter the view name in the Search box to narrow down the list.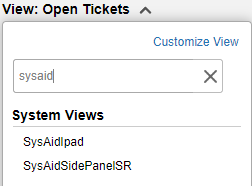
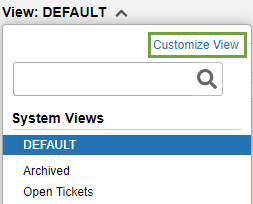
To customize an existing view or to create a new view, open the View drop-down and click Customize View. This opens the customize list page. For complete instructions for customizing lists, please go here.
Predefined list views
Some views, such as the EndUser view, come predefined with SysAid. The EndUser view, for example, controls the list end users see when viewing their service records from the End-User Portal. Predefined views are visible only to administrators with the SysAid Administrator privilege and cannot be deleted.
The individual help page for each list in SysAid notes if there are any predefined views for that list, and what they control.
