Once you've set up the Slack integration in SysAid, you can use the integration to attach a SysAid ticket to a Slack channel, use SysAid slash commands in Slack, and send Slack direct messages from SysAid.
Attach a Ticket to a Slack Channel
Channels attached to SysAid tickets are automatically archived when the the ticket's status changes to a closed class. If the ticket is reopened, the corresponding channel is automatically unarchived in Slack.
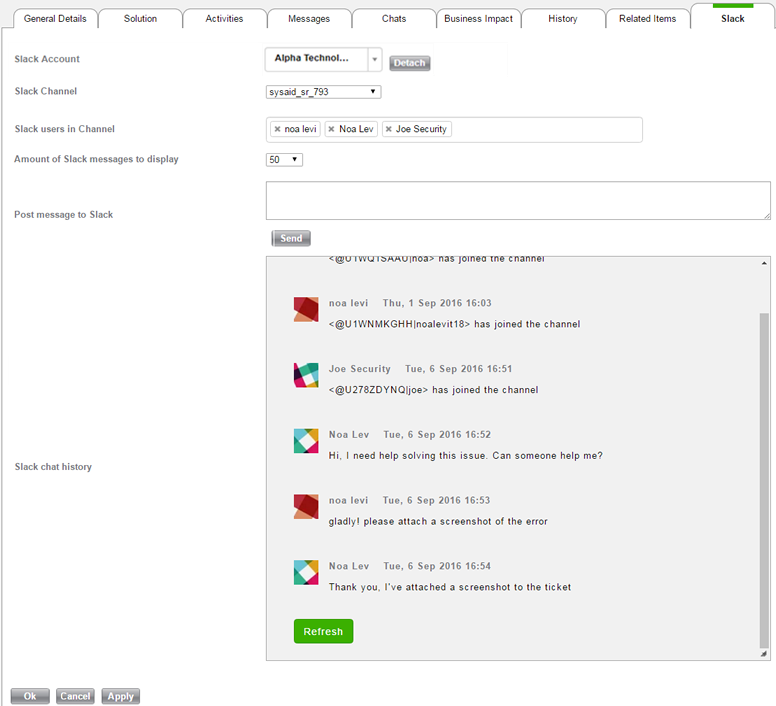
To attach a SysAid ticket to a Slack channel
- From the Slack Account drop-down, select the Account you want to access.
- (Optional) If you do not want to post to the default (most recently selected) channel, click Detach.
- To post to an existing channel, a select a channel from the drop-down
- To create a new private channel, click Create New Channel, enter the channel name in the dialog, and click Create.
- (Optional) To add Slack users to the selected channel, type their user names into the Slack Users in Channel field.
- (Optional) Select how many Slack messages to display in the Slack Chat History field.
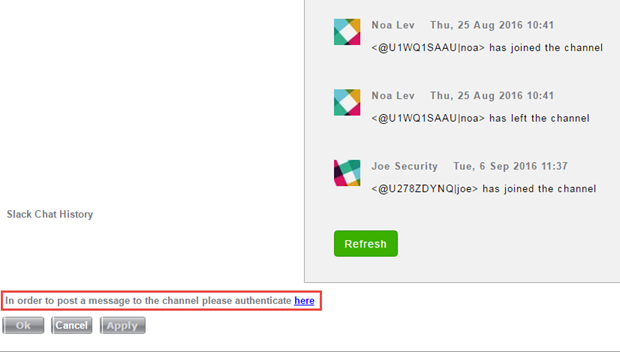
- If you are not logged in to Slack, click the Authentication link to login as your Slack user and post a message.
- After you login, click Authorize in the new window.
- Enter your message.
- Click Send.
Use the SysAid Slash Commands in Slack
If you setup slash commands for SysAid, you can create new SysAid SRs from Slack or link an SR to a Slack channel from within Slack.
Create an SR from Slack
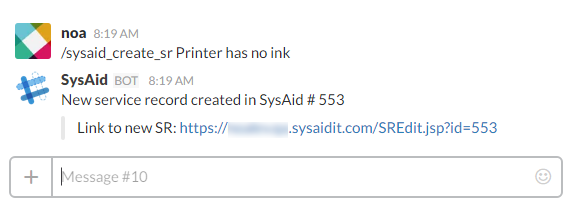
- In Slack, enter the text "/sysaid_create_sr" followed by the title you want to assign to the SR.
You must enter a title unless the "Enforce a title when creating service record from slash command" check box is cleared in the configuration page. If a user enters the slash command without a title, Slack retuns an error message informing the user that they must include a title for their ticket.
Slack responds with a confirmation that the SR was created and provides the direct URL to the SR.
The SR you create is only populated with a title and a request user.
If the Slack user who created the SR uses the same email address for their Slack and SysAid accounts, then SysAid populates the SR's Request User field with the SysAid user name. If the Slack user does not have a SysAid account or does not use the same email address in both SysAid and Slack, then SysAid populates the Request User field with the Slack user name.
Link a Slack channel to an SR
- In the Slack channel you want to link to the SR, enter the text "/sysaid_link_to_sr" followed by SR# of the SR you want to link.
Slack responds with a confirmation that the SR was linked to the channel. If the SR was previously linked to a different channel, this command overrides the previous link.
Approve/Deny pending action items from Slack
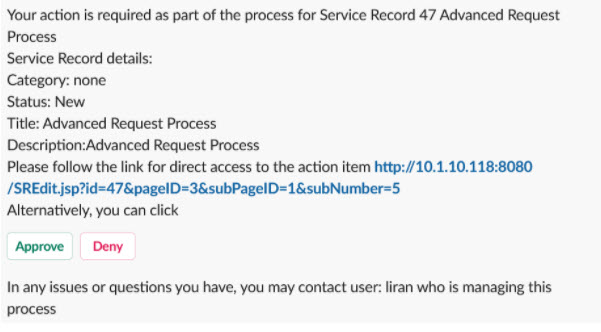
You can use a slash command in Slack to pull up all of your notifications for action items that require your approval. You can then approve or deny the action item directly from Slack.
- In Slack, enter the text "/sysaid_my_approvals".
Slack responds with all of your workflow notifications.You can Click Approve or Deny directly in the Slack message.
This notification is also sent to your email as configured in email integration.

Send Slack Direct Messages from SysAid
You can send a direct message in Slack from within a SysAid ticket to any Slack user in the selected Slack Channel. For this feature to work, make sure the Send notifications to Slack direct messages check box is enabled in the Slack add-on page. For every direct message an entry is added to the Slack history, indicating that the message has been sent.
To send a direct message.
- In the Slack Channel field select a Slack channel to populate the Select User list with the users from that channel.
- Select the Send as Direct Message check box.
- Choose a user from the Select User drop-down list.
- Enter your message to the Post Messages to Slack t ext area.
- Click Send.
Admins or end users who do not want to receive direct messages in Slack, can disable this feature for their user
To disable direct messages on your own account
- Navigate to the My Settings page on the Self-Service Portal.
- In the Get notifications as Direct Messages in Slack drop-down list, select N.
- Click Save.


