The SolarWinds integration allows you to automatically generate, update, and close SRs based on events that SolarWinds detects on a given asset in your network. The integration also allows you to automatically generate assets in SysAid for assets that SolarWinds is monitoring.
Only an admin with SysAid Administrator permissions can set up this integration.
Requirements
For the integration to work properly you must be running SolarWinds Orion v12 and SysAid 18.2.40 or higher.
Generate script
You can generate as many configuations as you like. You can adjust each configuration to run on a different type of alert. The SolarWinds add-on form allows you to set the defaults for SRs generated by the configuration files. After importing the SysAid alert into SolarWinds, admins will be able to further customize the configuration to add more complex scenarios for handling tickets.
Setting up SolarWinds Integration
To set up the SolarWinds integration in SysAid
- Obtain the SolarWinds Add-on from the SysAid Marketplace.
- On the main My Apps page, in the SolarWinds icon, click
 .
. - Click the Activate Integration slider to enable the SolarWinds integration. SysAid retrieves a trial license that you can use to test the SolarWinds integration.
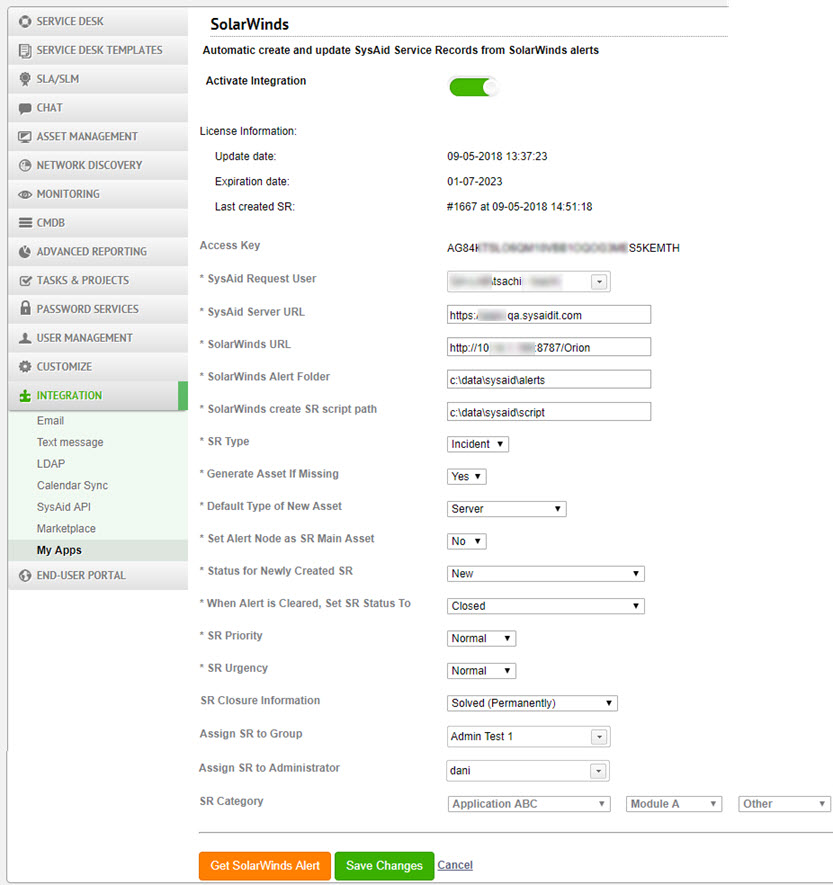
- Select the default Request User for SRs generated by this configuration.
- Enter your SysAid server URL and your SolarWinds server URL.
- In the SolarWinds Alert Folder field, enter the path for the folder where your SolarWinds alerts will be stored.
- In the SolarWinds Create SR Script Path field, enter the the path where the scripts generated by this integration will be stored.
- Select the type of SR you want the configuration to generate.
- If you want to create an asset for hosts, nodes, applications, or services that do not exist in SysAid:
- From the Generate Asset If Missing drop-down list, select Yes.
- Select a default asset type.
- Select if the asset should be set as the main asset for the generated SR.
- Select the default status for new SRs.
- Select the default status for the SRs when the SolarWinds alert is cleared.
- Set the default SR Priority and Urgency.
- Set the default value for the SR Closure Information field for when the generated SR is automatically closed by the integration.
- Select the Default Assigned group and the Default Assigned Admin.
- Select the Default Category.
- Click Save Changes.
- Click Get SolarWinds Alert.
SysAid initiates a download of a zip file containing the following files:
- A readme file containting a general explanation on how to enable alerts in SolarWinds.
- An XML file containing the alert information required for importing information into SolarWInds.
- A VB script that's executed when an alert is raised or cleared.
Generated files
As stated earlier, you can modify these files to customize and adjust them to meet your organizational needs.
Set up the integration in SolarWinds
After you generate your files in SysAid, you need to extract the zip file on the relevant SolarWinds machine and import the SysAId alert into SolarWinds. At that point, you can configure SolarWinds to run the alert to automatically generate the SRs you want and to import the assets you are monitoring with SolarWinds to SysAid Asset Management.
If the SolarWinds user does not have Windows permissions to access the locations that the files need to access, you'll need to add Windows domain credentials to the Push Ticket Info action in both the Trigger Actions and Reset Action tabs in SolarWinds. This process is described in below.
To setup the integration
- Locate the zip file you generated and extract it's files on your SolarWinds machine.
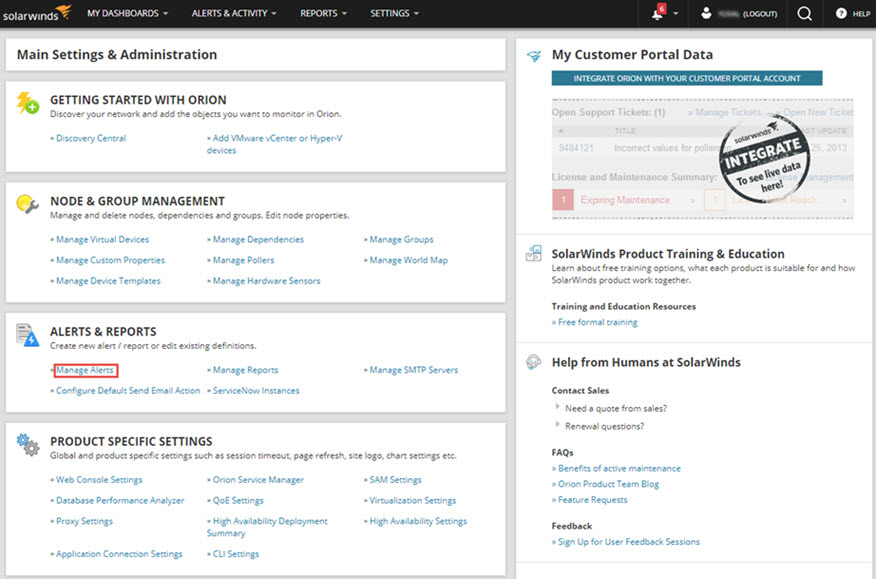
- In SolarWinds, navigate to Settings > All Settings.
- In the Alerts & Reports section, select Manage Alerts.
- Click Export/Import and select Import Alert.

- Select the XML file from the location that you extracted it to.
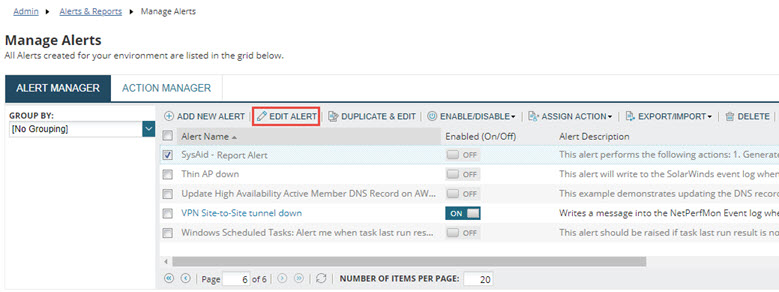
- Select the report you just alert you just imported and click Edit Alert.
- (Optional) Edit the title.
- Click the Enabled (On/Off) control so it is set to On.
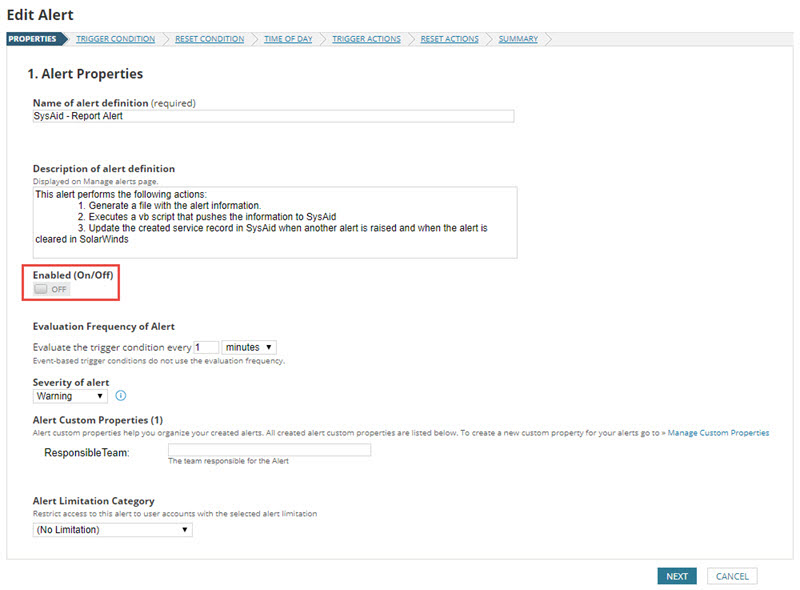
- Review the parameters in each tab, make any adjustments you want and click Next to save your changes and move to the next tab.
- (Optional) In the Trigger Actions and Reset Actions tab, you can click

to edit any of the variables in the actions.- Edit the Log Alert / Log Reset Alerts to modify the parameters of the SR generated by the integration.
- Edit the Push Ticket Info to modify the parameters that are passed to the configuration file.
To edit the text that appears in the automatically generated ticket description:- Locate the text: token_sr_description=Node${N=SwissEntity;M=DisplayName}
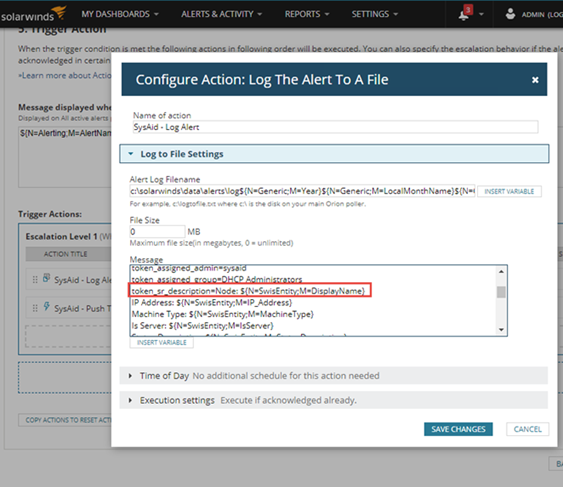
- Enter any text you want, in that parameter.
- To include a variable, click Insert Varaiable, select the variable you want, and click Insert Variable again.
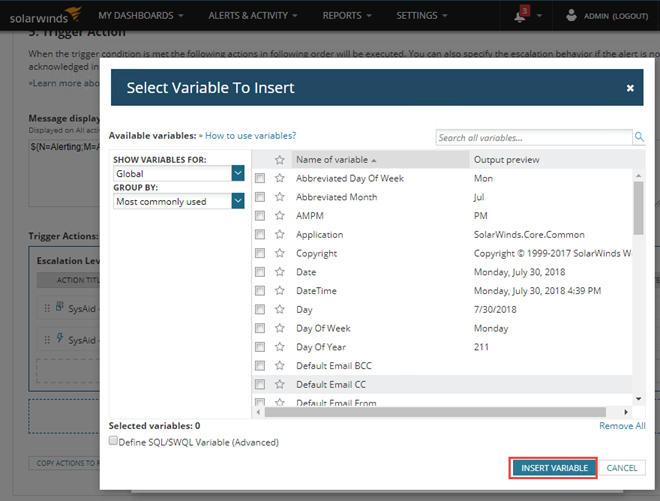
- Locate the text: token_sr_description=Node${N=SwissEntity;M=DisplayName}
- If the SolarWinds user does not have Windows permissions to access the locations that the scripts need to access, provide Windows domain credentials with the required access.
- In the Trigger Actions tab, on the Push Ticket Info action, click
 .
. - Select Define User.
- Enter Windows domain credentials of a user who has the necessary permissions.
- Click Save Changes.
- Click Next.
- Repeat this process in the Reset Actions tab.
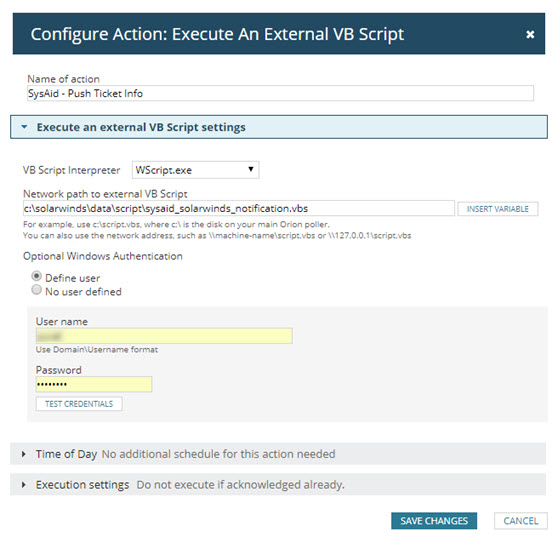
- In the Trigger Actions tab, on the Push Ticket Info action, click
- Review the information on the Summary tab and click Submit.
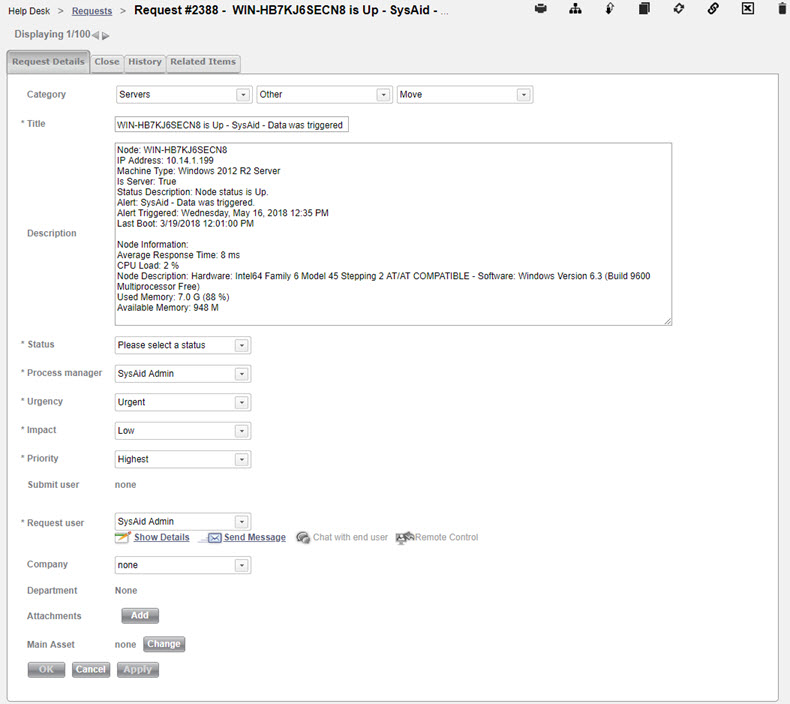
This completes the configuration of SolarWinds. When SolarWinds detects a monitoring event according to the parameters you set, SysAid generates a service record like this one:
