Follow these steps to set up the Google User Repository Integration in your organization’s Google Workplace
Step 1
Create a Google Project
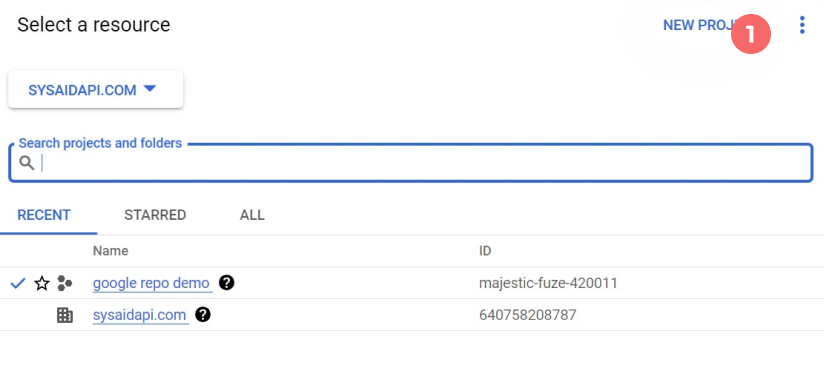
To create a Google Project:
Click New Project
Choose a Project Name
Set the domain and location
Step 2
Set up credentials

To set up your Project’s Credentials:
Go to API & Services > Credentials (tab)
Click Configure Consent Screen.
Select Internal for User Type
Click Create
Enter the app name (name of application), user support email for users to contact with questions, and developer contact information
Click Save and continue
Click Add or remove scopes
Step 3
Add scopes
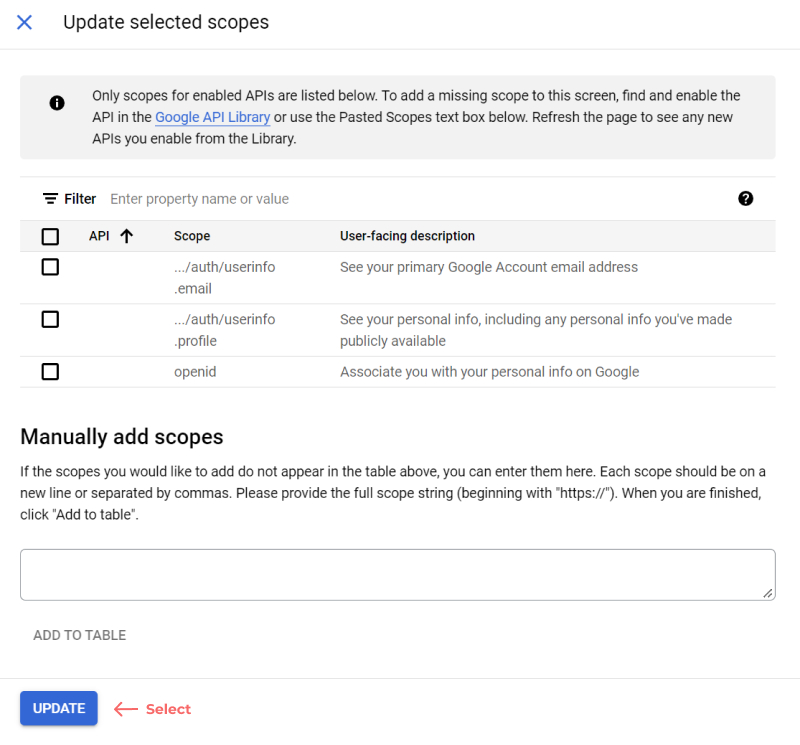
To add scopes manually:
In the Manually add scopes field, add:
https://www.googleapis.com/auth/admin.directory.user.readonly
https://www.googleapis.com/auth/admin.directory.group.readonly
https://www.googleapis.com/auth/admin.directory.group.member.readonly
Click Update
Click Save and continue
Step 4
Create Credentials
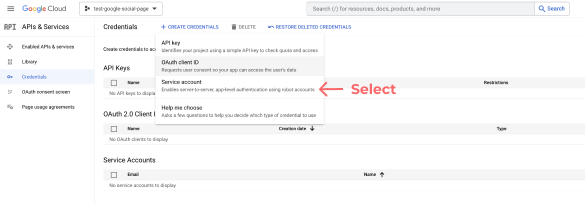
To create credentials:
Click on the Credentials tab in the sidebar menu
Click Create Credential
Select Service account
Step 5
Create Service Account
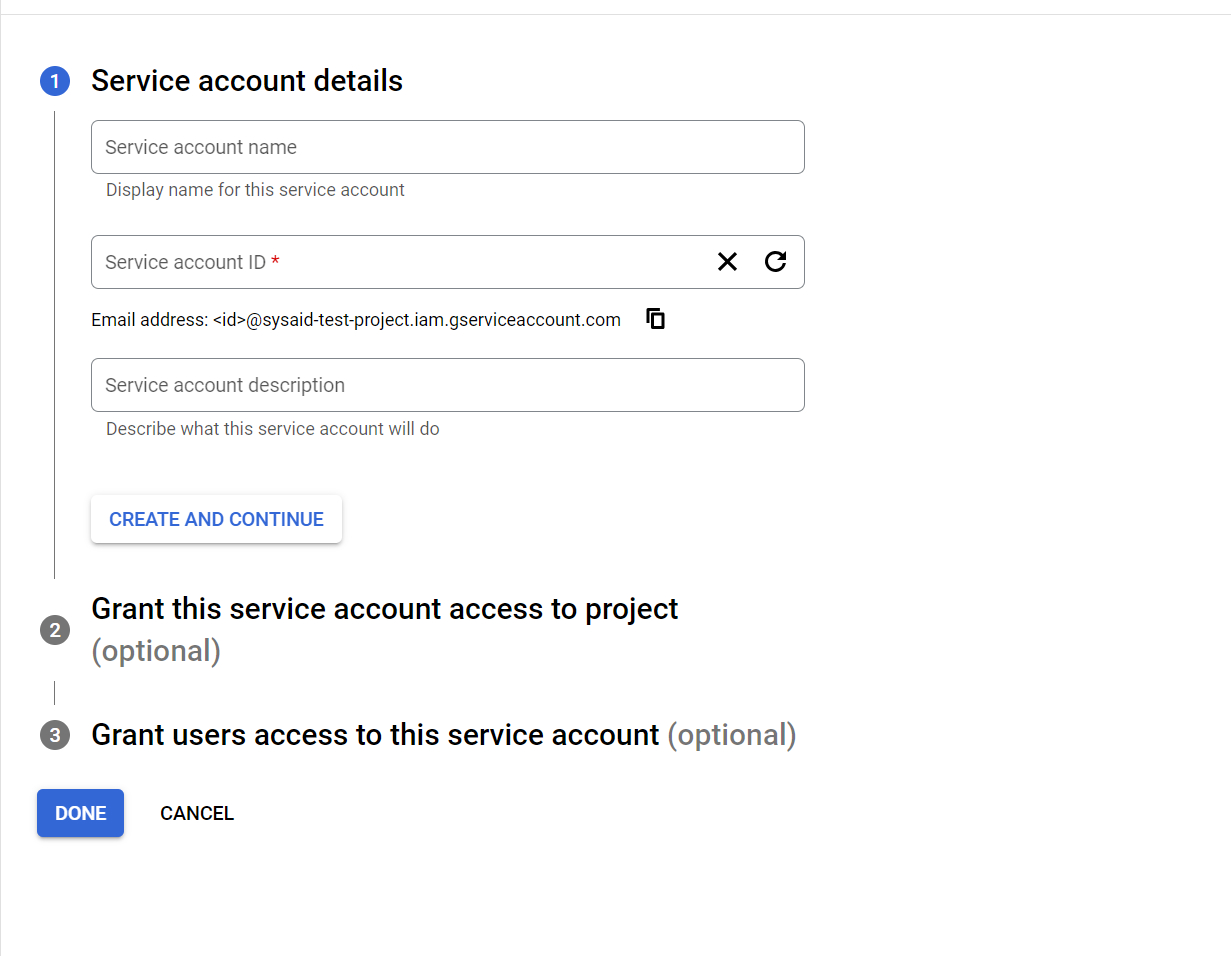
To create the Service Account:
Fill in the Service Account name
Click Create and continue
Leave Grant this service account access to project empty
Leave Grant users access to this service account empty
Click Done
Step 6
Add Service Account Key
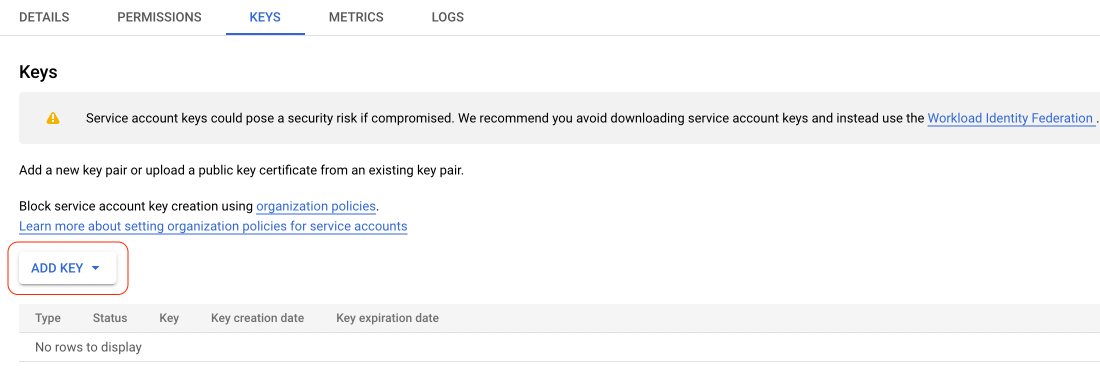
To add the Service Account Key:
Go back to the Credentials tab in the sidebar menu
Click the Key tab
Click Add Key
Select Create new key
Select .JSON
Click Create
Save the .JSON file in your local drive, so that you can upload it to SysAid later on
Step 7
Enable the API and Services

To enable the API and Services
Click Enable APIs and Services
Enable Admin SDK API
Open the JSON file
Copy the “client_email” value (to be used in Step 10)
Step 8
Assign Admin Roles
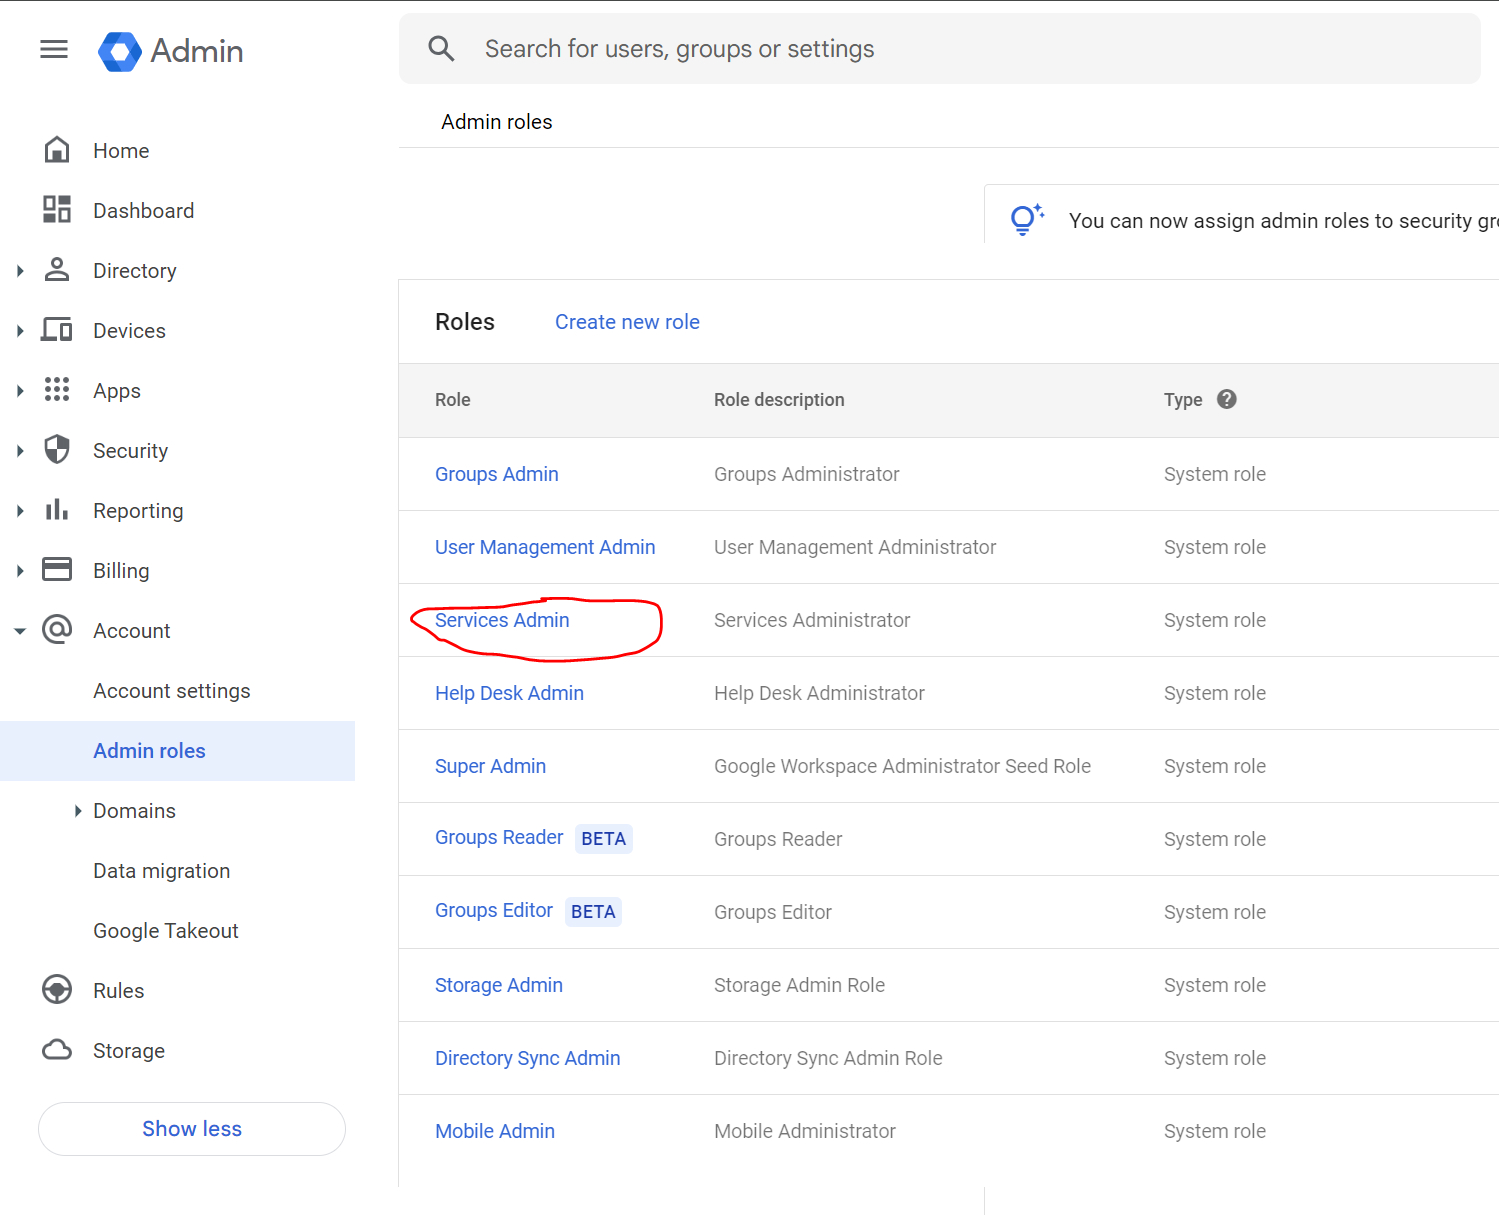
To assign Admin Roles:
Expand the Account dropdown item in the sidebar menu
Select Admin roles
Select Services Admin
Click Admin
Step 9
Assign User Management Role
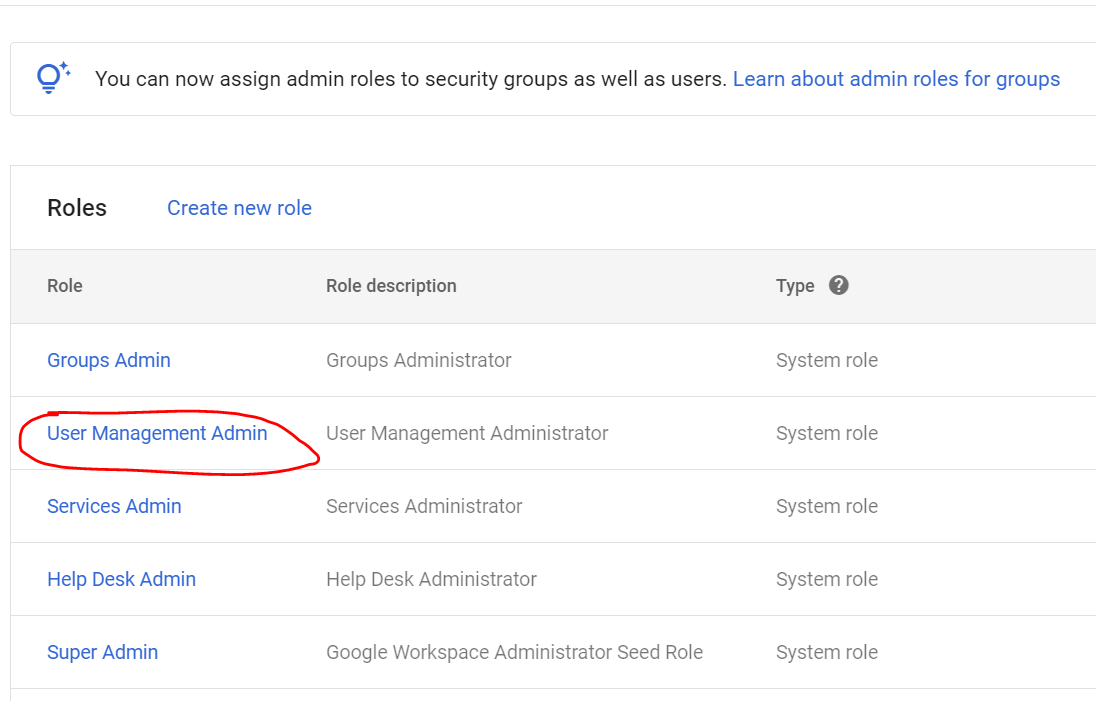
Select User Management Admin
Step 10
Assign Service Accounts
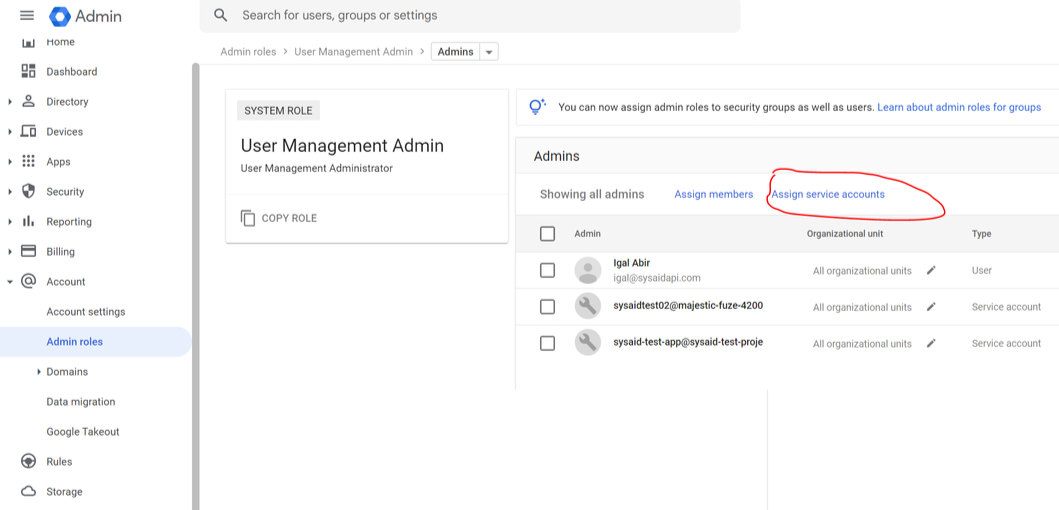
Enter “client_email” value that you copied in Step 7
(Add the “client_email” value for the Groups Admin rule)
Click Close