Use Hybrid Mode to create Default Printouts or Custom Printouts of any Service Record, for personal reference and convenience
Requirements
SysAdmin or Admin permissions
Spaces activated and enabled
Agents can create Service Record printouts by opening a Spaces Service Record in Hybrid Ticket View.
Service Record Printouts are available in two formats:
Default Printout
Custom Printout
This document provides the necessary steps to print a Service Record by opening it in its Hybrid View.
Step 1
Open Service Record in Hybrid View
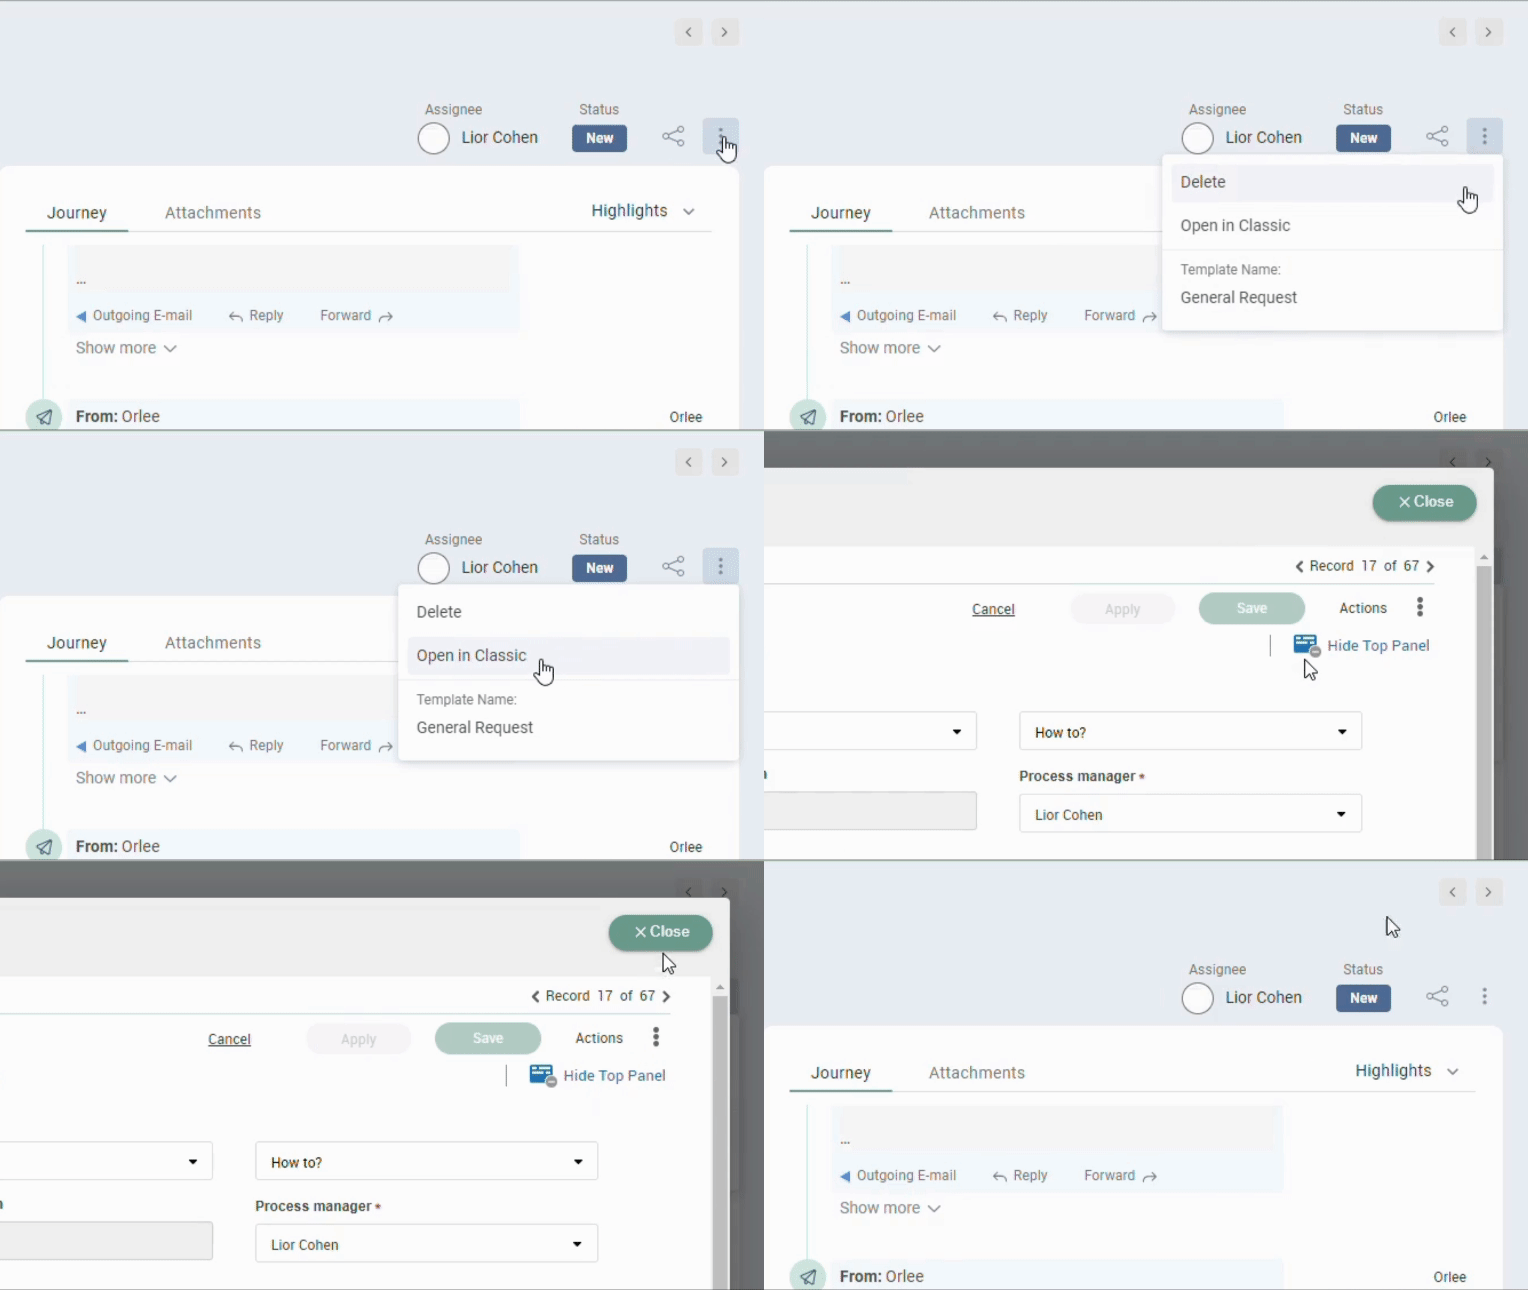
Click the three dots in the Request’s or Incident’s Service Record Header and select Open in Classic.
This will open the Hybrid View of the Service Record, in the familiar Classic UI.
Step 2
Create Default Printout
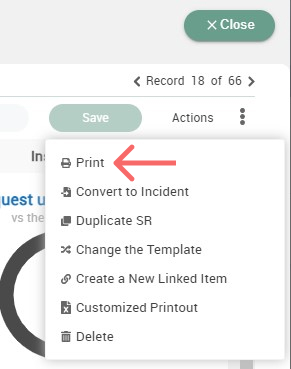
To create a Default Printout, select Print from the dropdown.
or
Create Custom Printout
To create a Customized Printout, follow these steps:
Custom Service Record printouts are Excel spreadsheets that contain necessary Service Record Fields – as customized by the Admin.
To customize a Service Record Printout, do the following:
Step 3
Design the Service Record Form
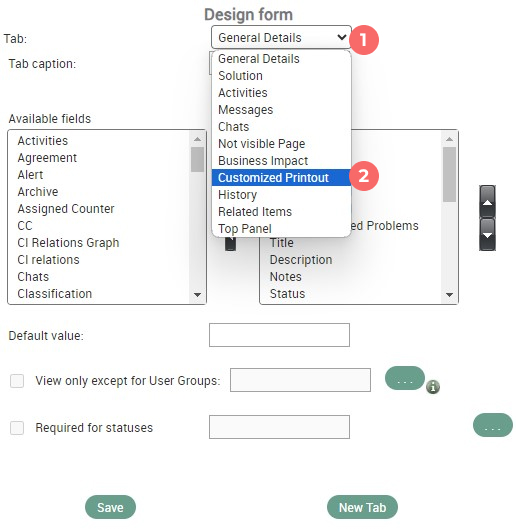
Click Design Form, which will open the form displayed above.
Move any relevant Fields from the Available Fields panel to the Visible Fields list, so that they will appear on the SR Form that you’ll print
Visible Fields
Fields that don’t appear in the Visible Fields panel won’t appear on the Custom Printout
After clicking Save, print the form using the three dots dropdown menu, as you do when printing a Default Printout
Step 4
View the Printout (Excel)
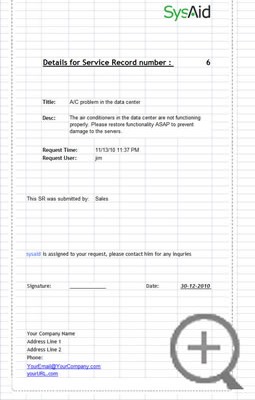
The Customer Printout is first downloaded on your device as an Excel file, with two tabs: SR Printout and Data.
Service Record Printout tab
The SR Printout tab is an editable, visual template for your customized report. You may edit this as you see fit. Please note that only text contained within the defined borders will actually be printed.
Adding the desired Fields and Field Value content in the SR Printout tab will generate it in the Data tab, once the tab’s content is populated in the printout.
Data
The Data tab contains a list of available SR fields that you may add to your printout.
Column A contains the Field Name, and Column B contains the Field Value content.
Step 5
Choose Fields for the Custom Printout
The data is only populated when you do a customized printout. Do not edit the Data tab.
Therefore, if you’d like to add the Solution field to the customized printout, on the SR Printout tab you would type "Solution:" in the desired cell and then type =$ Data.B14 in the adjoining cell.
If you'd like to add the Resolution field to the SR Printout tab, you would type "Resolution:" in the desired place and then type =$Data.B15 in the adjoining cell.
Step 6
Save & Print
Save the document when you are finished making changes. All customized printouts will use this Excel file as the template.
To print a service record using your custom template:
Open any Service Record
On the top right of the form, click Actions
From the drop-down list, click Customized Printout
Step 7
Return to Spaces UI
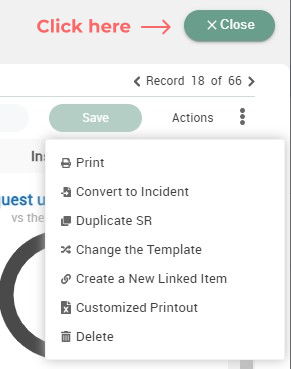
Once you’re finished performing your Service Desk actions in Hybrid View, return to the Spaces UI by clicking Close on the Service Record’s Hybrid View overlay.