Merge multiple Service Records into one by selecting the desired Service Records and merging them, according to your chosen “Primary” Service Record, which will then change the remaining Service Records and designate them as its Related Items instead of individual Service Records.
Requirements
SysAdmin or Admin with permissions to merge Service Records (User Management)
Spaces activated and enabled
Step 1
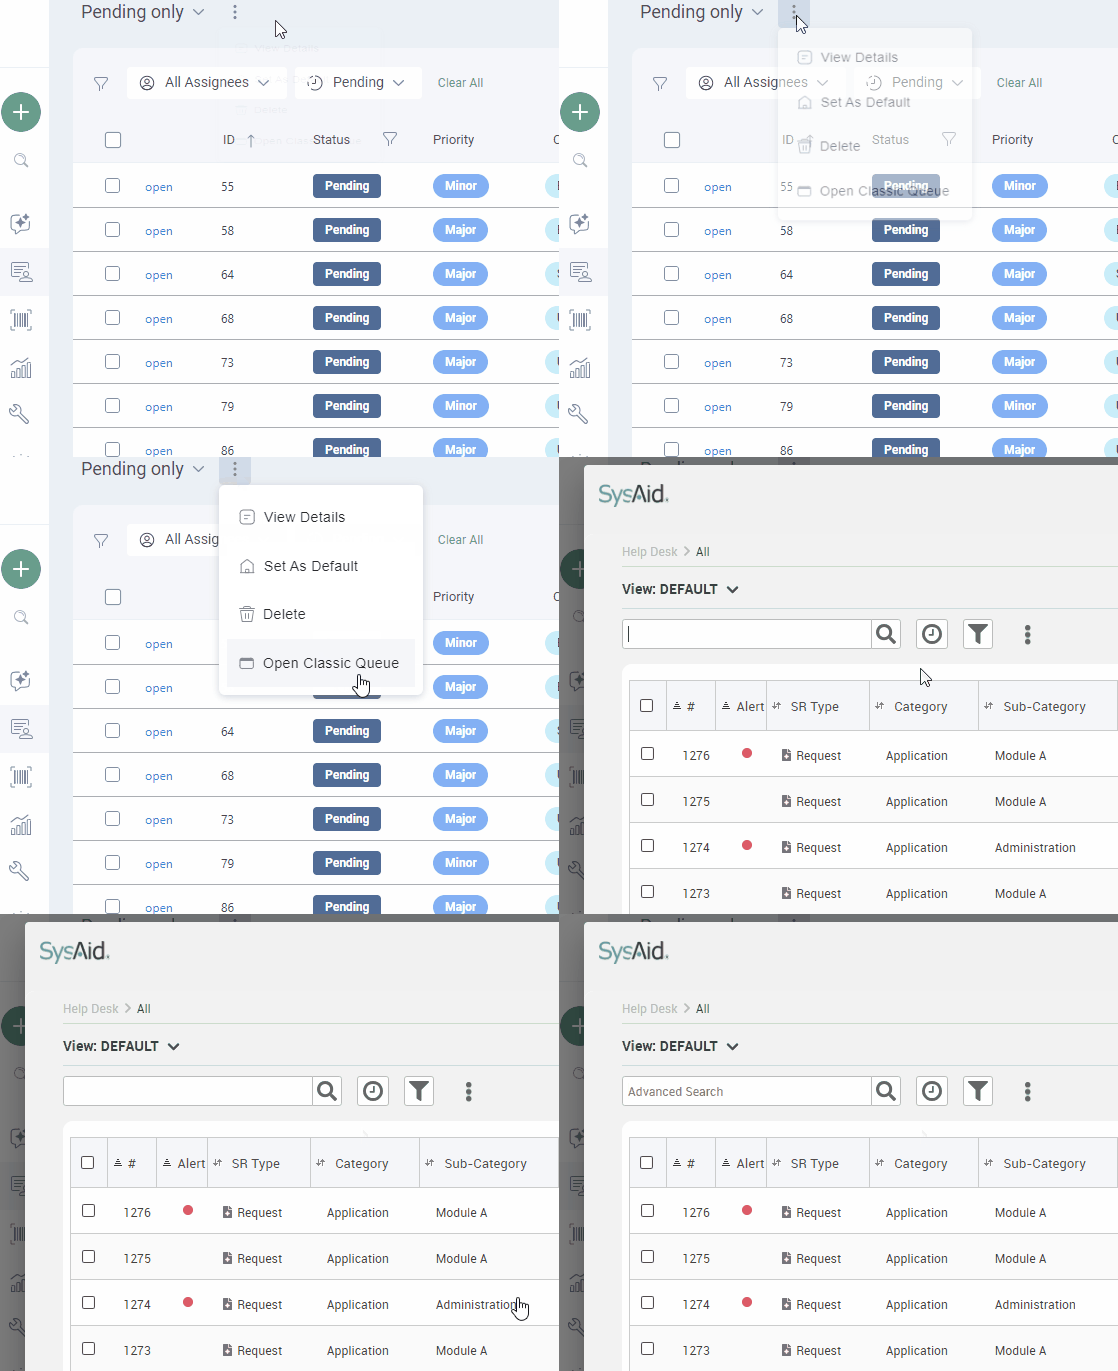
Open the Hybrid Queue

To open the Hybrid Queue, select the three dots in the Service Record Header and select Launch Classic Queue from the dropdown menu.
Step 2
Select and merge

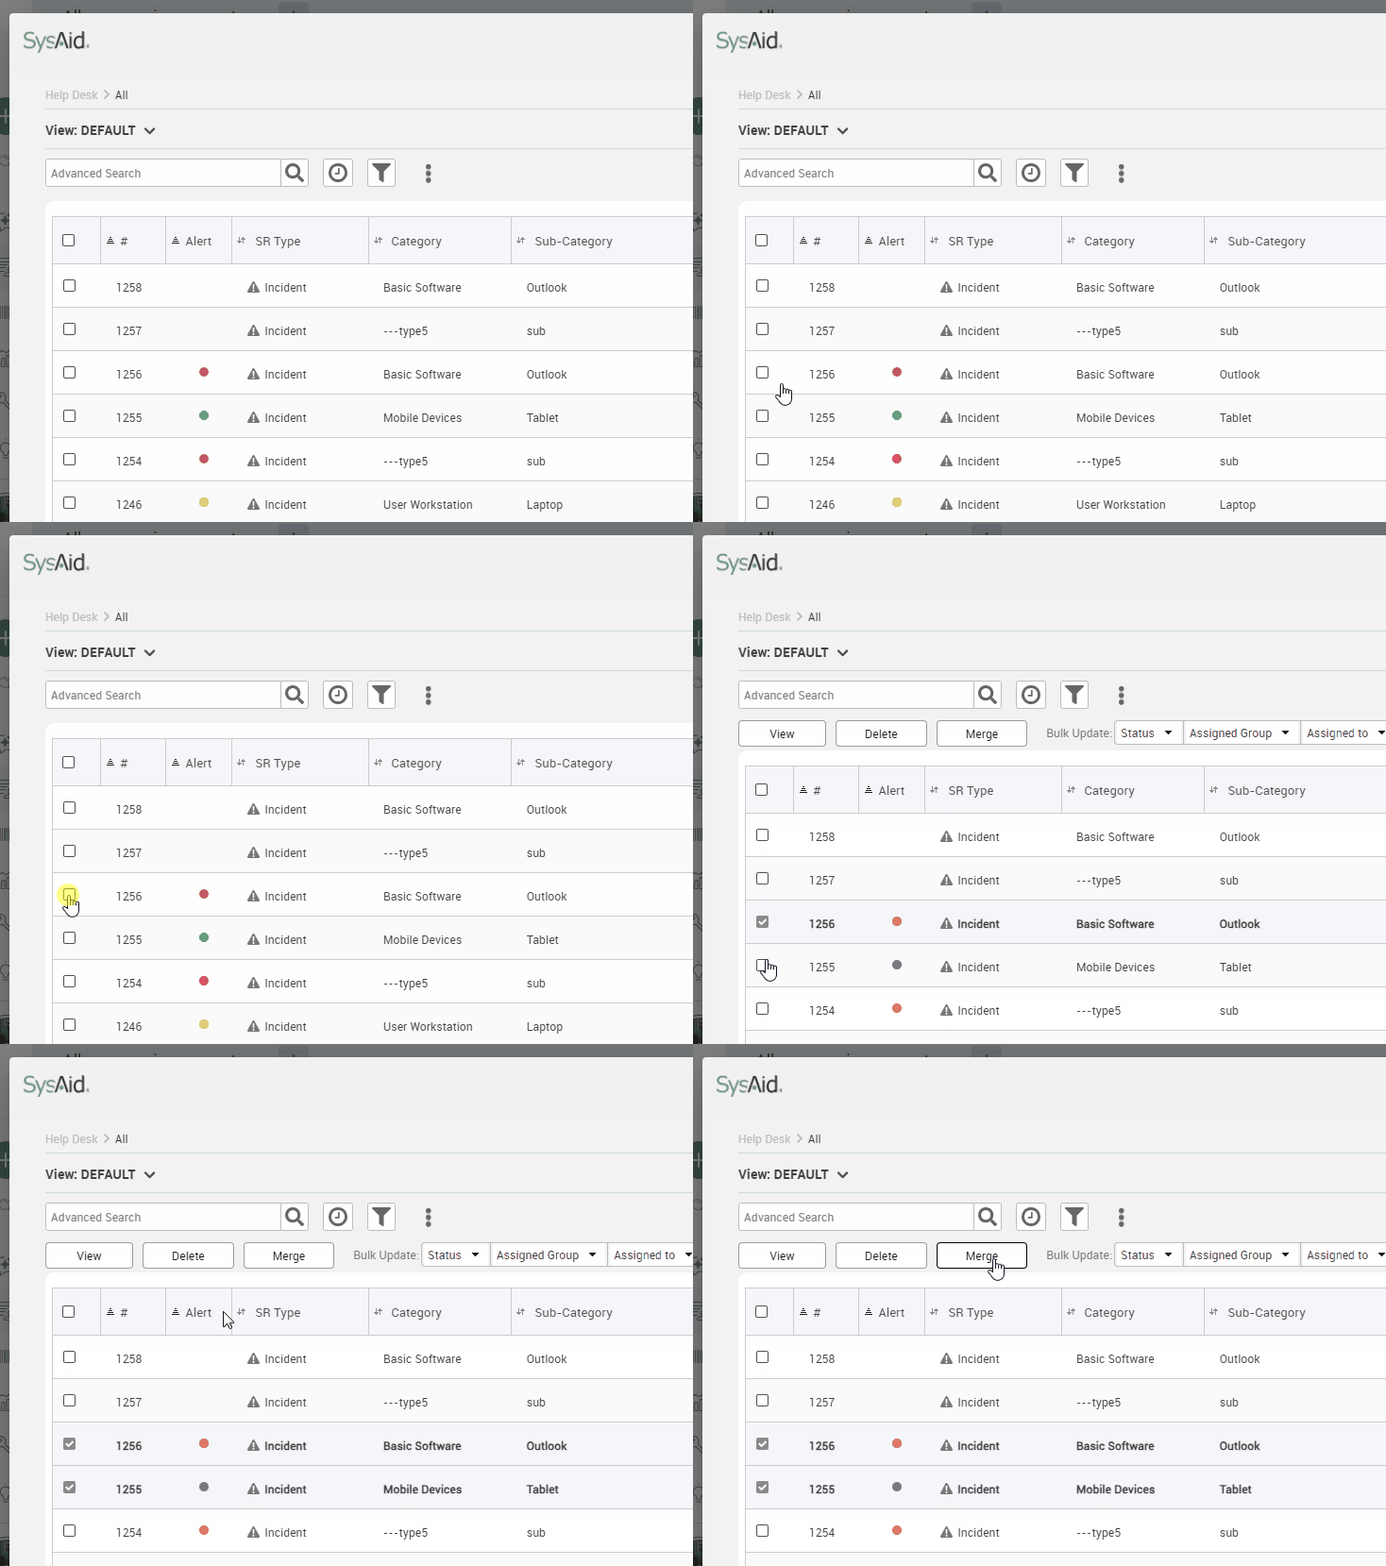
Select one or more Service Records, and the Service Record Action Bar will appear.
You can then click on the Service Records you’d like to merge:
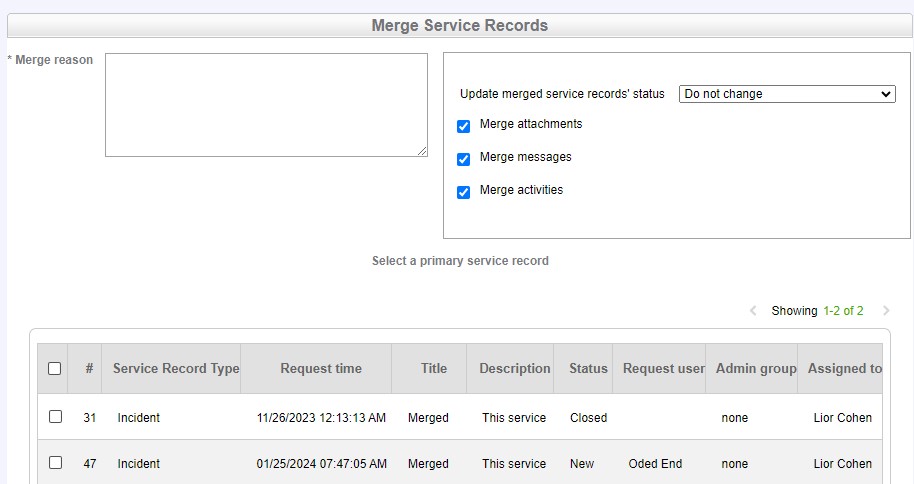
This will open the Merge Service Records form.
Step 3
Configure Merge

Admins (with necessary permissions) can configure Merge Settings in this form, and specify whether or not the Merge should include:
Attachments
Messages
Activities
The Admin performing the Merge must also provide a reason (in a short text field) explaining why they’re merging the Service Records.
Enter a reason for the merge
Click Merge
Select a primary service record for the other service records to be merged into
The primary Service Record will then display the remaining merged Service Records as its Related Items.
Merge Settings
Admins with necessary permissions can change the settings for each individual merge.
Admins without these permissions are limited to the default Merge Settings, as defined in the Merge Service Records page (shown above)
Step 4
Return to Spaces UI

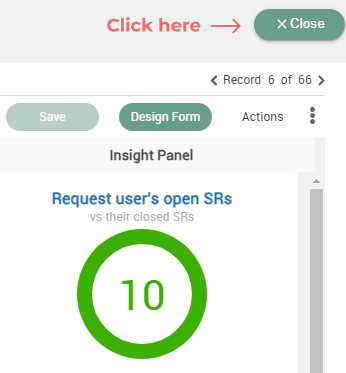
Once you’re finished performing your Service Desk actions in Hybrid View, return to the Spaces UI by clicking Close on the Service Record’s Hybrid View overlay.
Once the Merge is complete, return to the Spaces UI by clicking Close in the Service Record’s Hybrid View overlay.