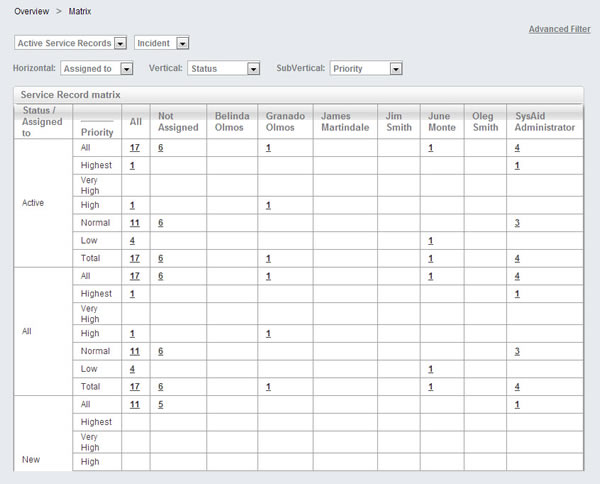
This page displays a matrix of the service records in your service desk. The matrix allows you to easily see the distribution of your service records, whether by status, administrator, category, priority, or any other variable. Click any number that appears in the matrix to see a list of those specific service records.
Click on a number in any of the columns to see a list of the service records included in the count.

Filter the Matrix
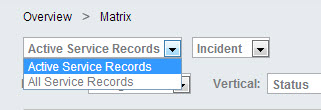
Use the drop-down filter at the top left of the list to choose whether the matrix shows all your service records or only your active service records. Use the drop-down filter next to it to choose which types of service records (incidents, requests, changes, or problem requests) you wish to see on the matrix.

You can also click on the advanced filter link to open the Expression Builder and create a filter that gives you even more precise control over which SRs are included in the matrix.
Choosing which fields appear in the Matrix
The lower line of drop-down filters allows you to filter the helpdesk matrix by any field on the helpdesk form.

The Horizontal field is displayed across the top of the matrix. The Vertical Field is displayed down the left side. The Sub-vertical field is displayed down the left side as a subset of the vertical field.
By filtering and then viewing your service records according to the three different helpdesk fields you specify, you can discover new information and discern overall patterns that exist in your helpdesk.
Make sure to click Apply after you select the fields you want.
Filter the selected fields
You can filter a selected field in the matrix to only display some of its values. Let's say you want to sort the matrix by the Status field, but only want to display certain statuses. You can create a filter for those statuses and select that filter in the Matrix.
To display a filtered field in the matrix
- Navigate to the Incident list.
- Ensure that the Default view is selected in the View drop-down menu.
- Click Customize View.

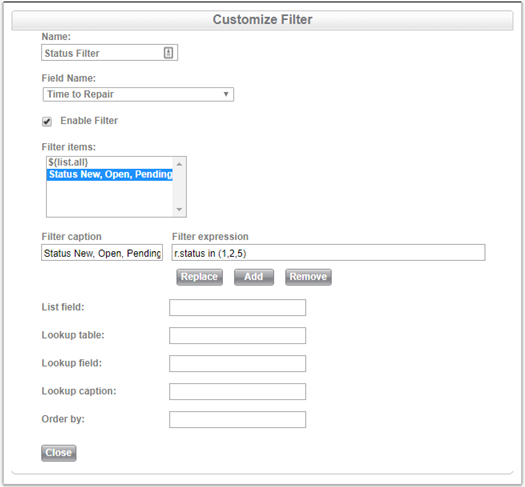
- In the Filter Menus area, click Add.
- Enter a name for your filter.
- From the Field Name drop-down list, select a field that is visible in the Incident form.
- In the Filter Caption field, enter a name for your filter.
- In the Filter Expression field, enter the SQL query for your filter [for example: r.status in (1,2,5) or r.status=1 ].
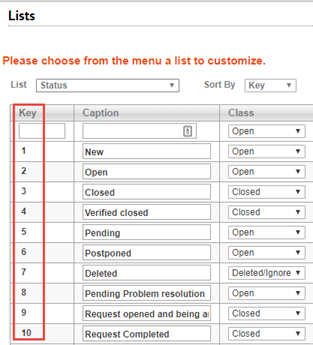
You can find the numeric keys for field values you want to include by navigating to Settings > Customize > Lists and selecting the field you want from the Lists drop-down menu.
- Click Add.
- Delete the contents from the following fields
- List Field
- Lookup Table
- Lookup Field
- Lookup Caption
- Order By
- Click Close.

- In the Customize List dialog, click Save.
- Navigate to Analytics > Matrix.
- Instead of selecting the field you wanted to filter, select the filter you just created from the relevant drop-down.
