The Jira integration allows you to sync information between Jira and SysAid.
Once the integration is set up, you'll be able to:
View Jira information in SysAid SRs
Generate Jira issues from SysAid SRs
Configure email and escalation rules to generate Jira issues
Map fields and sync statuses between Jira and SysAid
Set up multiple integration configurations to support multiple Jira projects

This can contribute to streamlined collaboration between the service desk, DevOps, and operations, slashing IT response and handle times.
Requirements:
SysAid Classic edition. If you’re Using SysAid Spaces, please see Jira integration with SysAid Spaces.
Licensing
You can contact your account manager to purchase an account. If you want to set up a trial account, enter your Jira credentials in the setup page, enable the addon. This will initiate a 10-day trial license for you to try out SysAid's Jira addon.
Requirements
For the integration to work properly you must have a Jira Software account and be running SysAid version 19.2 or higher. For Jira On Premise, this integration is compatible with Jira 8.12.3 or above.
Note that regular Jira users can set up this integration. The user does not need to be an 'Org and Site' admin in Jira.
Setup the Integration
Obtain the Jira add-on from the SysAid Marketplace
On the main My Apps page, in the Jira icon, click
 .
.
Connect Jira and SysAid
Please note that the step for obtaining the API token is different for Jira Cloud and Jira On Premise accounts.
In the Jira URL field, enter the URL for your Jira account.
Enter your Jira Username and password.
Get a Jira Token (for Jira Cloud accounts):
Login to Jira and click this link.
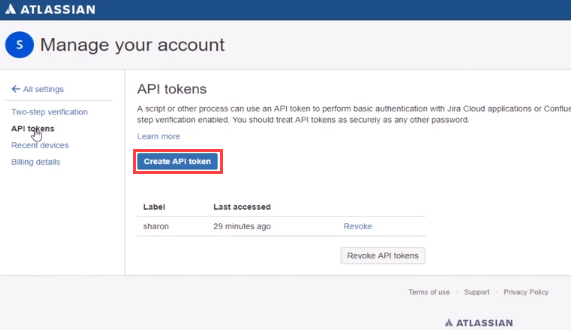
In the Jira account settings, click API tokens.
Click Create API token.
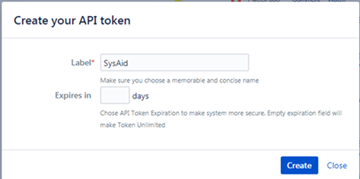
Enter a label for the API token.
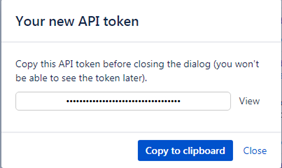
Click Copy to clipboard.
Back in SysAid, paste the token into the Jira Token field.
Get a Jira Token (for Jira On Premise accounts):
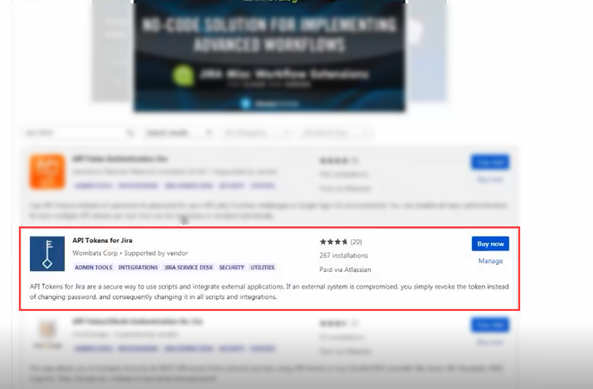
Login to Jira and access the Atlassian Marketplace for JIRA.
Purchase the API Tokens for Jira plugin.
From the Profile menu, select Profile.
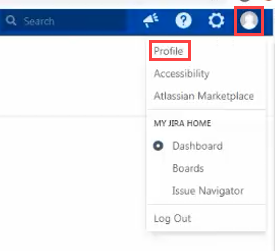
In the User Profile page, click Create API Token.

Enter a label for the API token.
Leave the expiration date field empty.
Click Create.
Click Copy to clipboard.
Back in SysAid, paste the token into the Jira Token field.
Click Save Changes.
Authenticate the integration:
In SysAid, in the SysAid Access Token field, click Generate Token.
Copy the token that appears.
In Jira navigate to Settings > System> WebHooks.
Click Edit.
In the URL Field, add the following to the existing text at the end of the existing URL:"&accessToken=<COPIED_ACCESS_TOKEN>"
The resulting URL should appear as follows:
https://<ACCOUNT>/addonsConsume/jiraEmbedded?ticket=${issue.key}&accessToken=<COPIED_ACCESS_TOKEN>
Click the slider to enable the integration.
Click Test connection to see if SysAid is successfully communicating with Jira according to the credentials you’ve entered.
If the connection is successful, a confirmation message is displayed.
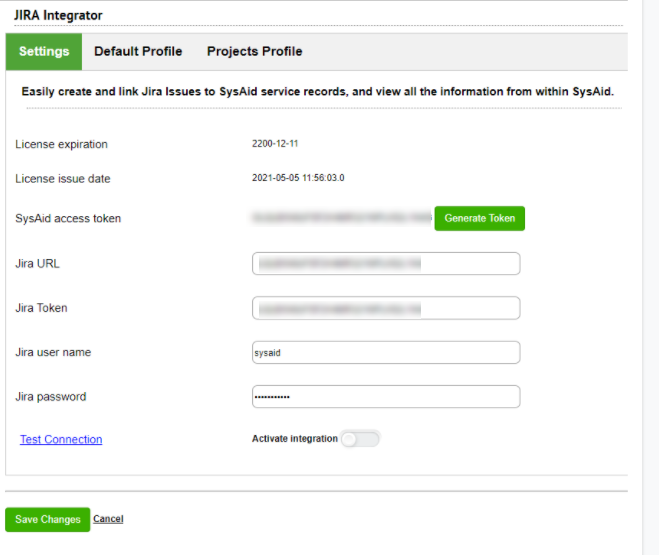
Map fields between Jira and SysAid
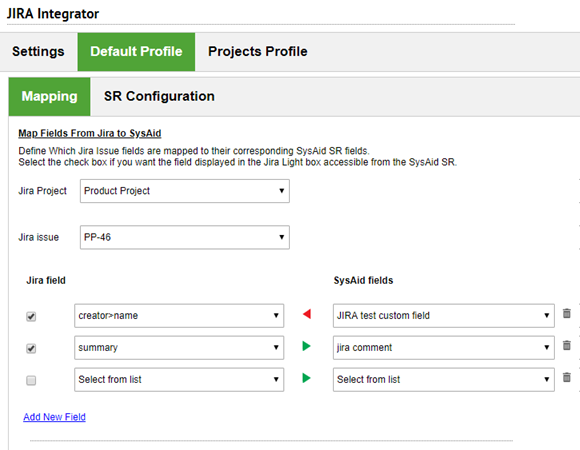
Once the integration has been set up you can map fields between SysAid and Jira. This means that values of SysAid SR fields are populated in their corresponding fields in Jira. To map fields you must first create custom fields in SysAid to store Jira information. Then you need to use an existing Jira issue to populate the Jira field drop-downs so you can select which fields to map to SysAid.
Please note that Jira fields can only be mapped to SysAid custom text or text area fields.
To map Jira fields to SysAid fields
Setup the webhook in Jira
In your Jira account, click
 .
.Select System.
Scroll down to the bottom of the side panel, and click Create a WebHook.
Enter a name for your WebHook (e.g. SysAid Webhook).
In the URL field, enter your SysAid URL and append the following URL parameters "/addonsConsume/jiraEmbedded?ticket=${issue.key}".
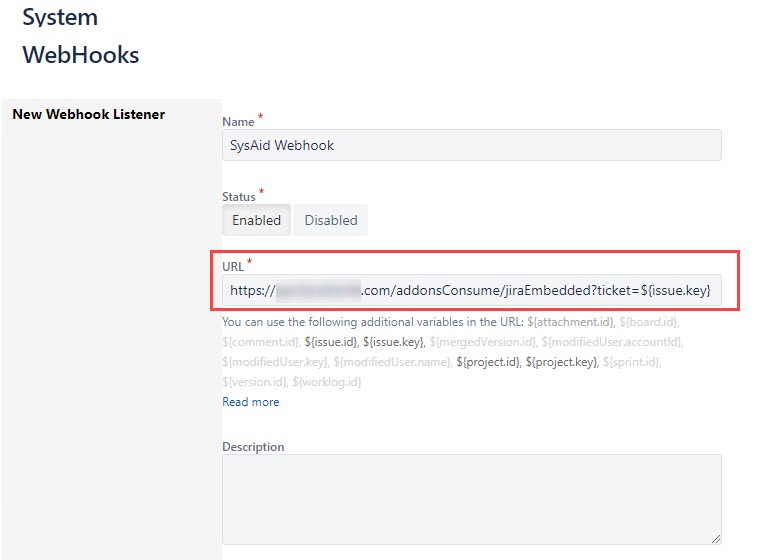
In the Issues Related Events area, select Attachment created and Issue updated check boxes.

On the bottom of the screen, click Create.
Create custom Jira fields. Make sure that the field's DB field name begins with "jira_". For more information about creating custom fields in SysAid, see Create Custom Column.
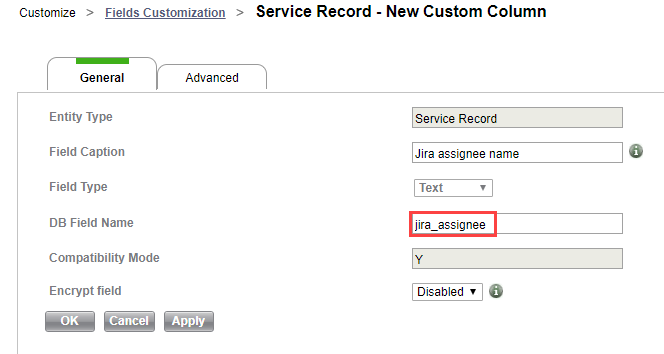
Populate the Jira field drop-downs:
In the Mapping tab, select a project from the Jira project drop-down list.
Select an issue from the Jira issue drop-down list.
In the Jira field column, select the Jira field you want to map from.
In the SysAid fields column, select the SysAid field you want to map to.
To change the direction of the mapping, click the arrow. The arrow changes from green to red when it is mapping from SysAid to Jira.
Click the check box to display the field in the Jira tooltip in the SysAid SR.
(Optional) To map more fields, click Add New Field.
(Optional) To delete a field mapping, click
 .
.Click Save Changes.
Map Statuses Between Jira and SysAid
The Status Mapping area allows you to connect a Jira status with a status in SysAid. This way, when a status is updated in a Jira issue, the update is reflected in the connected SysAid SR.
To map statuses:
In the Mapping tab, select a status from the Jira status drop-down.
Select a corresponding status from the SysAid status drop-down.
(Optional) To map more more statuses, click Add New Status.
(Optional) To delete a status mapping, click
 .
.(Optional) To also update Jira issue statuses, based on changes to SysAid SR statuses, select this check box.
SR Configuration
The SR Configuration tab allows you to determine what the contents of the description fields for Jira issues generated from SysAid tickets. It also allows you to create a field in Jira issues to display the corresponding SysAid ticket, and to generate an SR activity whenever a Jira issue is generated from, linked to, or removed from the ticket.
In the SR Configuration tab, you can copy any of the SR data from SysAid to Jira using the Description field. You can manually edit the description templates for the Jira issues that are automatically created by this SysAid-Jira integration to add or remove SR information that will appear in the Jira issue.
(Optional ) To generate a SysAid SR activity for every time the integration creates, links to, or removes a Jira issue, select the "Add SR activity when creating/linking/removing a Jira issue " check box.
(Optional) In the "Display SysAid SR ID in this field" field, enter the ID of the custom field that Jira will use for displaying the ID of the SR connected to the automatically-generated Jira issue:
In Jira, click
 .
.Select Issues.
Select Custom fields.
Search for the field you created in Jira for this purpose.
On the field record, click
 .
.Select Configure.
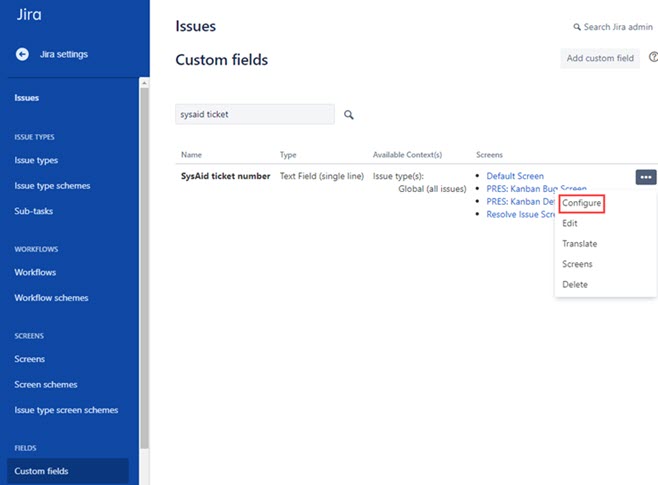
Copy the ID at the end of the URL.

Back in SysAid, in the SR Configuration tab, enter "customfield_" and paste the copied ID after the underscore in the "Display SysAid SR ID in this field" field.
Click Save Changes.
Projects Profile
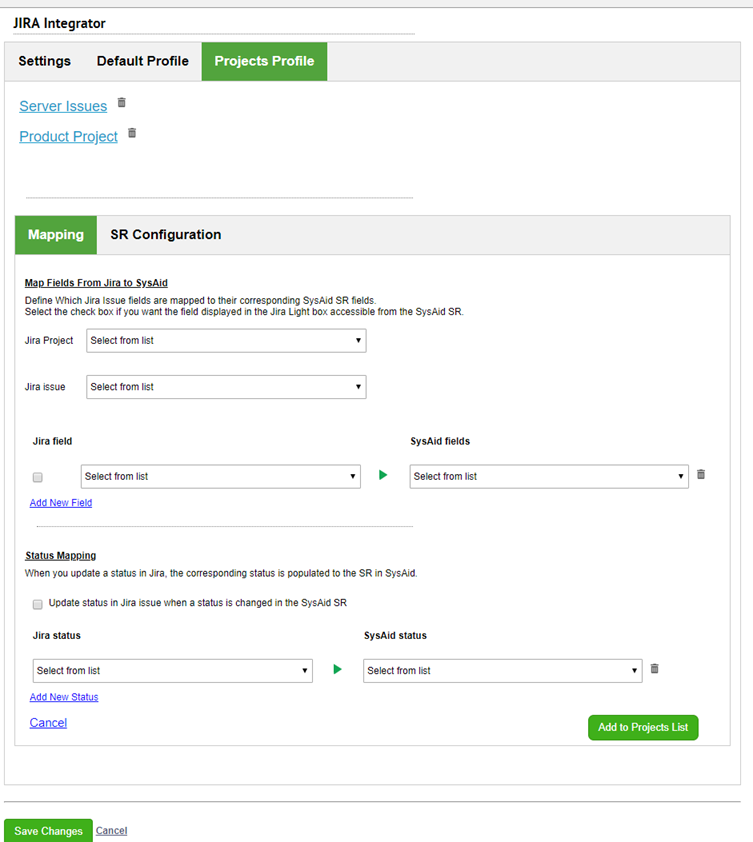
In Jira, an issue's fields may differ based on what project that it belongs to. That's why you may want to configure setup different configurations to apply to different projects, in addition to your default configuration.
To add a new designated Jira project configuration
In the Projects Profile tab, click Add Jira Project.
Set up the field mapping, status mapping, and SR configuration, according to the procedures detailed above.
Click Add to Projects List.
(Optional) To delete a project configuration, click

next to that project.
Using the Jira integration
Now that you've set up the integration, you can create a jira issue from a SysAid SR, or link an existing Jira issue to a SysAid SR.
To create a Jira issue from a SysAid SR
In the SR form, from the Jira Issue drop-down, select Create.
Select which Jira project you want the issue to be included in.
Select a Jira type for the issue.
If you select Sub-Task as the Jira type, enter the parent ID in the Jira Parent Issue field.
Select who should be assigned to the issue in Jira.
Click Apply.
SysAid generates an activity in the service record corresponding to the creation and linking of the new Jira issue.

The Jira issue information is displayed in the Jira Issue field.
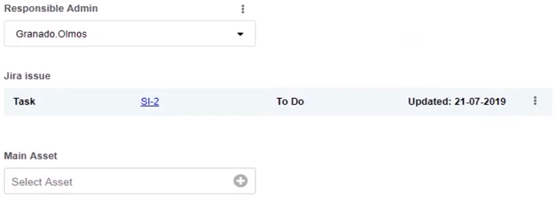
(Optional) To remove the issue or relink the SR to another Jira issue click
 .
.(Optional) To view more of the issues information click the link in the Jira issue field.
To open the issue in Jira, click the link in the tooltip.

The Jira issue contains all the information you defined when you set up the SysAid-Jira integration.
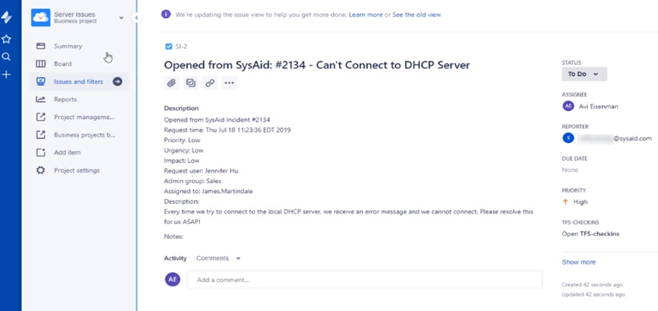
When you change the status of the issue in Jira, the status is automatically updated in SysAid and in the Jira issue field.
Set a Jira action in an escalation or email rule
You can also set escalation rules and email rules to create Jira issues.
To set an escalation rule or email rule to create a Jira issue based on a SysAid SR
Set the criteria for the rule. For more information, see Escalation Rules or Email Rules.
In the Action Builder, select the Jira-related fields you want the escalation rule to affect:
For the Jira Issue field, select Create.
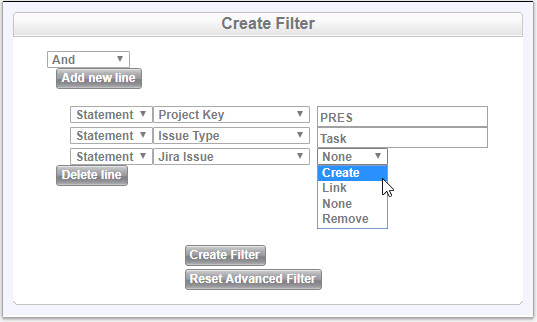
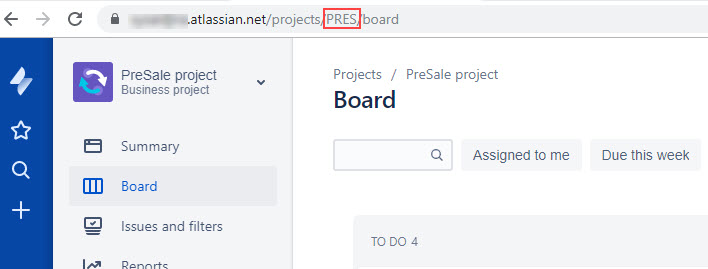
Select the Jira Project field and enter the project ID that you can locate in the URL of the project's page.
Click Create Filter.
In the rule form, click Save.
