This guide is designed to help you get up and running with SysAid's Automate Joe service orchestration service. You can use it as a check list for the steps you need to take in setting up Automate Joe in your SysAid account.
Only an admin with SysAid Administrator permissions can set up this integration. For more detailed information, see the Automate Joe Guide.
To set up Automate Joe in your SysAid
- Acquire and install the Automate Joe add-on
- Activate the add-on
- Set permissions
- Deploy Automate Joe agents
- Update credentials
- Update parameter mappings
1. Acquire and Install the Automate Joe Add-On
To install the Automate Joe add-on in your SysAid account, contact your customer success representative.
2. Activate the Add-On
- Navigate to Settings > My Apps page, in the Automate Joe icon, click
 .
. - Click the slider.
- Click Save Changes.
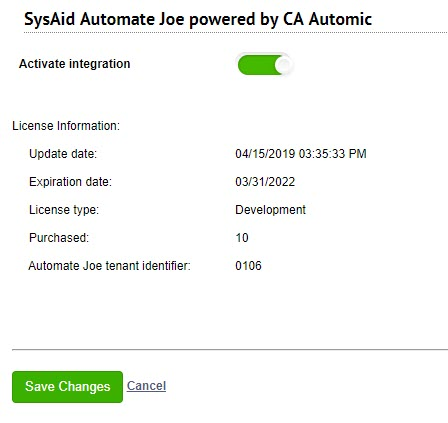
For information about Automate Joe licenses, see the Automate Joe Guide.
3. Set Permissions
Once Automate Joe is enabled, configure the two additional permissions for admins and/or groups.
| Permission | Description |
|---|---|
| Enable/Disable Automate Joe agents and targets | Allows admins to enable or disable Automate Joe agents and targets. |
| Modify Automate Joe parameter mapping | Allows admins to create/update the parameter mapping for an Automate Joe action processes input/output. |

4. Deploy Automate Joe Agents
Next, deploy an Automate Joe agent on a computer that has assess to the machines you want to integrate with the relevant Automate Joe process. For more information about the various types of Automate Joe agents, see the Automate Joe Guide.
To deploy an Automate Joe agent
- Navigate to Asset Management > Asset List.
- Select the asset you want to deploy an agent on.
- In the asset form, select the Embedded Services tab.
- Select Enable from the drop-down for the agent(s) you want to deploy.
- Click OK.
.png)
5. Update Credentials
Automate Joe uses SysAid's credentials management to access the various applications and services in your network by automatically and securely syncing them to a secure repository in the Automic Orchestration Server.
To prepare a credentials set for an Automate Joe process
- From the Credentials list, open the credentials you want to use.
- Ensure that the user name includes the domain name. For example: "domain\administrator"
- Select the Valid for Automate Joe check box.
- Click OK.
You can now select this credentials set in the parameter mapping of an Automate Joe process. It's important that any credentials you select have access and permissions to the service on which you want to execute the automated process.
6. Parameter mappings
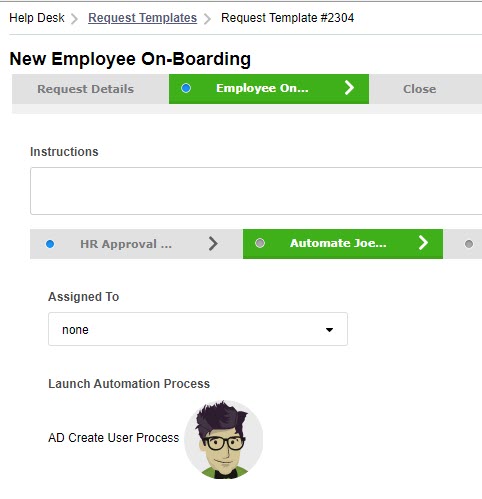
The new Automate Joe action item control allows you to launch an automation process from an action item in a request, change, or problem template. Once this is configured, the moment an Automate Joe action item is activated, Automate Joe executes the process and completes the action item when the defined process is complete.
To add an Automate Joe process from an action item
- Navigate to Settings > Service Desk Templates.
- Select the template you want to configure and navigate to the action item you want to automate.
- Click
 .
. - Click Edit.
- Add the Launch Automation Process field to the Visible fields area.
- (Optional) We recommend removing all other fields from this action item.
- Click Save.
- In the action item, click
 .
.
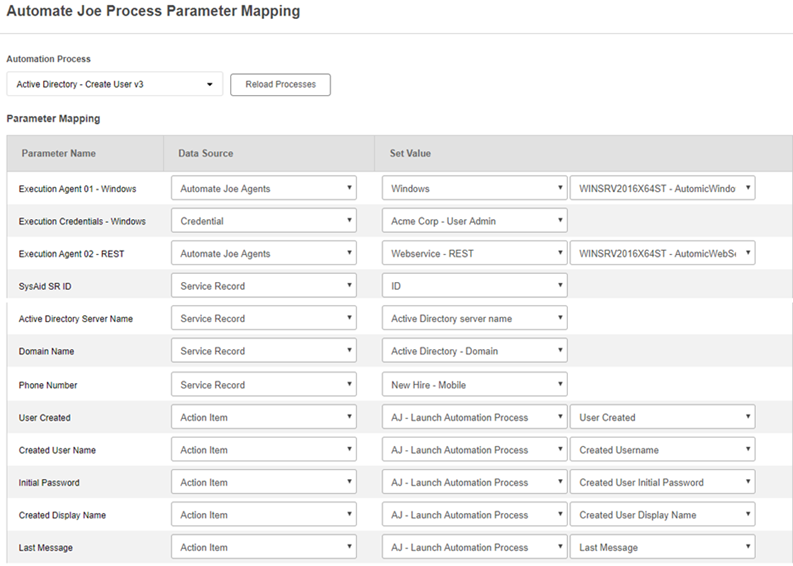
- If it's the first time accessing the Automate Joe Parameter Mapping screen, click Reload Processes to populate the list of available processes.
- From the Automation Process drop-down list, select the process you want to configure.
- Provide parameter mapping for this process.
- Select if you want the parameter to be populated from an SR field, an action item field, credential set, Automate Joe agent, group field, or a manual Velocity command.
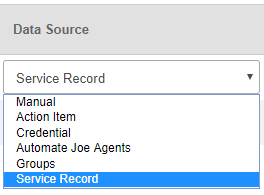
- In the Set Value column, select a field, or type input with the variable name of the field you want to populate.
- Select Get Text if you want to output the field value's caption instead of the its key.
- Click OK.
- Back in the workflow template, click OK.