Introduction to Automate Joe
SysAid's Automate Joe embedded service is a service desk orchestration tool that allows admins to free up a significant percentage of their workload by automatically running a script-based processes from SysAid, using CA Automic. These processes can include password resets, setting up a VM, employee onboarding/offboarding, granting access to network folders, software deployments, start/stop services, and more.
Requirements and Prerequisites
Only an admin with SysAid Administrator permissions can set up this integration.
For the service to run:
- You must be running the latest version of SysAid and the SysAid agent.
- Ensure that ports 2217-2220 are open from the machines where the Automate Joe agents are installed
- The relevant Automate Joe workstation must be able to access the following addresses at ports 8443 and 443:
- https://gateway.sysaid.com
- https://teamviewer.gateway.sysaid.com
- teamviewer.gateway-eu.sysaid.com
- data.gateway-eu.sysaid.com
- gateway-eu.sysaid.com
We also recommend using a machine that is already running the RDS.
Enable the Automate Joe Add-On
Activate Automate Joe
- Obtain the Automate Joe add-on from the SysAid Marketplace.
- On the main My Apps page, in the Automate Joe icon, click
 .
. - Click the slider.
- Click Save Changes.
License Information
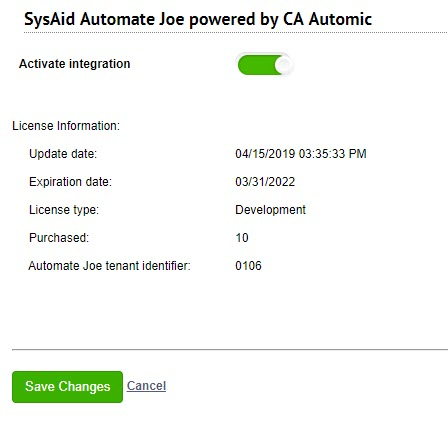
Once Automate Joe is enabled, the following license information is displayed on the setup page:
Added Permissions
Once Automate Joe is enabled, you can configure two additional permissions for admins and/or groups.

Deploy Automate Joe Agents
Automate Joe works by deploying specific agents on the target machines or services. You do not need to deploy the Automate Joe agents on every machine in the organization. You only need to deploy them on a single machine that has access to the machines you want to integrate with the relevant Automate Joe processes. If any single machine has access to your entire network, that's an ideal host for the Automate Joe agents.
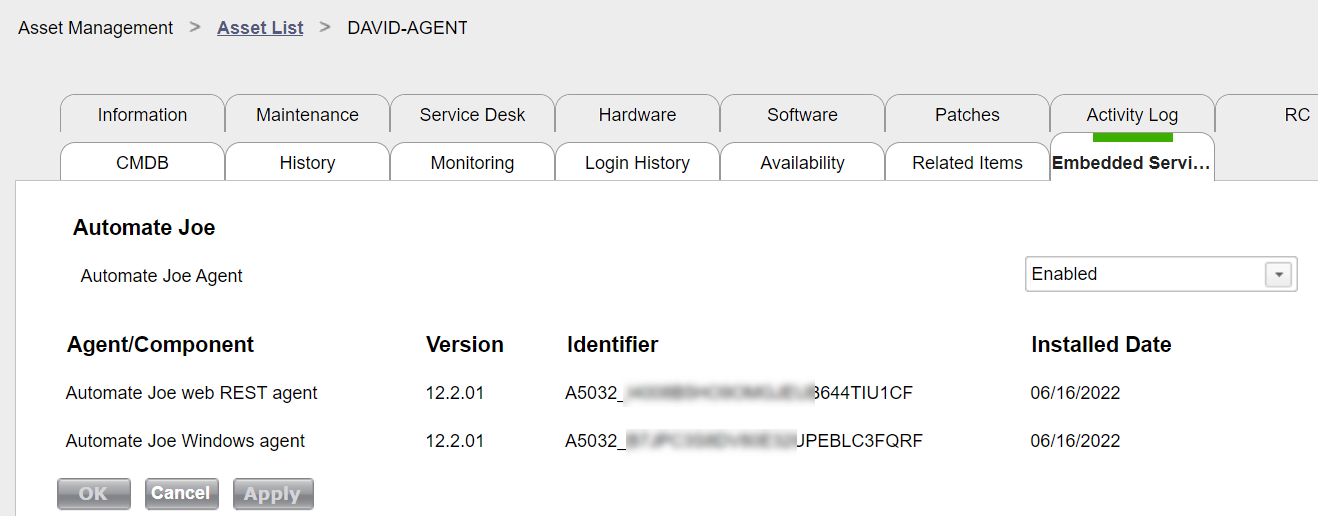
Once an agent is enabled, the SysAid agent deploys it on the relevant machines and automatically generates a unique ID for each deployed Automate Joe agent.
To deploy an Automate Joe agent
- Navigate to Asset Management > Asset List.
- Select the asset you want to deploy an agent on.
- In the asset form, select the Embedded Services tab.
- Select Enable from the drop-down for the agent(s) you want to deploy.
- Click OK.
Import Content Packs
Sync SysAid Credentials with Automate Joe
Automate Joe uses SysAid's credentials management to access the various applications and services in your network by automatically and securely syncing them to a secure repository in the Automic Orchestration Server.
To prepare a credentials set for an Automate Joe process
- From the Credentials list, open the credentials you want to use.
- Ensure that the user name includes the domain name. For example: "domain\administrator"
- Select the Valid for Automate Joe check box.
- Click OK.
You can now select this credentials set in the parameter mapping of an Automate Joe process. It's important that any credentials you select have access and permissions to the service on which you want to execute the automated process.
Process mMapping
New Action Item Control
The new Automate Joe action item control allows you to launch an automation process from an action item in a request, change, or problem template. Once this is configured, the moment an Automate Joe action item is activated, Automate Joe executes the process and completes the action item when the defined process is complete.
To add an Automate Joe process from an action item
- Navigate to Settings > Service Desk Templates.
- Select the template you want to configure and navigate to the action item you want to automate.
- Click
 .
. - Click Edit.
- Add the Launch Automation Process field to the Visible fields area.
- (Optional ) We recommend removing all other fields from this action item.
- Click Save.
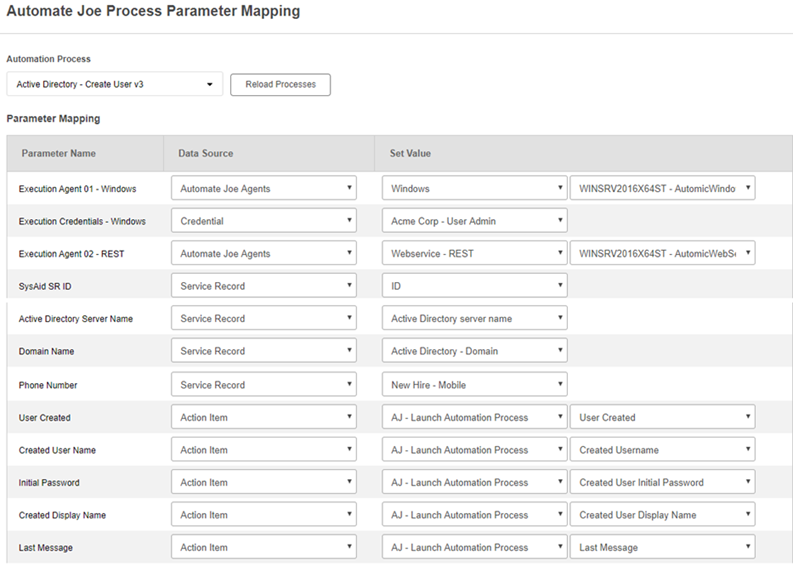
- In the action item, click .

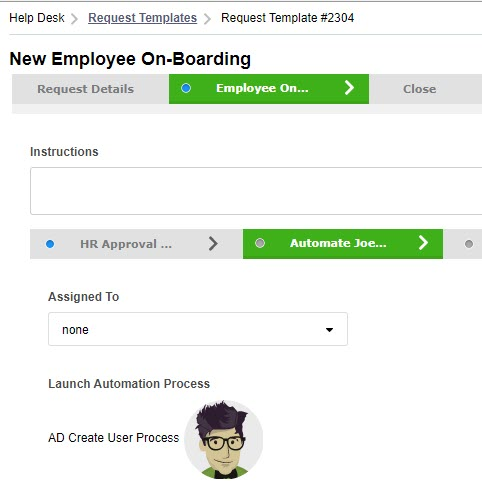
- If it's the first time accessing the Automate Joe Parameter Mapping screen, click Reload Processes to populate the list of available processes.
- From the Automation Process drop-down list, select the process you want to configure.
- Provide parameter mapping for this process.
- Select if you want the parameter to be populated from an SR field, an action item field, credential set, Automate Joe agent, group field, or a manual Velocity command.
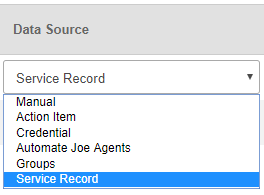
- In the Set Value column, select a field, or type input with the variable name of the field you want to populate.
- Select Get Text if you want to output the field value's caption instead of the its key.
- Click OK.
- Back in the workflow template, click OK.
You can access a record for each process run by Automate Joe in Settings > Automate Joe > Process Monitor.