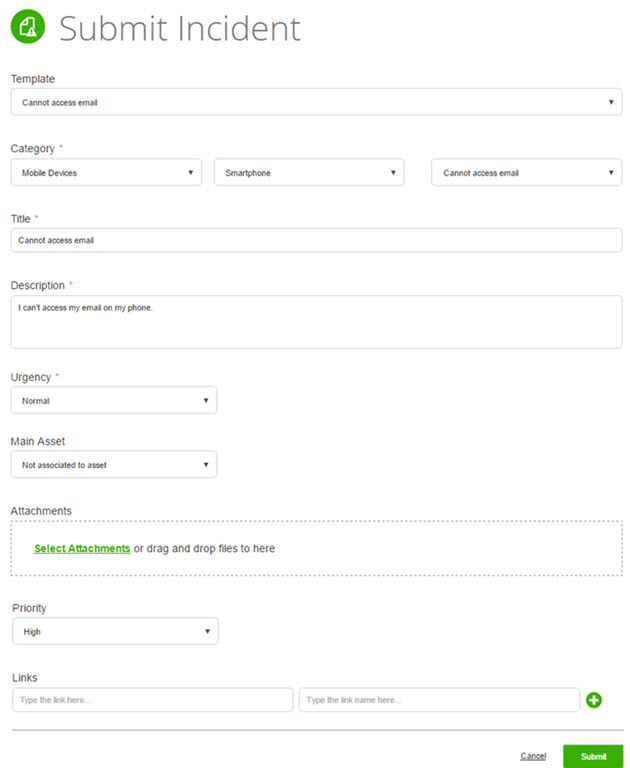
This page allows you to submit incidents to your IT staff when you need help that isn't related to a component failure or error. For example, you might open an incident for permission to access a server.
Submitting an incident, tells your IT department what issue you are experiencing, and creates a record that they can refer to if they have any questions. This is the best way to ensure that your IT department quickly provides the resolution you need and gives you results that you're satisfied with.
Submit an incident via the Self-Serice Portal
Submitting a incident

Required fields
When you submit an incident, it's recommended to give your IT department as much information as possible about the help you need. The fields on the Submit Incident form are designed to make it easy for you to provide that information.
When you submit a new incident, fill out the following mandatory fields:
Category
When you select a category for the incident, the IT staff can automatically route your incident to the correct administrator.
For example, if you need your printer is malfunctioning, your service record can be automatically routed to the administrator who repairs such devices. This speeds up response time, and helps you get your password reset as quickly as possible.
Title
When IT administrators review their lists of service records (including incidents), the title of each service record gives the administrator a summary of that SR. Enter a concise and descriptive title for the incident to immediately help your administrator understand what the incident is, and to enable the administrator to quickly determine a solution.
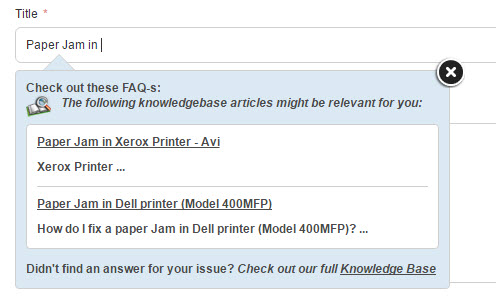
As you are typing the title of your incident, a list of suggestions from the FAQ may appear. These suggestions are intended to help you find an FAQ article that addresses your issue and that may allow you to handle your incident on your own. If you see an article that looks like it might be helpful, click on it to open the full article. This could be the fastest way to get the service you need!
After entering a title for your service record, the FAQ offers you
relevant articles designed to help you resolve the incident on your own
Description
Enter all of the relevant details for your incident. The better a description you give, the more easily your IT department can assist you.
Urgency
The incident's urgency tells your IT staff how quickly you need your incident fulfilled. Please keep in mind that if you mark every service record as Urgent, your IT staff will likely start to ignore the urgency you select.
Optional fields
Template
Your IT department may have created templates for you to use for different types of incidents. Scan through the list of templates, and if you find an appropriate template for your incident, select it.
Attachments
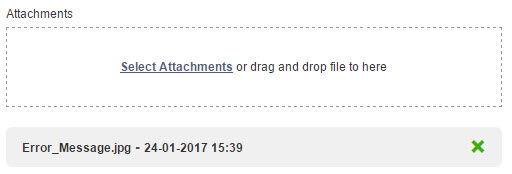
There may be times when you need to send a file to your IT department along with your incident. To do so, click Select Attachments or drag and drop the file into the Attachments area.
Add attachments to a service record
Main Asset
An asset is any physical IT device. The Main Asset list is configured by your IT department, and shows you a list of assets that you can submit incidents for. Choose the relevant asset from the list.
For example, if your computer sometimes crashes unexpectedly, choose your computer from this list (if it appears). When you access the Self-Service Portal by pushing the F11 hotkey, SysAid automatically selects your computer as the asset.
Notes
Allows you to log notes on the service record. you may add a note by clicking Add a note. This adds your name and a timestamp indicating when the note was added.
Other fields
Your IT department has the ability to customize the Submit incident form. If they have done so, there may be other fields that appear on the form that. Please refer to your IT department for an explanation of these fields and how to use them.
Service record confirmation
When you have filled out all relevant fields on the Submit incident form, click the Submit button to submit your incident. A confirmation page appears with your service record number.
Service record confirmation message

If you'd like, you can check the status of any service records you've submitted. To do so, see the Scoreboard in the Self-Service Portal.