After you generate your scripts in SysAid, you must configure Nagios XI to run those scripts to automatically generate the SRs you want and to import the hosts you are monitoring with Nagios to SysAid Asset Management.
Automatically create SRs for Nagios events and alerts
The first two of the three scripts you generated allow Nagios to automatically create SRs in SysAid for events and alerts relating to hosts and services you are monitoring. The following procedure allows enables Nagios to run those scripts and communicate the information to SysAid. You can repeat this process to configure different host groups or service groups to run different scripts.
Preparatory Steps
- Transfer the "sysaid_host_notification.bash" and the "sysaid_service_notification.bash" script files that you generated in SysAid to the nagios/etc/objects folder.
- Change the access permissions on the scripts to allow their execution, using chmod:
chmod +x sysaid_host_notification.bash sysaid_service_notification.bash - Locate the nagios.cfg file and update the enable_environment_macros parameter to '1':
enable_environment_macros=1
Update the Nagios contacts and commands
- In the Nagios XI navigate to, Configure > Core Config Manager.
- Define a new command for each of the notification scripts you generated in SysAid:
- From the right-pane, click Commands.
- Click Add New.
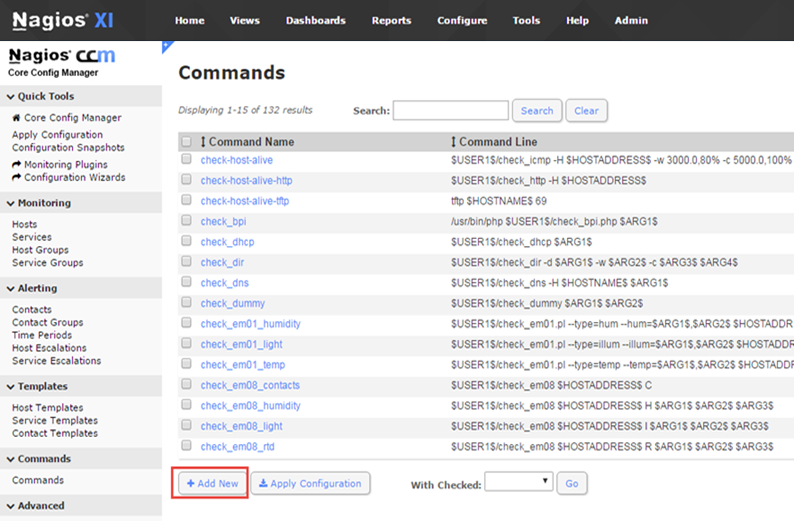
- Enter a Command Name.
- Specify the full path to the script (for example, "/usr/local/nagios/libexec/eventhandlers/sysaid_host_notification.bash").
- From the Command Type drop-down list, select misc command.
- Click Save.
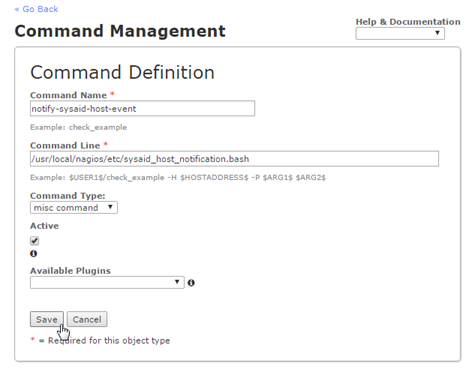
- Repeat for these steps for the second script.
- Define a contact to receive the notifications:
- From the right-pane, select Alerting > Contacts.
- Click Add New.

- In the Common Settings tab, enter a Contact Name and Description.
- Click Manage Contact Groups.
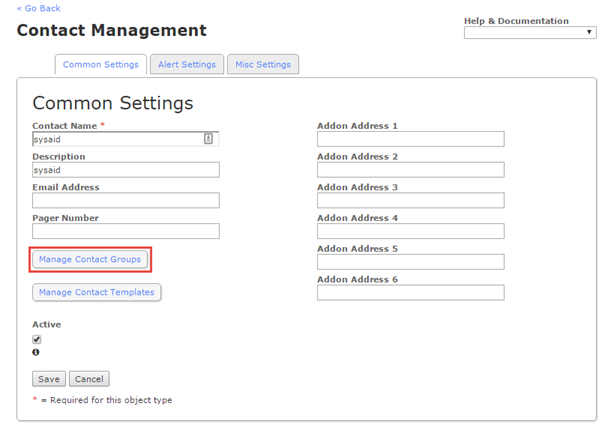
- Add the contact to a group that will receive the relevant notifications (we recommend adding the contact to the "Admin" group).
- In the Alert Settings tab, select the settings you want for host and service notifications (see the Notification Options table below for more information).
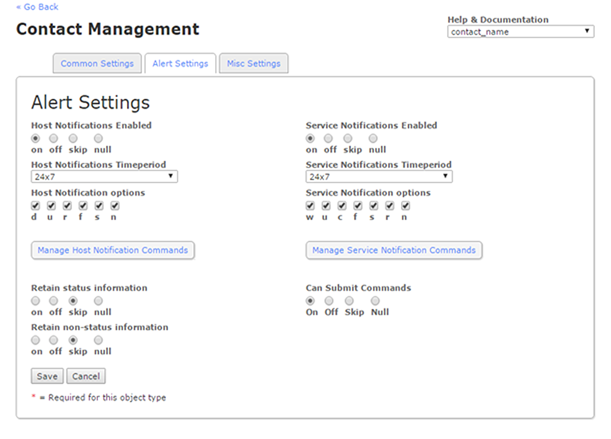
- Click Manage Host Notification Commands, add the host command you created in the previous script, and click Close.
- Click Manage Service Notification Commands, add the service command you created in the previous script, and click Close.
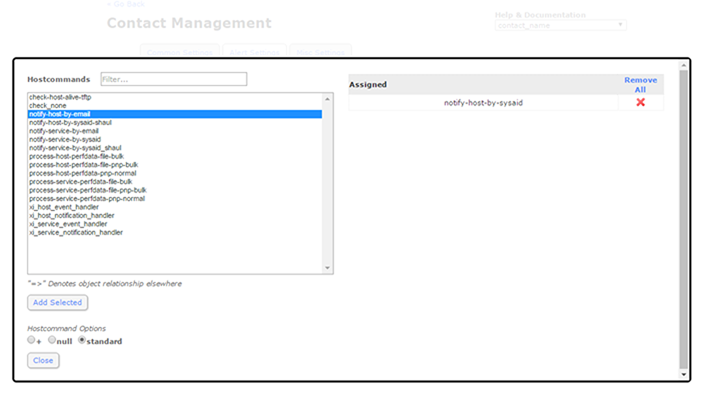
- Click Save.
- Click Apply Configuration.

Notification options
You can trigger a notification to run on the following host/service states.
| Syntax | Definition |
|---|---|
| Host Notifications | |
| D | Down |
| U | Up |
| R | Recovery |
| F | Flapping |
| S | Scheduled Downtime |
| Service Notifications | |
| W | Warning |
| U | Unknown |
| C | Critical |
| F | Flapping |
| S | Scheduled Downtime |
| R | Recovery |
| N | Null |
Import Nagios hosts as assets in SysAid
The third script you generate in SysAid allows you to import all of the hosts defined in Nagios into SysAid Asset Management.
Transfer the "send_host_list_to_sysaid.bash" script file to a folder in Nagios.
Change the access permissions on the scripts to allow their execution, using chmod:
chmod +x send_host_list_to_sysaid.bashConfigure Nagios XI to import assets to SysAid when it runs the script:
- Locate the httpd.conf file in the following directory: "/etc/httpd/conf/httpd.conf".
- Backup the httpd.conf file.
- Add the following lines to the file. Be sure to add the lines near the ScriptAlias tag and not within the VirtualHost tag.Text
ScriptAlias /nagios/cgi-bin "/usr/local/nagios/sbin" <Directory "/usr/local/nagios/sbin"> AllowOverride None Options None Order allow,deny Allow from all </Directory> - Restart the httpd service with the following command:
service httpd restart
Run the script as follows:
./send_host_list_to_sysaid.bash
It is recommended to to set up a scheduled cron job to import assets on a regular basis.