Queue Columns can be reordered, added or removed — to display Service Records according to priority, use-case, and agenda.
Requirements
Admins granted the “Save custom personal views” permission can configure Queue Columns
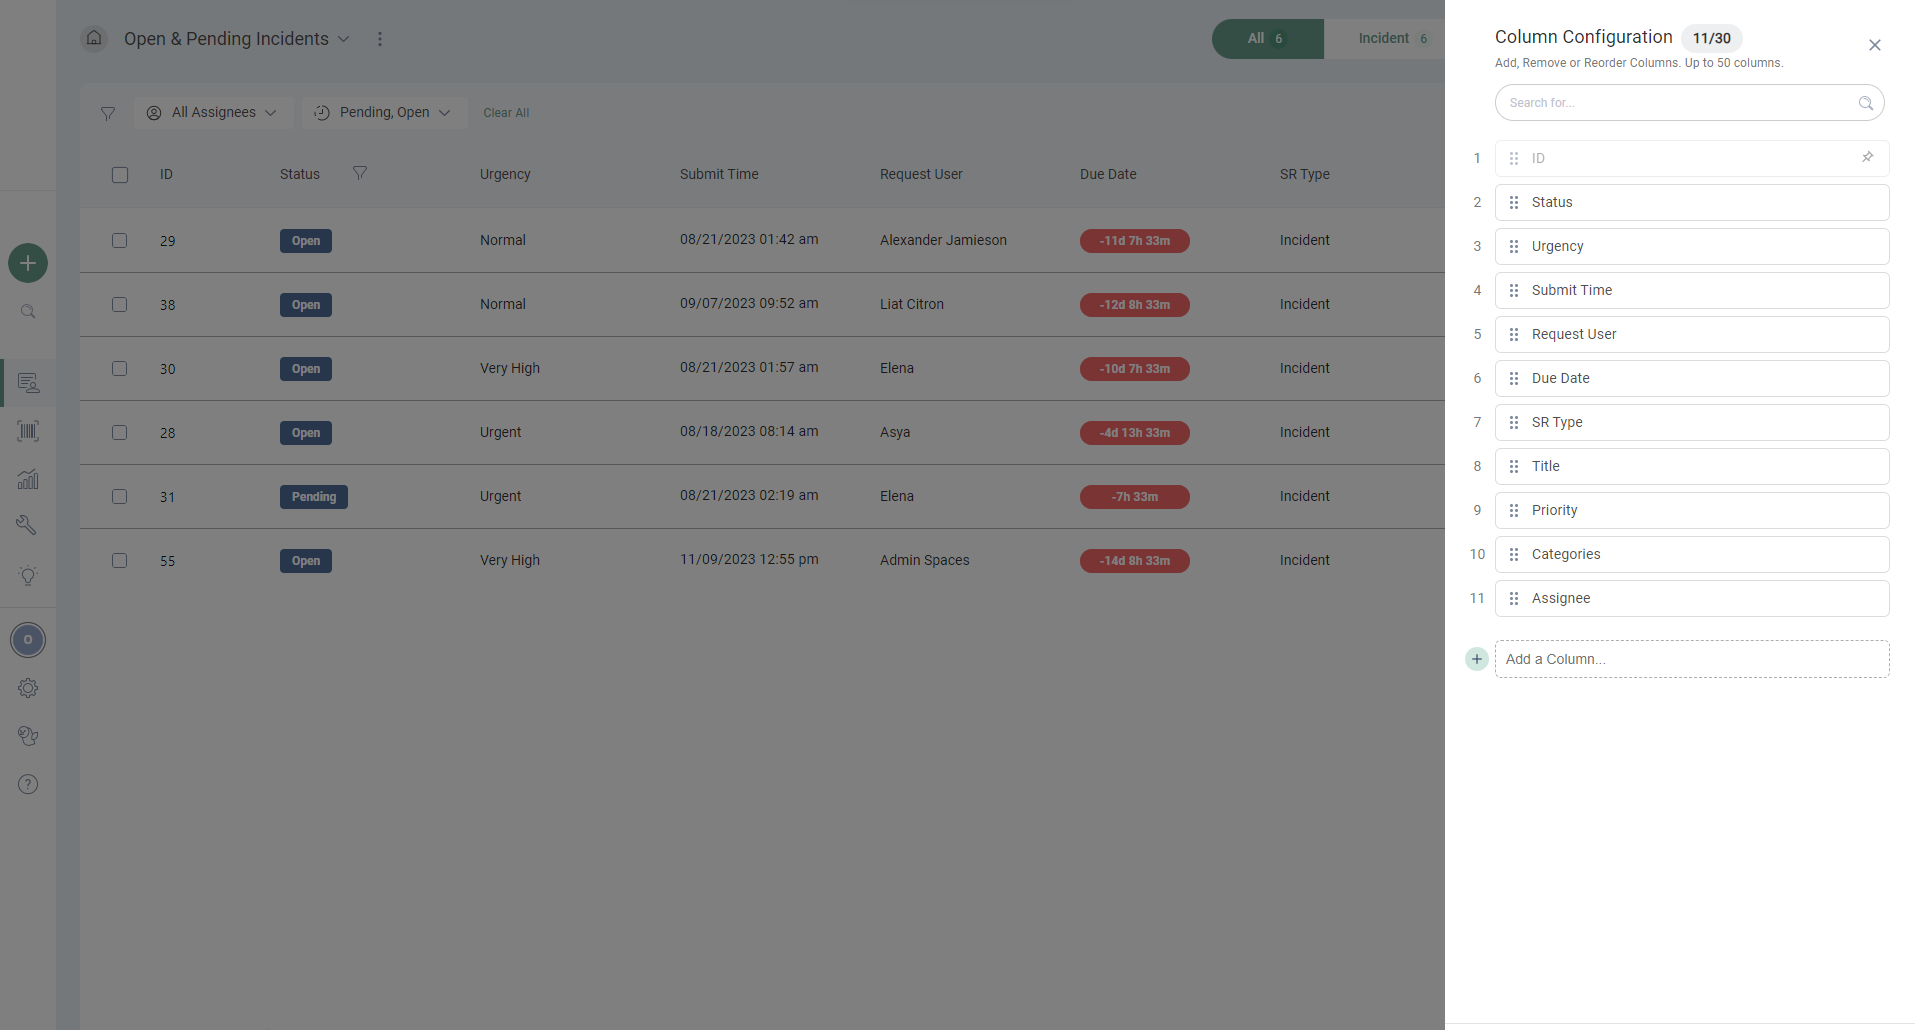
This document provides an overview of how to use the Queue’s Column Configuration Panel to customize and configure your Queue Grid Columns:
Column Configuration Panel

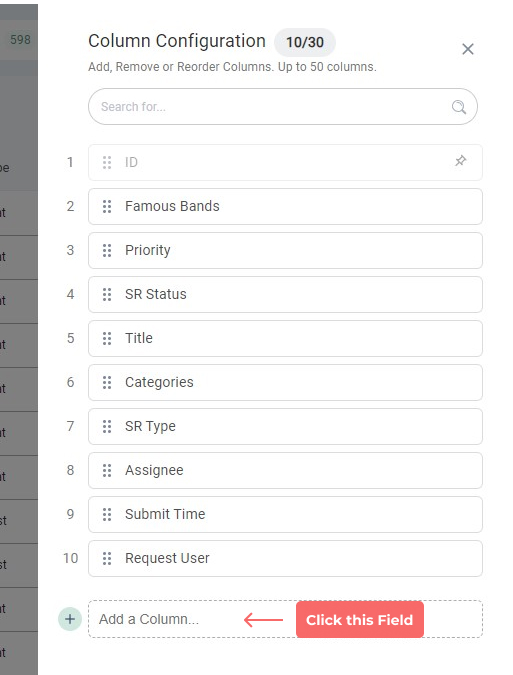
The Column Configuration Panel consists of:
Header: indicates the displayed Column count out of the 30 Column limit, and a search bar where you can search for displayed Columns
Displayed Columns: shows all fields representing the Queue Grid’s desired Columns — which you can rearrange as you see fit
“Add a Column” line: sticky action line used to add additional Columns to the Queue Grid
Note
The panel’s search bar results show displayed Columns only
Configuration changes are only saved after clicking the “Apply” button in the Column Configuration Panel
Add Columns

You can add up to 30 Columns to the Queue.
To add a Column:
Click the (sticky) “Add a Column” line in the Column Configuration panel
Search and/or select your SR field of choice from the dropdown menu
The new Column will automatically be positioned as the last on the list, but you can drag it to your desired position.
Reorder Columns
You can reorder Queue Columns via drag and drop in the Column Configuration Panel.
To change the position of a Column, hover over its Column Name in the panel and drag it to your desired position in the list.
You can change the position of any Column except which is fixed as the first one in the Queue Grid.
Remove Columns
You can remove any Column from the Queue (except the Service Record ID) using the Column Configuration Panel.
To remove a Column, hover over its row and click the  icon.
icon.