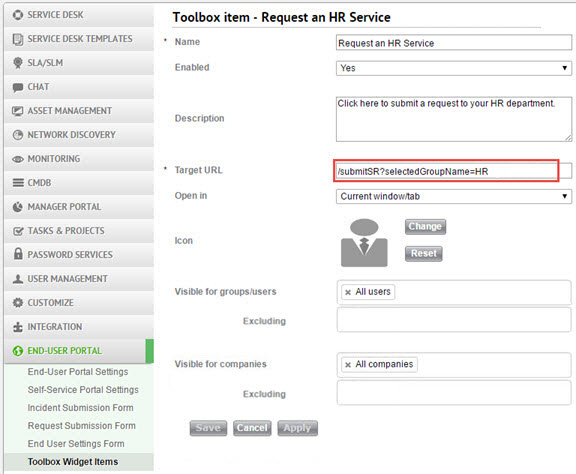
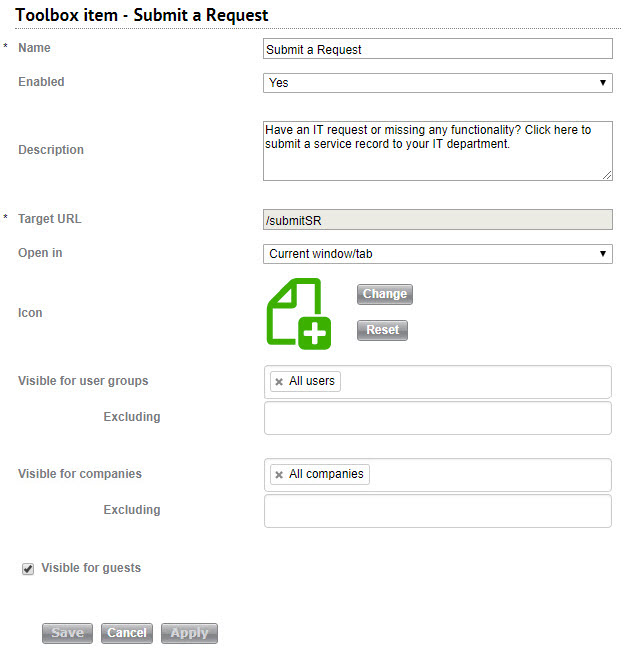
Fill in the fields for the item you want to add/change. Be sure to save your changes.
| Field | Description |
|---|---|
| Name | The name you select for this toolbox item |
| Enabled | Select Yes to display the item in the Toolbox widget in the Self-Service Portal |
| Description | The description that appears under the name in the toolbox item |
| Target URL | The URL that the toolbox item links to including its protocol (for example, "http://") |
| Open in | Select how you want to open the toolbox item |
| Icon | Click Change to customize the default icon for this item. Click Reset to revert the item's icon back to the default icon. |
| Visible for groups/users | To select groups/users who can view the toolbox items
|
Visible for companies (ITSM edition only) | To select companies whose users can view the toolbox items
|
Visible for guests | Check this box if you want the Toolbox item to be visible to end users who access the Self-Service Portal as guests. |
Link to a custom SR form
You can create a widget item that opens an incident or request form with a predefined template or limited set of available categories. This allows users to easily open SRs that are designed to address some of the more common issues that you handle.
Define a template for an SR toolbox item
Define a toolbox item to create an SR with a preset template
You can design a toolbox item that opens an SR form with a predefined template. Let's say you receive a lot of incidents regarding paper getting jammed in your company's printers. You may want to allow users to click a toolbox item in the Self-Service Portal to open an incident form already loaded with data from the Paper Jam incident template.
To define a toolbox item's template
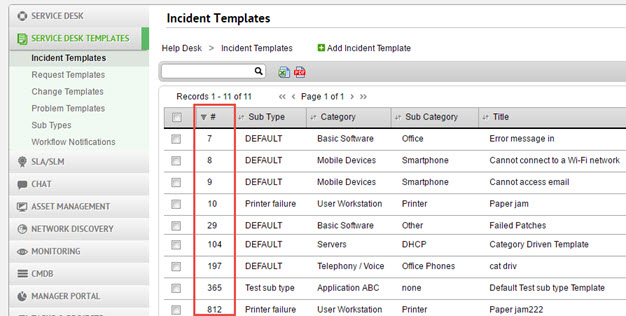
- In Settings> Service Desk Templates find the incident or request template you want to select. Note the template's ID number.
- In the Toolbox Item list, duplicate the Report an Issue item to create a link to an incident from or duplicate the Submit SR from Template item to create a link to a request form.
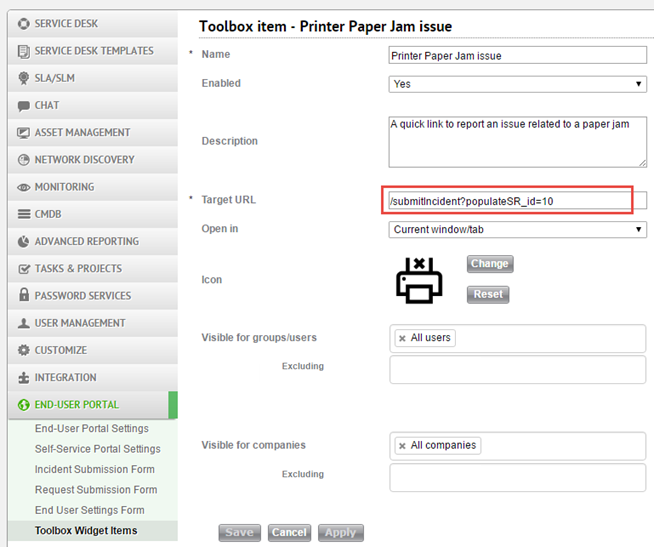
- In the new toolbox item form, rename the toolbox item. For example, you may want to call it "Printer Paper Jam Issue".
- In the Target URL field, append the text ?populateSR_id=<Template ID#> to the URL and include the ID number of the template you want (for example: /submitIncident?populateSR_id=10).
If you are using an On Premise edition of SysAid add the parameter "/servicePortal" to the URL. For example, "/servicePortal/submitIncident?populateSR_id=10"
To create a link to a request template, replace the word "Incident" with "SR" so it reads /submitSR?populateSR_id=15
or /servicePortal/submitSR?populateSR_id=15 for On Premise.
- (Optional) Select a new icon for the toolbox item.
- Click Save.
Define a category set for an SR toolbox item
You can design a toolbox item that opens an SR form with a limited set of available categories. Let's say you receive a lot of requests that are directed to the Human Resources team. You may want to allow users to click a toolbox item in the Self-Service Portal to open an request form in which they can only select HR-related categories.
To define a toolbox item's category
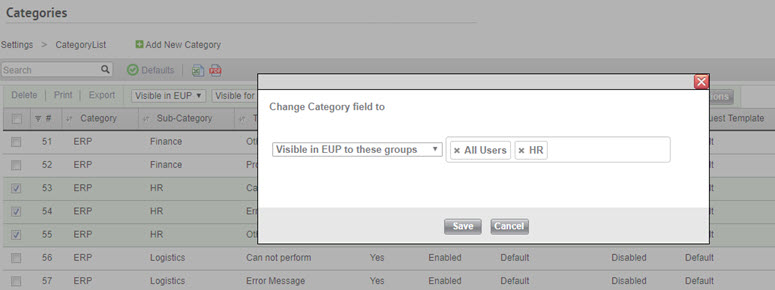
- Mark each category you want available for this SR:
- In the Category list, select the categories you want to include.
- On the List Actions bar, click More.
- From the first drop-down list, select Visible in EUP to these Groups.
- In the second text box add All Users.
- Add the user group you want to specify this SR for (e.g. "HR").
- Click Done.
- In the Toolbox Item list, duplicate the Report an Issue item to create a link to an incident from or duplicate the Submit a Request item to create a link to a request form.
- In the new toolbox item form, rename the toolbox item. For example, you may want to call it "Submit an HR Request".
- In the Target URL field, append the text ?selectedGroupName=<Name of User Group> to the URL and include the name of the group you want ("for example: /submitIncident?selectedGroupName=HR ).
If you are using an On Premise edition of SysAid add the parameter /servicePortal to the URL. For example, /servicePortal/submitIncident?selectedGroupName=HR
If you are creating a link to a request category, replace the word "Incident" with "SR" so it reads /submitSR?selectedGroupName=HR or /servicePortal/submitSR?selectedGroupName=HR for On Premise.
- (Optional) Select a new icon for the toolbox item.
- Click Save.
