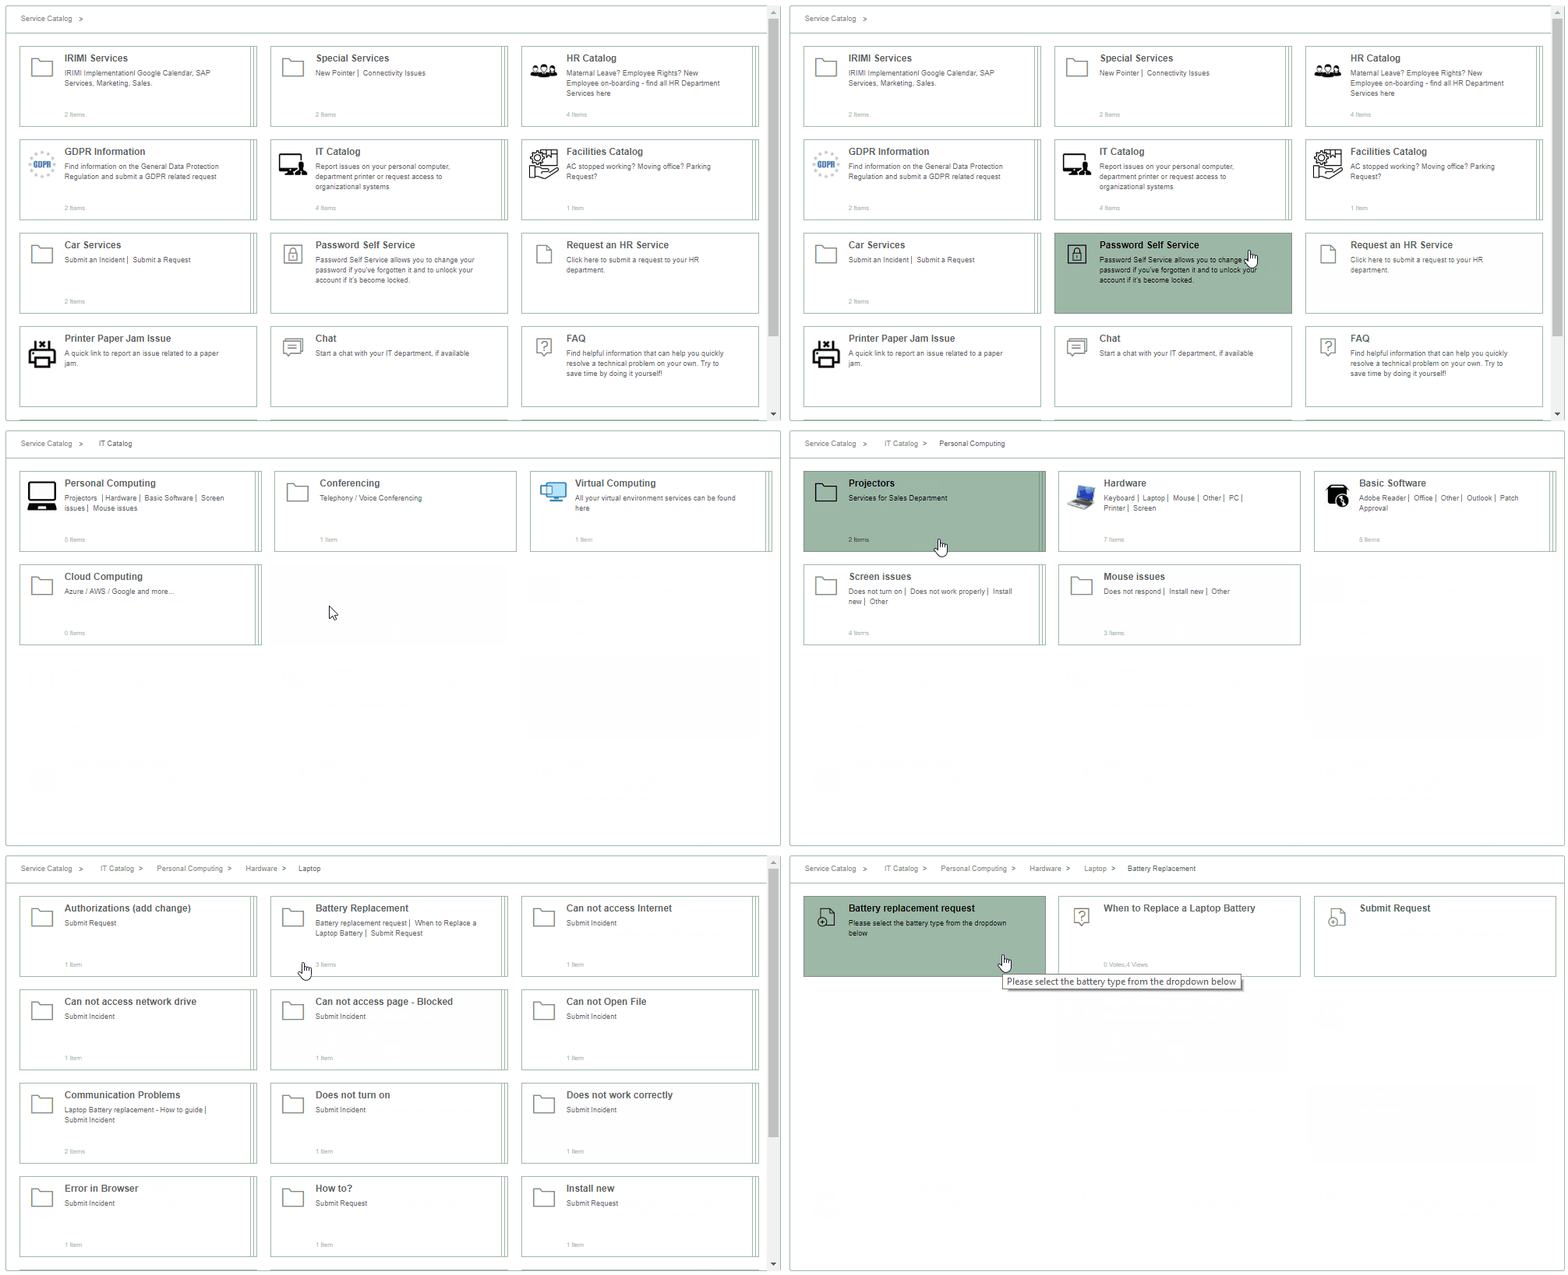
The Service Catalog provides your end users with quick access to various services, functions, and resources in the Self-Service Portal. This simplifies the experience for the end users, making it easier for them to locate and make use of the service you offer.
Please note:
If you do not already have the Service Catalog, you can contact your customer success manager to request it.
Managing the Service Catalog
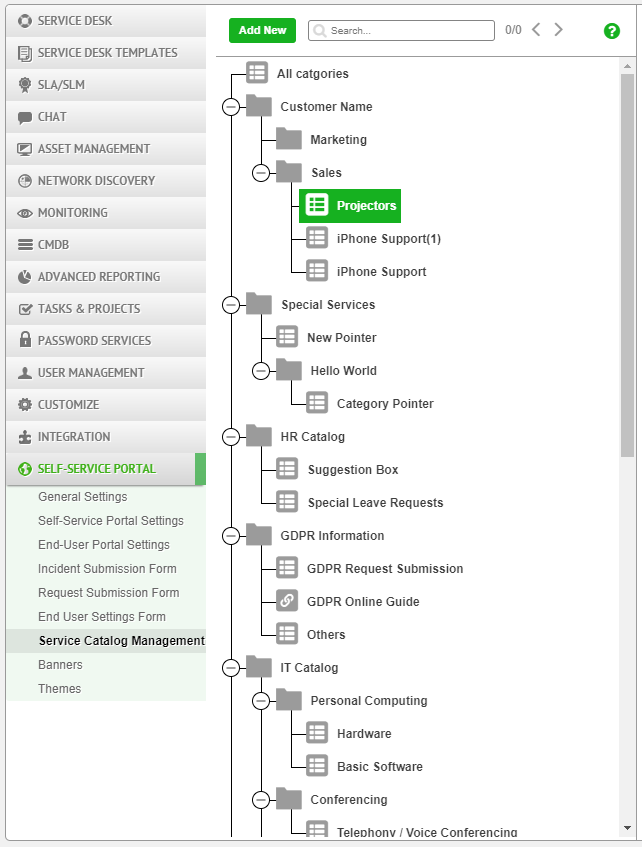
Admins can manage the Service Catalog in a tree structure that displays the order and hierarchy of the catalog items. You can expand or collapse folders by using the  and
and  buttons.
Setting Up the Service Catalog video
Service Catalog items
There are four types of items you can add to the Service Catalog.
Folders
Items that contain other items. You can build a folder hierarchy that makes it easy for your users to navigate to the service they need.
Links
Items that provide a link to an SR template, an FAQ article, or an external page.
Category pointers
Uses existing categories to automatically generate a visual navigation of items in the selected category including FAQ's, templates, and an option to open a ticket with the category already populated.
For example you can create a pointer the top-level Hardware category. A user who is experiencing a problem with his laptop battery, can navigate down to the Laptop folder and locate forms for requesting a new battery, forms for reporting specific issues with laptop batteries, along the way they are handed FAQ articles you might have created about optimizing or replacing a laptop battery.
Category Pointer video
Category pointer references
Shortcuts to category pointer items in the Service Catalog. This provides access to a given category pointer from multiple, relevant locations within the Service Catalog, while maintaining the item in just a single location. Once created, you can drag these items to the location you want in the Service Catalog. When you click the reference item in the Service Catalog, SysAid navigates to the original category pointer item.
Best practices
Before setting up your Service Catalog, we recommend to ensure that:
Your service desk includes a helpful set of categories that meet your organizations needsYour Knowledge Base is populated with articles, each assigned to the appropriate category
Your Templates are assigned to the correct categories
This allows the Service Catalog's category pointers to generate a helpful and easy-to-navigate set of resources for your users.
Display the Service Catalog in the Self-Service Portal
To enable your service catalog in the Self-Service Portal
Naviage to Settings > Self-Service Portal > Self-Service Portal Settings.
In the Widgets area, select the Service Catalog check box.
Click Save.
Move an item
To move an item to a different position on the Service Catalog tree
Hover over an item until the mouse cursor turns into a four-pointed-arrow (
 ).
).Drag the item to the position you want, and release. If you want to insert the item into a folder, drag the item over the folder and move it to the right.
You can view an animated gif of this process by clicking  .
.
Add a new item
To add a new service catalog item
Click Add New.
Select an item type.
Fill out the information in the item form.
Click Save.
Delete an item
To delete an item from the Service Catalog tree
Hover over the item in the tree and click the down arrow that appears.
Click Remove.
When prompted, click Delete.
Duplicate an item
To duplicate an item to use as the basis for a new item
Hover over the item in the tree and click the down arrow that appears.
Click Duplicate.
Find an item
To find an item in the tree
Enter keywords in the search bar.
Use the arrow buttons to browse through the items that contain those keywords.
Catalog Item form
Fill in the fields for the item you want to add/change. Be sure to save your changes. The form differs based on item type.
Field | Description |
|---|---|
Name | The name you select for this service catalog item |
Type | (Read only) The service catalog type |
Enabled | Select Yes to display the item in the Service Catalog in the Self-Service Portal |
Description | The description that appears under the name in the service catalog item |
Category (for Category Pointer items only) | The category for the item. The Service Catalog compiles all templates, FAQs that use this category and any of its sub-categories into a visual navigation. It also creates the option for a user to open an SR with the category field already populated. |
Target URL (For Link items only) | The URL of the page that the users are directed to when they click this item. Be sure to include its protocol (for example, "https://www.sysaid.com/") |
Open in | Select how you want to open the service catalog item |
Icon | Click Change to customize the default icon for this item. If you do not change the icon, the Service Catalog displays the a default icon for this item. Click Resetto revert the item's icon back to the default icon. Please note: Only .svg,. png, .jpg, .gif, or .jpeg image files are accepted. Please ensure that the file is smaller than 300KB. The recommended image size is 72x72 px. |
Visible for guests | Check this box if you want the service catalog item to be visible to end users who access the Self-Service Portal as guests. |
Visible for groups | To select groups who can view the service catalog items
|
Visible for companies (ITSM edition only) | To select companies whose users can view the service catalog items
|
Link to a custom SR form
You can create an item that opens an incident or request form with a predefined template or a custom set of available categories. This allows users to easily open SRs that are designed to address some of the more common issues that you handle and minimizes the amount of effort on their part.
Add a link to an SR form for a specific template
You can design a service catalog item that opens an SR form with a predefined template. Let's say you receive a lot of incidents regarding paper getting jammed in your company's printers. You may want to allow users to click a service catalog item in the Self-Service Portal to open an incident form already loaded with data from the Paper Jam incident template.
This type of item can be created automatically with a category pointer item, but this process allows you to create it manually if you want to add it to your Service Catalog without the other items that use that category, or if you want to place it highter in the folder hierarchy than it would otherwise appear.
To create a template link, you'll need the following information:
The platform of your SysAid account (Cloud or On Premise)
The type of ticket template you want to link to (incident or request)
The ID of the template you want to link to (See step 1 below)
To define a service catalog item's template
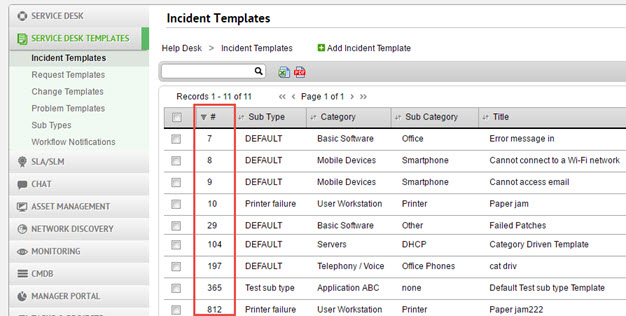
In Settings > Service Desk Templates find the incident or request template you want to select. Note the template's ID number.
In the Service catalog tree, duplicate the Submit SR from Template link item to create a link to an incident from or duplicate the Submit SR from Template item to create a link to a request or incident form.
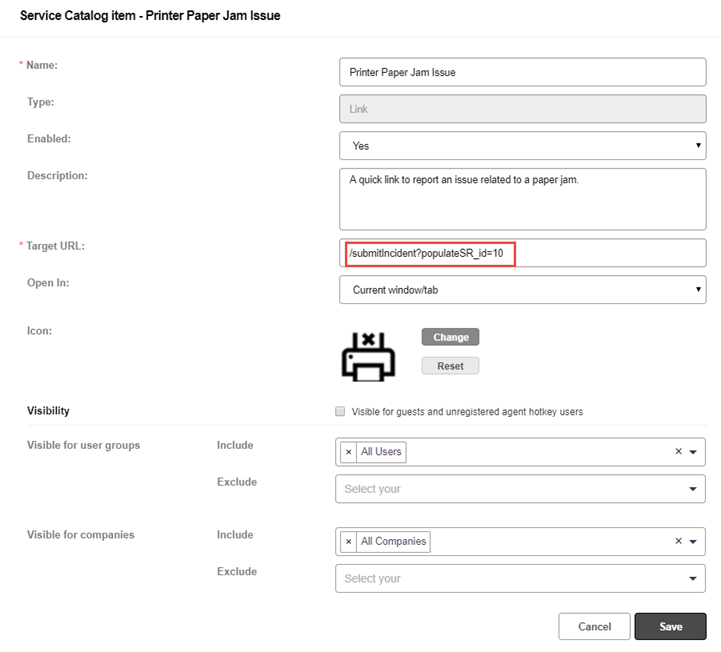
In the new item's form, rename the item. For example, you may want to call it "Printer Paper Jam Issue".
Modify the description to something like "a quick link to report an issue related to a paper jam."
In the Target URL field, append the text ?populateSR_id=<Template ID#> to the URL and include the ID number of the template you want (for example: /submitIncident?populateSR_id=10 ).
Please note:
To create a link to a Request template, replace the word "Incident" with "SR" so it reads /submitSR?populateSR_id=15
(Optional) Select a new icon for the item.
Click Save.
(Optional) Drag the item to the position you want in the Service Catalog tree.
Add a link to an SR form with custom categories
You can design a service catalog item that opens an SR form with a limited set of available categories. Let's say you receive a lot of requests that are directed to the Human Resources team. You may want to allow users to click open a service catalog item in the Self-Service Portal to open an request form in which they can only select HR-related categories.
To define a service catalog item's category set
Mark each category you want available for this SR:
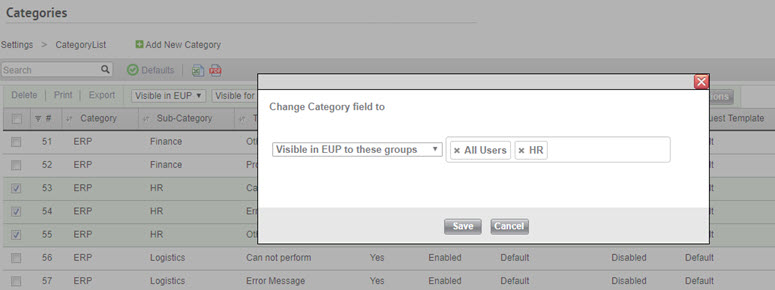
In the Category list, select the categories you want to include.
On the List Actions bar, click More.
From the first drop-down list, select Visible in EUP to these Groups.
In the second text box add All Users.
Add the user group you want to specify this SR for (e.g. "HR").
Click Done.
In the Service catalog tree, duplicate the Submit an Incident link item to create a link to an incident from or duplicate the Submit a Request item to create a link to a request form.
In the new item's form, rename the item. For example, you may want to call it "Submit an HR Request".
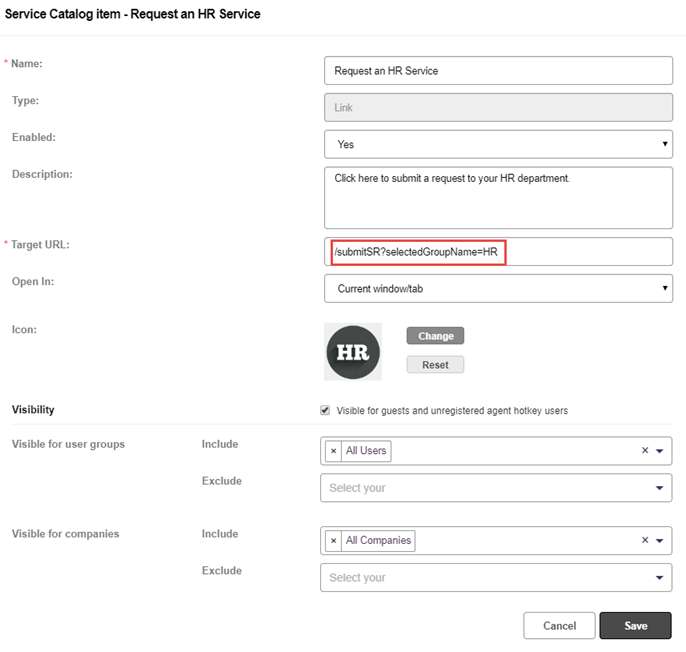
In the Target URL field, append the text ?selectedGroupName=<Name of User Group> to the URL and include the name of the group you want ("for example: /submitIncident?selectedGroupName=HR ).
If you are using an On Premise edition of SysAid add the parameter /servicePortal to the URL. For example, /servicePortal/submitIncident?selectedGroupName=HR
Please note:
If you are creating a link to a request category, replace the word "Incident" with "SR" so it reads /submitSR?selectedGroupName=HR or /servicePortal/submitSR?selectedGroupName=HR for On Premise.
(Optional) Select a new icon for the item.
Click Save.
(Optional) Drag the item to the position you want in the Service Catalog tree.
