The TeamViewer integration allows admins to initiate a TeamViewer remote control session with end users from any ticket, even if they lack a TeamViewer account.
Requirements
For successful integration with TeamViewer, make sure the following requirements are met:
Your network has an internet connection and access to the TeamViewer URL
Your SysAid URL is accessible from outside your company network
You're using the SysAid URL and not the server's IP address
You're running SysAid version 25.1.70 or higher
All TeamViewer servers are accessible to you. Either open port 5938 (TCP) for outbound connections to any IP addresses or add TeamViewer.com to your whitelist
For on-premises accounts, the SysAid server must have access to the SysAid Gateway at: https://gateway.sysaid.com
Please note:
Only an admin with SysAid Administrator permissions can set up this integration.
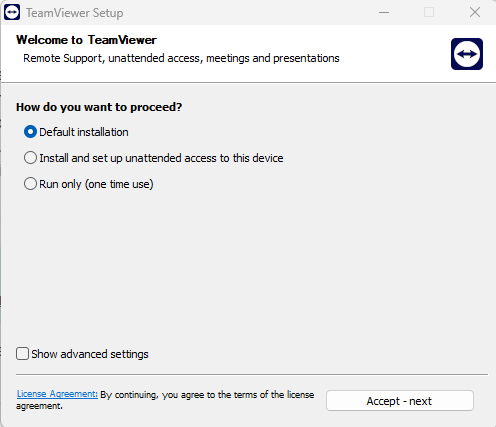
To avoid downloading and installing the TeamViewer file every session, we recommend that admins install TeamViewer on their machine before using this embedded service:
During installation, select both commercial and non-commercial use for proper TeamViewer compatibility with SysAid's embedded service license.
Licensing
SysAid TeamViewer Embedded operates on an annual subscription model, requiring a valid license subscription to retain its capabilities. Each concurrent license enables access to 150 devices per month.
Each SysAid TeamViewer Embedded concurrent license allows for access to 150 devices per month (this number covers above-average service desk remote control usage per admin based on our aggregated statistics)*.
In a standard service desk attended remote control scenario, there is no need to pre-install the TeamViewer agent on the device you want to access; the SysAid agent launches the remote control session on the spot. You can also enable unattended sessions on a per-need basis without the need to enable this capability on all devices in your network.
If your organizational needs do require enabling unattended capability on all of your devices at all times, you can contact your account manager to discuss the purchase of a specialized license.
Enable the TeamViewer Integration
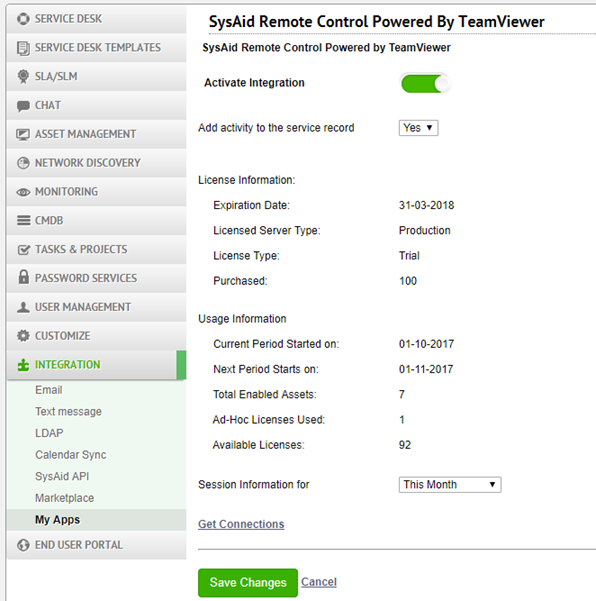
In SysAid, go to Connect > My add-ons.
Search for TeamViewer and click the gear icon.
Click the slider to activate the TeamViewer integration.
Select if you want an activity added to an SR or Asset activity log for each TeamViewer session.
Click Save Changes.
Grant TeamViewer Embedded access to an admin
For an admin to be able to use TeamViewer embedded, they need the required permissions. Once the TeamViewer Embedded is enabled on your account, you can allow admins or admin groups to deploy/undeploy TeamViewer embedded on assets and/or to initiate a TeamViewer Embedded remote control session. You can access these permissions in the admin form.
Launch a TeamViewer session from a service record
Once the integration is configured, you can launch a TeamViewer remote control session from any service record. You can launch an attended session from the user field or an unattended session from the Main Asset field.
Please note:
You must have at least one available license to launch a TeamViewer session on an asset.
Attended session
Attended sessions are sessions you launch with the assistance of the users whose machines you are accessing. These users must be logged in during the sessions, and they must grant you permission to access their machines. Click here to view a video tutorial for launching an attended session.
To launch an attended session from a service record:
Find the user you want to share the session with and click the TeamViewer icon in that user's actions.
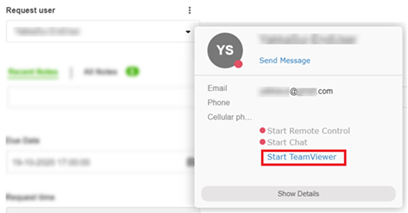
If this is the first time you are accessing TeamViewer from SysAid, a prompt appears requesting the necessary permissions. Click Allow.
In the TeamViewer Integration window, click Connect as admin.
If you have TeamViewer installed on your machine, it opens and launches the session.If you do not have TeamViewer installed on your machine, an .exe file automatically downloads on your machine. Run the file to launch the session.
Once the session begins, you need to send the admin or end user you are connecting with the necessary information to join the session. To do this, you can either manually send your session partner the session code or you can generate a predefined email notification with a link to the session.
To manually send the session code:
When you click the Start TeamViewer link, a TeamViewer window opens on your screen. Copy the session code in the top half of the window.

Paste the code into an email or instant message and send it to your session partner.
To generate a predefined email notification with a link to the session
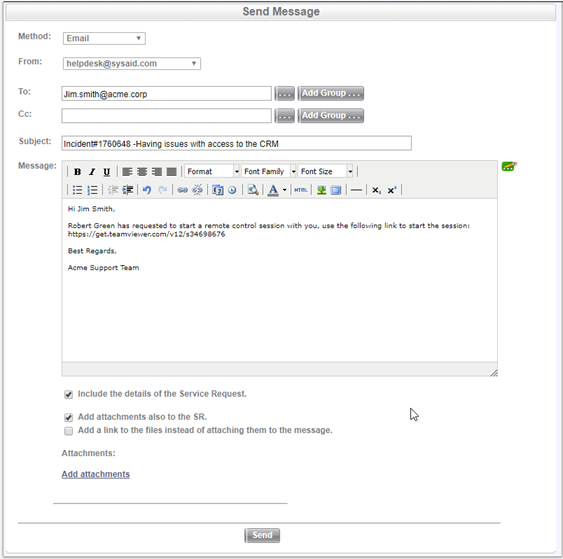
In the TeamViewer Integration window, click Send Message.
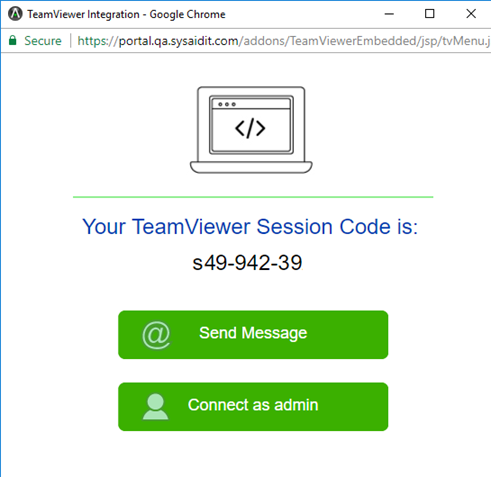
A Send Message window opens with a ready-to-send email that includes a link to the TeamViewer session.
Click Send.
Unattended session
Unattended sessions are sessions that you launch without the assistance of the users whose machines you are accessing. These users need not be logged in during the sessions.
Please note:
You must be running the latest version of the agent to launch an unattended session. To upgrade the agent, navigate to Settings > Network Discovery > Upgrade Agent Version.
Deploy TeamViewer
To initiate an unattended session on an asset, you must first deploy the TeamViewer agent on the asset.
To deploy/undeploy a TeamViewer on an asset
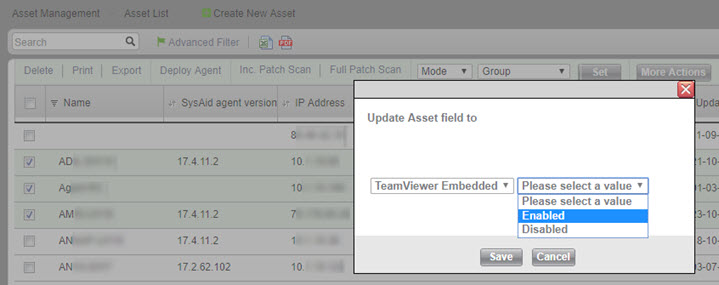
- In the Asset list, select the assets you want to deploy TeamViewer on.
- In the List Actions, select MoreActions.
- Select TeamViewer Embedded.
- Select Enabled or Disabled to deploy or undeploy the TeamViewer agent on the selected assets.
- Click Save.
Launch a session from a service record
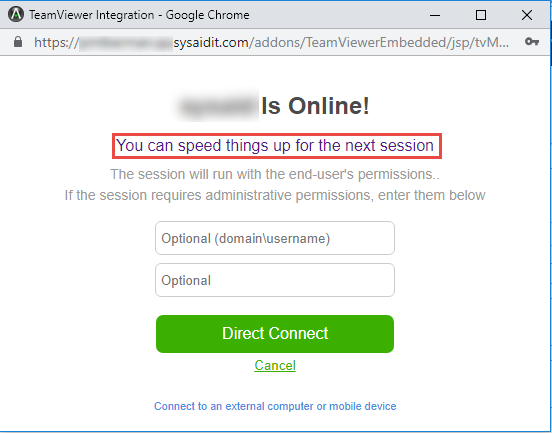
Once TeamViewer is enabled on the asset, you can launch an unattended session from a service record by clicking the TeamViewer icon corresponding to the Main Asset field.

If TeamViewer is not installed on your computer, SysAid's TeamViewer dialog offers a link to download TeamViewer to your machine. This will speed up future sessions that you initiate from your computer.
If you're using Microsoft Azure as your user repository, the Admin should add "azureAD" as his domain when requested to enter credentials.
Initiate a TeamViewer Session
Launch a TeamViewer session from an asset
Once the integration is configured, you can launch an unattended TeamViewer remote control session from any asset with the TeamViewer agent deployed on it.
Please note:
You must have at least one available license to launch a TeamViewer session on an asset.
To launch a TeamViewer session from an asset
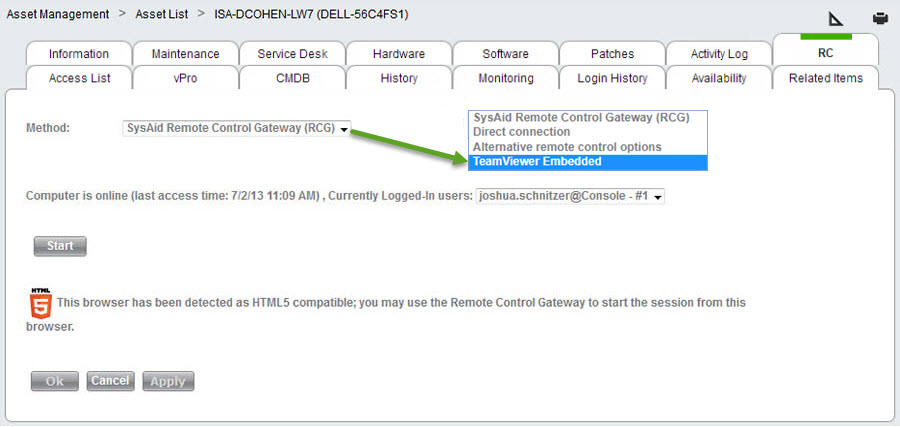
From the asset form, open the RC tab.
From the Method drop-down list, select TeamViewer Embedded.
Click Start.
Notifications
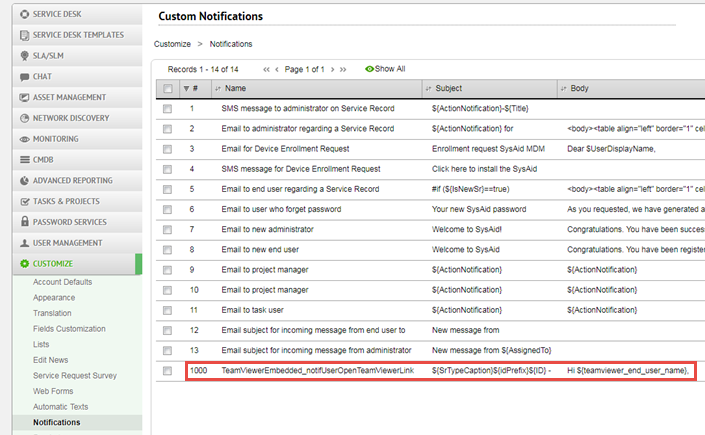
You can edit the email before you send it. You can also edit the default text of the automatically generated notification by locating the TeamViewer notification in Settings > Customize > Notifications.
Activities
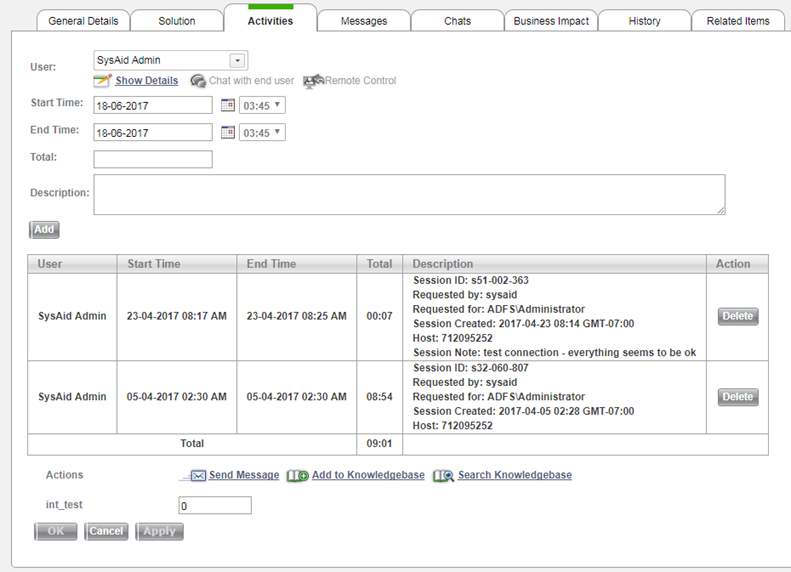
Once a TeamViewer session is closed, SysAid automatically generates an activity for the session and adds it to the SR.
Download session information
You can download monthly .csv reports that detail the usage of TeamViewer Embedded service for the specified monthly period.
To download a TeamViewer Embedded usage report
From the TeamViewer Embedded configuration page, select the monthly period you want to report on.

Click Get Connections.