This page allows you to configure settings for the Self-Service Portal. Be sure to click Save when you are done making changes to this page.
Theme & Banner
The selected theme and banner determine the look and feel of the Self-Service Portal.
To preview the currently selected theme and banner, click Preview.
Branding the Self-Service Portal
Default theme
To select a default theme for all of the users in your SysAid account, select a theme from the drop-down menu. All users in your account see the selected theme when they access the Self-Service portal unless they belong to a company that has a different theme selected in the company form.
To edit a theme or create a new one, click Manage to open the Theme list, click Manage.
Banner
Select the check box to display the welcome banner in the Self-Service Portal.
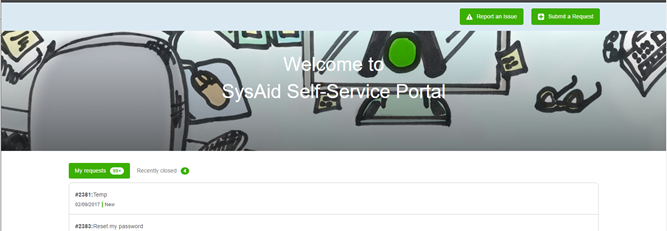
To select a default banner for all of the users in your SysAid account, select a banner from the drop-down menu. Select if you want the banner to appear at the top or bottom of the Self-Service Portal.
All users in your account see the selected banner when they access the Self-Service portal unless they belong to a company that has a different banner selected in the company form.
To edit a banner or create a new one, click Manage to open the Banner list.
To show your changes live, please refresh the page.
Widgets
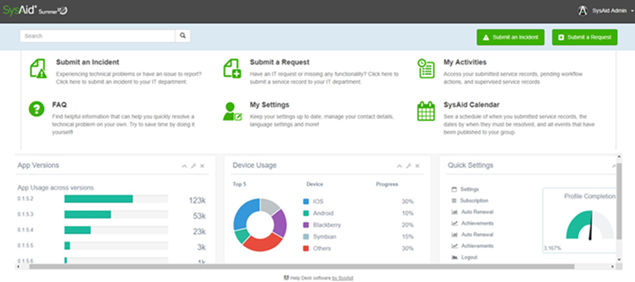
This sections allows you to select and customize the widgets that appear in your Self-Service Portal.
Rearranging Widgets
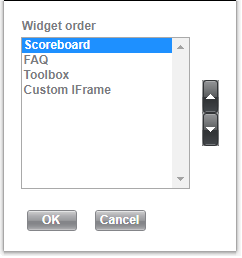
To customize the order that the widgets appear in the Self-Service Portal
- Click Customize Widget Order.
- Use the Up and Down arrows to arrange the widgets in the order you want them displayed in the Self-Service Portal.
- Click OK.
News
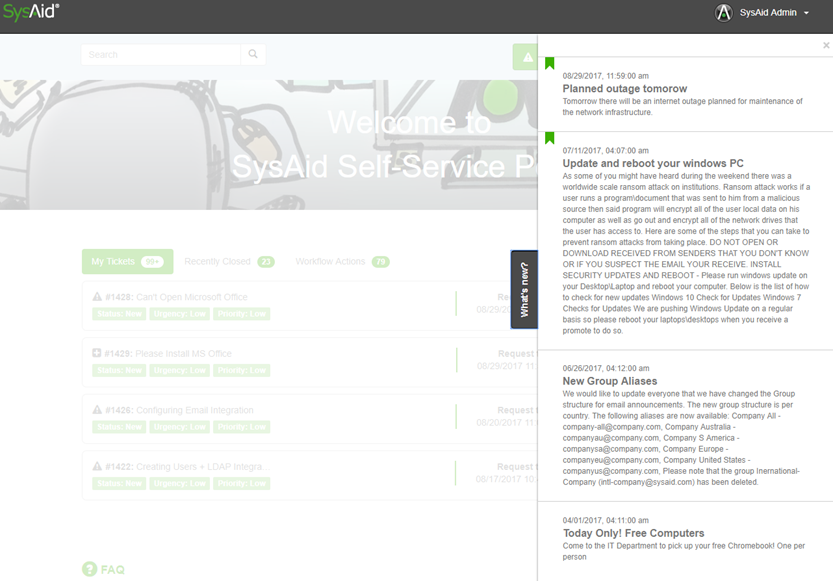
Select the check box to display a list of your news items in the Self-Service Portal. Administrators with the correct permissions may create and edit news items.

To create a new news item, click ![]() .
.
To edit an existing news item, click on its title. Click here for further instructions for editing and creating news items.
To delete a news item, select its check box and click ![]() .
.
Viewing news items
News items are visible on in a collapsible and expandable sidebar in the Self-Service Portal and in the Announcements list on the Administrator side of SysAid. Because of their high visibility, news items are a great way of sharing news with your entire company.
Scoreboard
Select the check box to display a list of the user's SRs in the Self-Service Portal.
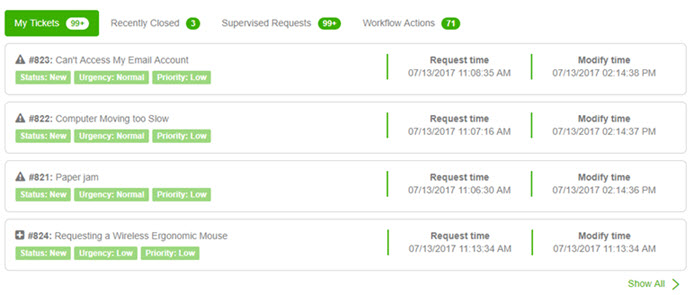
To customize which SRs are displayed on the scoreboard
Select Customize widget.
Use the Left/Right arrows to determine which SR tabs are displayed on the scoreboard.
Use the Up/Down arrows to determine the order in which the visible tabs are displayed.
Click OK.
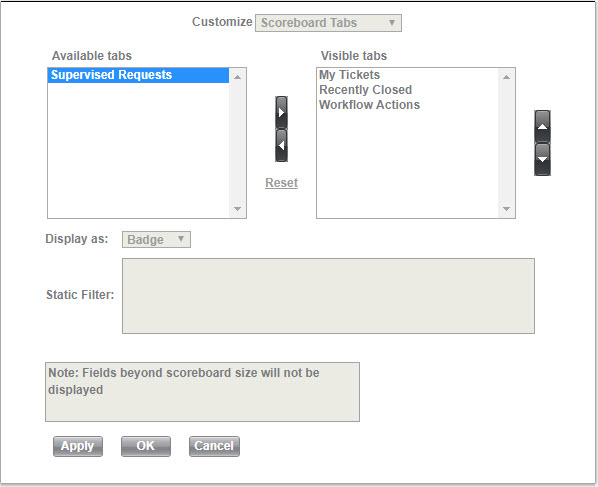
Customize Scoreboard lists
You can decide which columns are displayed in scoreboard lists and in what format the fields are displayed on the list.
To customize a Scoreboard list
Select Customize widget.
From the Customize drop-down select the Scoreboard list you want to customize.
Use the Left/Right arrows to determine which fields are displayed for each SR on the list.
Use the Up/Down arrows to determine the order in which the fields are displayed.
Please note:
If you have many fields, the ones on the bottom may not be displayed.
You can highlight a field, in the Visible Fields area and select if the field should be displayed in the list as a Badge or a Column.

Click OK.
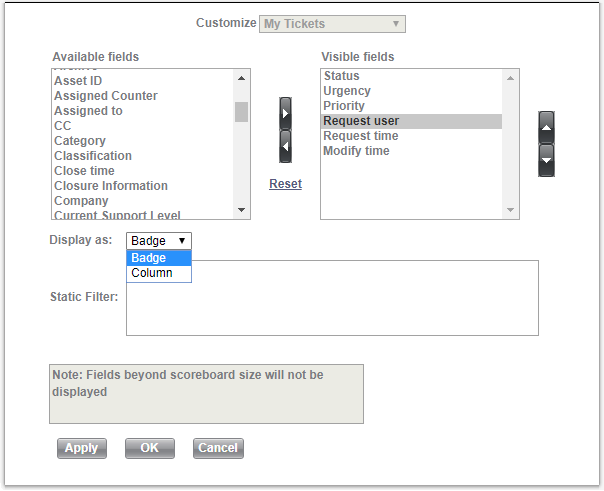
Customize Scoreboard lists
You can decide how many tickets are displayed on a Scoreboard lists page when a user clicks Show All in the Self-Service Portal. If a user has more than the selected number of tickets, they can view the rest by clicking on the page numbers at the bottom of their Scoreboard page.
To set the number of tickets per page in the Scoreboard
Select a number from the Records displayed in Scoreboard lists drop-down list.
Click Save.
FAQ
Select the check box to display a list of articles from the FAQ (Knowledge Base).
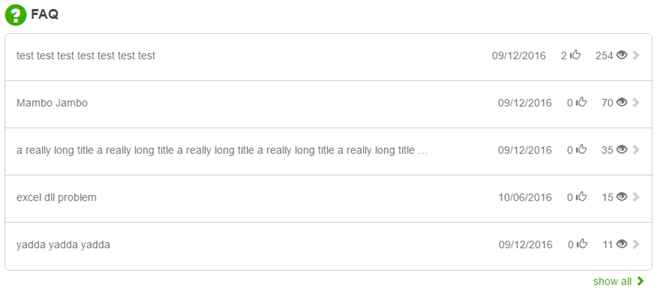
To customize the FAQ widget
Select Customize widget.
To set criteria for which articles are displayed, click Query Builder and set your criteria.
To determine how the articles are sorted on your list use the Up/Down arrows to change the sorting hierarchy.
Click OK.
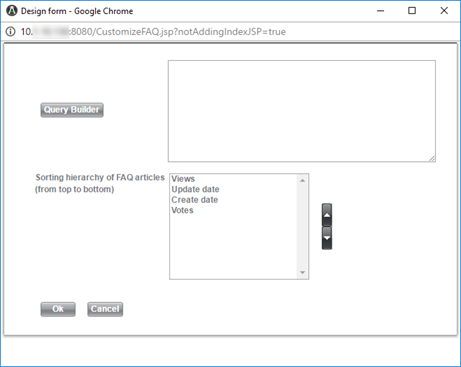
To arrange the FAQ and Scoreboard widgets side by side, select the Show Scoreboard and FAQ side-by-side check box.
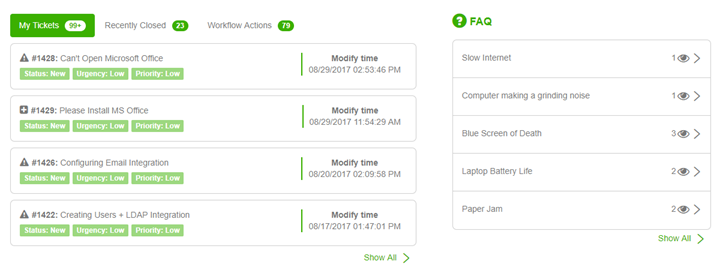
Using the FAQ
Toolbox
Select the check box to display the section of designated icons that link to pre-defined actions or URLs.

Toolbox Widget Items list
To customize the toolbox widgets that are displayed in your Self-Service Portal, click Manage Toolbox Items to open the Toolbox Widget Items list.
Custom IFrame
You can embed a custom iframe from an external URL in the Self-Service Portal.
To enable the custom IFrame widget
Select the Custom IFrame check box.
Enter the website you want to display in the IFrame Source URL field. The URL you enter must user the HTTPS protocol.
(optional) Set the height you want for the IFrame.
(Optional) Select the Enable scrollbar check box if you want to allow scrolling within the IFrame.

Advanced Settings
Service Record view
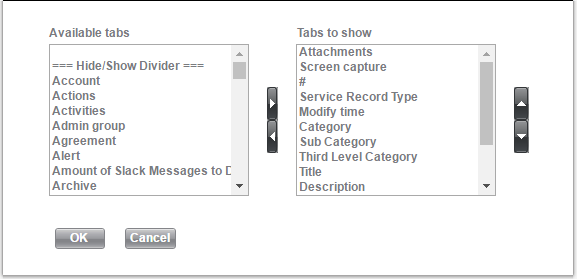
This allows you to customize the fields that are visible on the SR screen when a user opens the SR screen.
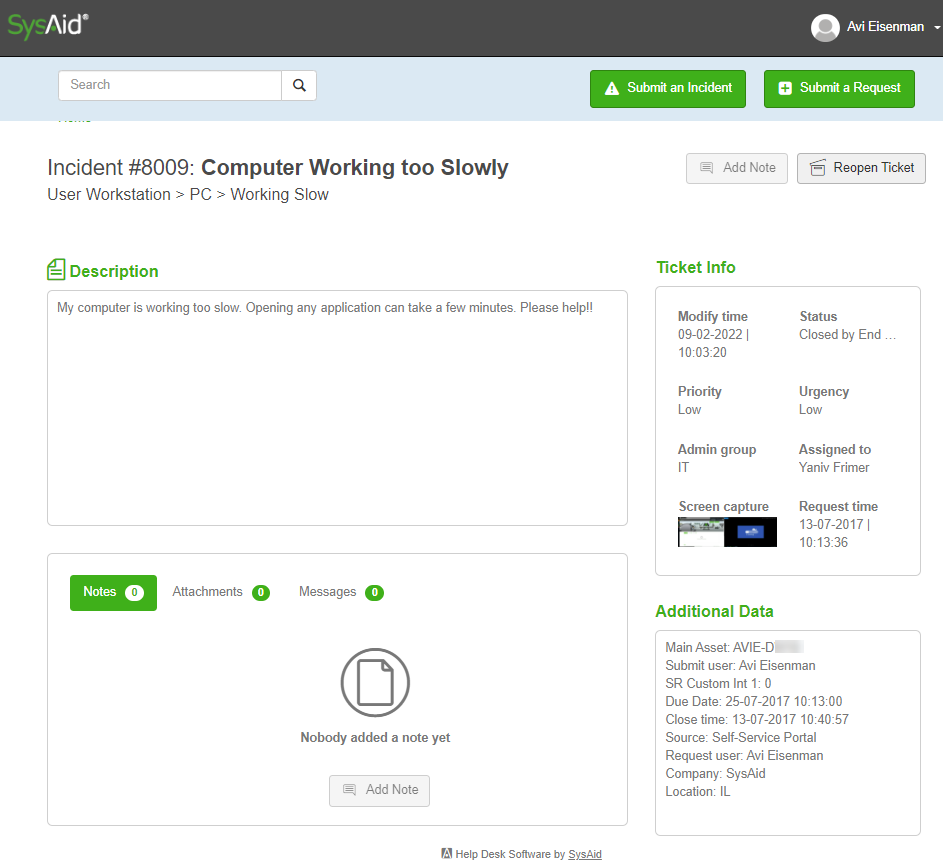
To customize the SR screen
Click Add/remove fields.
Use the Left/Right arrows to determine which fields are displayed on SR screen.
Use the Up/Down arrows to determine the order in which the visible fields are displayed.
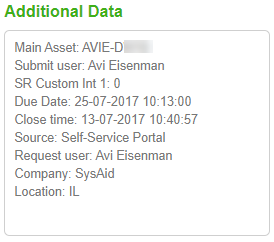
(Optional) Include the Additional Data field to display other fields that were added to the ticket template and filled in by the user.
Click OK.
Search bar
Select the check box to display the search bar at the top of the Self-Service Portal.
When you search a term in the Self-Service Portal the results are split up by area that they are located in. For more information on the search functionality, see Search.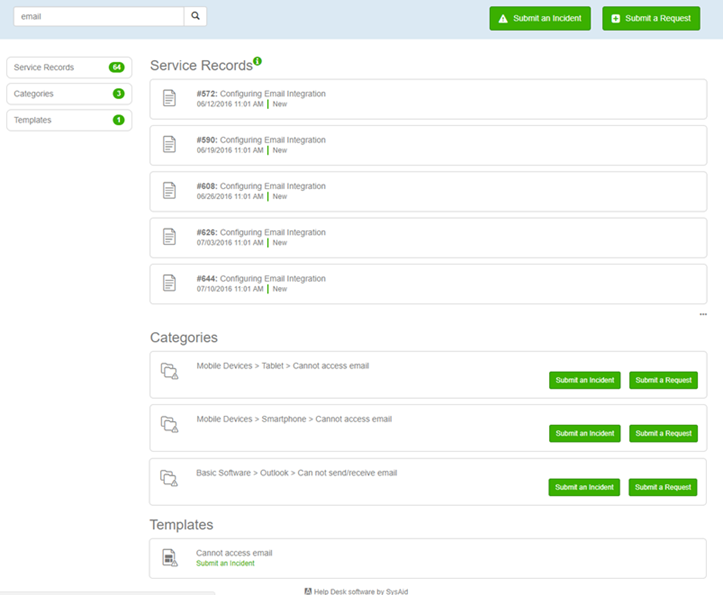
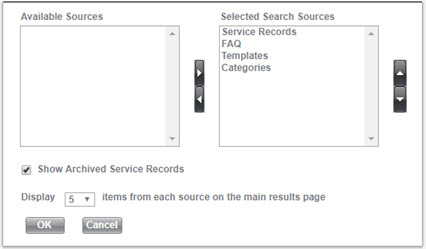
You can also customize what sources in the Self-Service Portal that the search checks.
To customize the search
Click Customize.
In the dialog, use the arrow buttons to determine what sources the search draws on and the order of those sources in the search results page.
Select the Show Archived Service Records check box to display archived SRs in the search results.
From the drop-down list, select the maximum number of items from each source that SysAid should display in the search results.
Enable incident submission
If this is enabled, end users are able to submit incidents from the Self-Service Portal.
Select the check box to display the Submit Incident button in the Self-Service Portal's action bar.
You can limit this permission to users who are members of specific groups and/or companies.

Enable request submission
If this is enabled, end users are able to submit requests from the Self-Service Portal.
Select the check box to display the Submit Request button in the Self-Service Portal's action bar.
You can limit this permission to users who are members of specific groups and/or companies.

Display SysAid help link
If this is enabled, end users can access SysAid's Documentation for the Self-Service Portal in the profile menu.

Allow user to search categories in other languages
If this is enabled, end users can search for categories in languages other than the account's display language. Click  to select up to three languages that the end user can search for categories in.