Introduction
The SysAid mobile solution is a fantastic tool that allows you to access SysAid on a mobile browser from anywhere with an internet connection - no installation necessary.
The SysAid mobile solution allows you to:
- View your Help Desk list
- Submit, edit, and reassign incidents
- Search tickets
- Scan CIs with the embedded barcode scanner
The Install App option on the side menu currently does not work. You can add a shortcut to your home screen by bookmarking your server URL and adding that to the home screen.
Access the mobile solution
If are running SysAid Cloud, you can access the mobile solution by entering your SysAid account URL in the browser on your mobile device. If you have were already logged in to a different browser or device, you may need to logout and log back in (only one session is allowed at a time).
Also, the mobile device you are using, must be connected to your organization's network or it's VPN for it to access the SysAid Mobile solution.
If you have a SysAid On-Premises account running version 21.4 or above, see these instructions for setting up the add-on that allows you to access the mobile solution.
Ensure that you have the Access Via Mobile App permission enabled for your user.
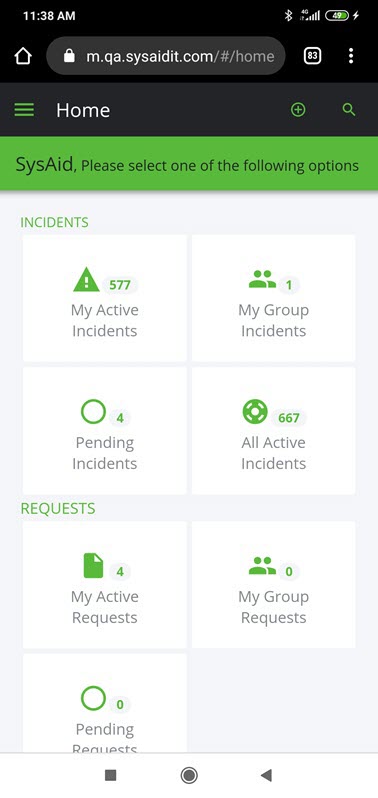
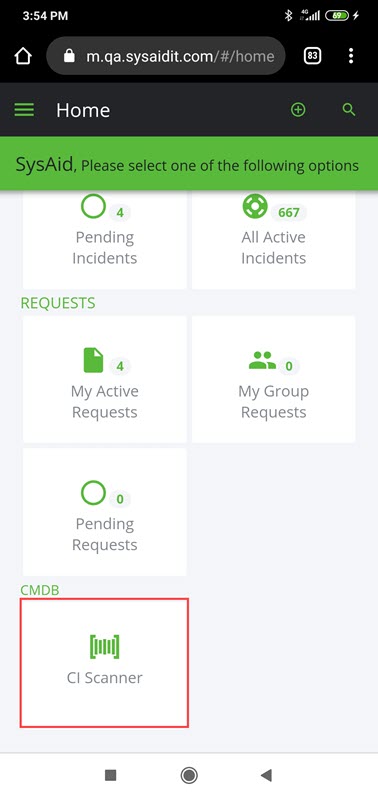
Access Help Desk lists
From the home screen, you can access the following ticket lists:
- Active incidents that are assigned to you
- Incidents that are assigned to groups that you belong to
- Incidents that are in the Pending status
- All active incidents
- Active requests that are assigned to you
- Requests that are assigned to groups that you belong to
- Requests that are in the Pending status
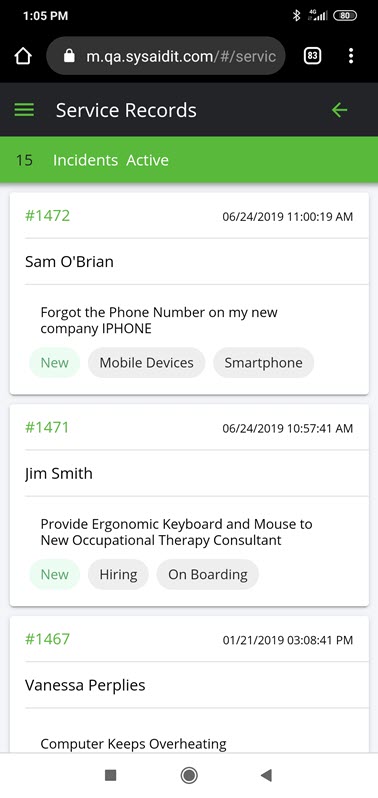
Click on the relevant icon to open the corresponding list.
Edit an incident
To edit an incident
- Select an incident from the list that you opened.
- Make the changes that you want.
- On the top of the page, click Save.
Submit a new incident
To open a new incident from the mobile solution
- In the home screen, click
 .
. - Enter the information in the ticket form.
- On the top of the screen, click Save.
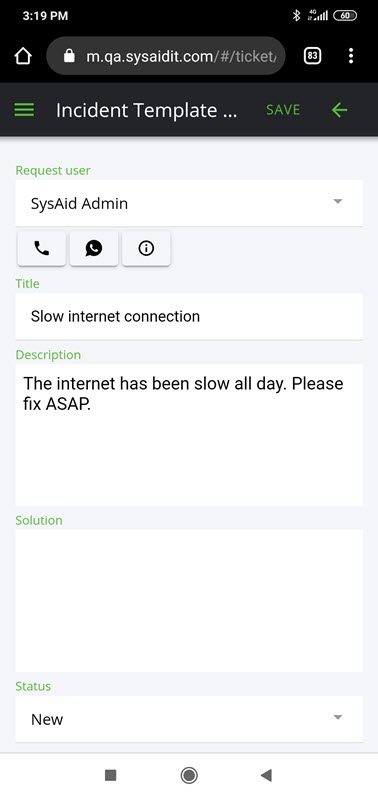
Incident Form
The incident form in the mobile solution is made up of multiple tabs.
General
The general tab contains the main information for the ticket. The process manager, category, title, description, etc.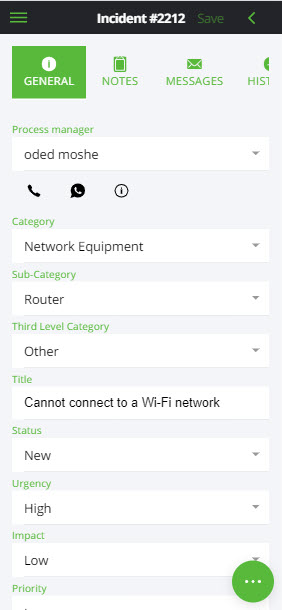
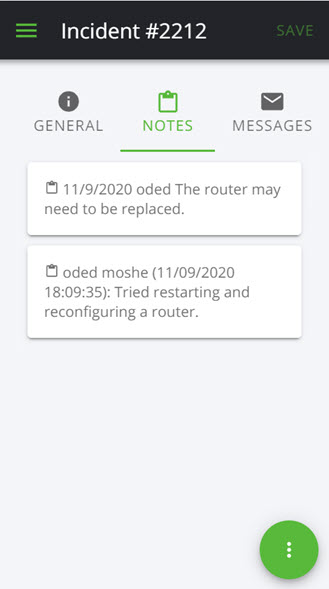
Notes
The Notes tab displays all the notes for that ticket.
Messages
The messages tab records all emails sent from a service record and all emails received by SysAid that are connected to a service record.
SysAid identifies an email as being relevant to a service record if it finds "#XXXX" in the subject of an email and "XXXX" corresponds to an existing service record ID. (Example subject line: "Regarding Service Record #106 Software X keeps crashing")
Attachments
The Attachments tab provides access to all the ticket's attachments.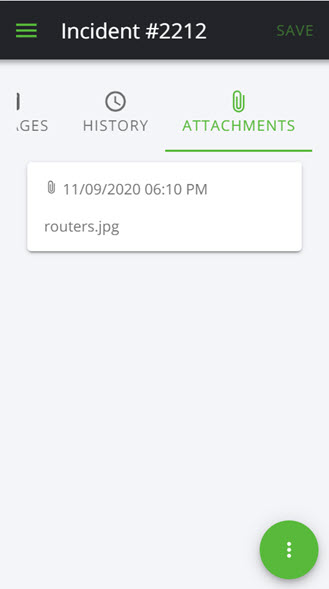
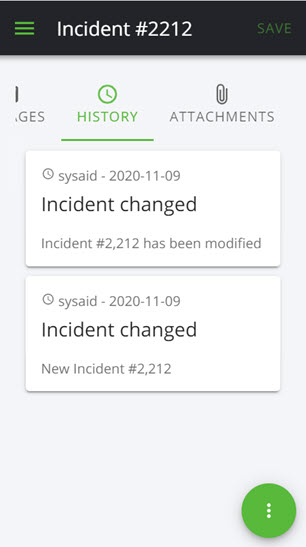
History
The History tab displays a record for every update made to the ticket.
Actions
The Action button allows admins to perform the following actions on the ticket, assign and close, add a note, and take a pic.
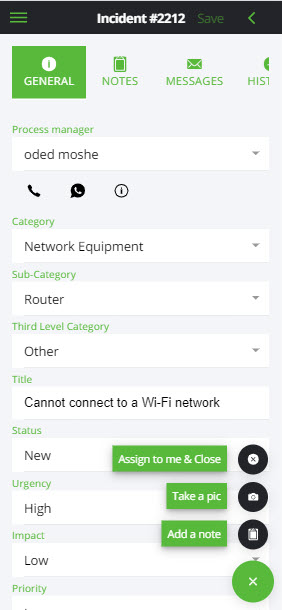
Assign to me & close
This option reassigns a ticket to you and closes the ticket.
Take a pic
This option opens your devices camera and allows you to take a picture and add it to the the ticket's attachments. The image can be accessed in the Attachments tab.
Add a note
This option lets you add a note to the ticket.
Enter the text of the note and click Add.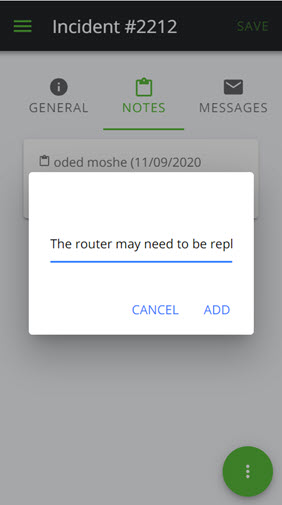
Customize
You can customize which fields are displayed in the ticket on the mobile solution by adding them to the Mobile tab for the ticket's sub-type. If a sub-type doesn't have a Mobile tab, you can add a new tab and name it "Mobile" otherwise SysAid uses the "Mobile" tab from the default sub-type.
The following fields always appear in the Mobile solution, regardless of what's configured for a particular sub-type:
- Title
- Category / Sub-category / Third-level category
- Process manager
- Urgency
- Impact
- Priority
- Request user
- Request time
- Description
- Solution
To customize the fields for the mobile solution
- In SysAid, navigate to Settings > Service Desk Templates > Sub Types.
- Select the sub-type you want to customize.
- Click Edit Sub-Type View.
- Click Design Form.
- Click New Tab.
- In the Tab Caption field, enter Mobile.
- Add the fields you want and click Save.
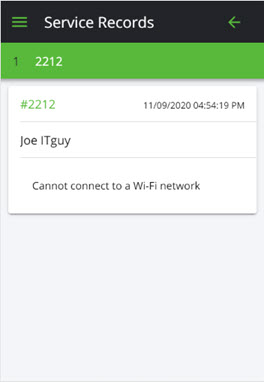
Access a ticket from the menu
You can search tickets by ID from the main menu.
To search for tickets
- On the top of the screen, click
 .
. - Enter the ID of the ticket you want to access.
- (Optional) If you want to include Closed tickets in the search, click the Slider.
- Click Search.
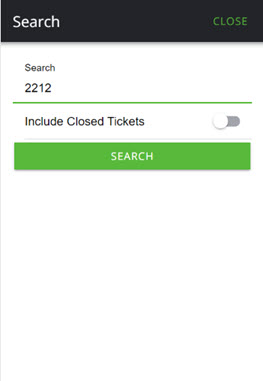
- Click the ticket in the search results to open it's ticket form.
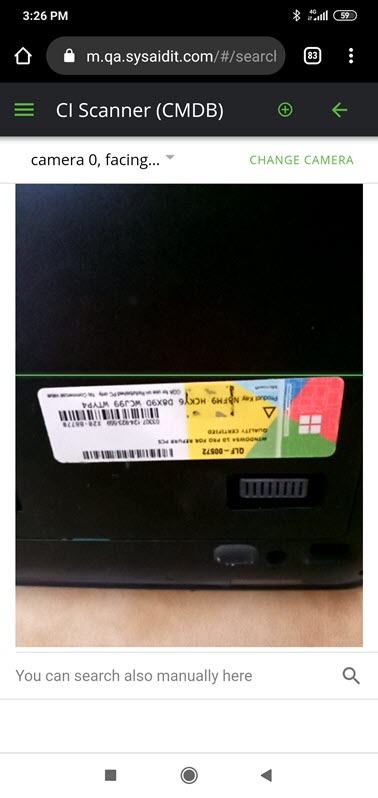
CI Barcode Scanner
To scan a CI from the CMDB with the device's camera
- In the home screen, click CI Scanner.
- Use your camera to scan the barcode of the CI.

SysAid opens the form for that CI.
Add a CI to the CMDB
You can also add new CIs to the CMDB using SysAid Mobile's barcode scanner.
This method should only be used for CIs that are not related to asset records in SysAid. Asset-related CIs should be generated automatically upon the creation of the asset in SysAid. Creating such CIs in SysAid Mobile does not generate the related asset and could result in duplicate records in the future.
To add a new CI to the CMDB
- In the home screen, click CI Scanner.

- Use your camera to scan the barcode of the CI.
- When prompted, click Add.
- Enter the information in the CI form.
- On the top of the screen, click Save.
Customize
You can customize which fields are displayed in the CI on the mobile solution by adding them to the Mobile tab to the CI form. If a sub-type doesn't have a Mobile tab, you can add a new tab and name it "Mobile."
Mobile tabs must be defined per CI sub-type. If a Mobile tab is not defined, the default fields are displayed.
Some fields are not supported in the mobile solution, even if you add them to the Mobile tab for a CI's sub-type.
To customize the fields displayed in the CI form in the mobile solution
- In SysAid, navigate to Assets > CMDB > CI List.
- Select the CI type and CI sub-type that you want to customize.
- Click
 .
. - Click New Tab.
- In the Tab Caption field, enter Mobile.
- Add the fields you want (required fields are supported).
- Click Save.Note
The options to configure visibility or access to fields for specific user groups are not supported in the Mobile solution.
Customized fields are visible in the mobile solution only for existing CIs. When you create a new CI from the mobile solution (even when a Mobile tab has been defined for the selected CI sub-type) the default fields are displayed until the CI is saved.