Keeping service records accurate and complete is essential for smooth operations in any industry.
Merging records helps eliminate errors, improve efficiency, and ensure continuity. However, the process can be complex, requiring careful verification and standardization.
In this article, we’ll explain how to merge service records in SysAid Spaces.
Available for:
SysAid Spaces. If you’re using SysAid Classic, please see the Help Desk List article.
How it works
You can select up to 50 service records from the queue and merge them.
When merging service records, one record becomes the primary service record—the active service record that remains in the queue—and all the other service records become secondary service records.
Please note:
An agent must have the Merge service records permission enabled to merge service records. The Edit Administrator article explains user permissions in more detail.
The agent can choose whether to include the following secondary service record assets in the primary service record:
Attachments
Messages
Notes (Spaces only)
Activities
Once the merge is complete, the primary service record will be marked as “Primary.” The merge details are in the Journey tab within the primary service record.
Warning:
The merge action is irreversible - restoring merged service records is impossible.
Merged secondary service records
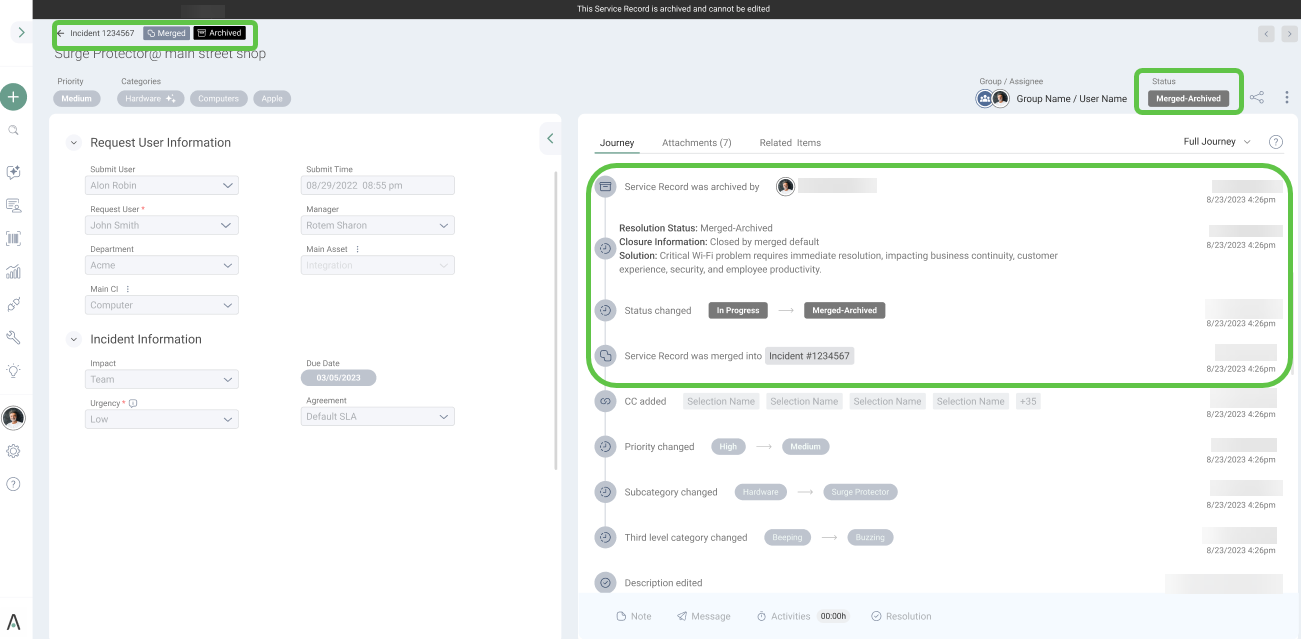
All the secondary service records will be closed and archived. They can be found in the “Archive” view.
They will automatically receive a “Merged-Archived” status, and all merge-related information will appear in the Journey tab of each secondary service record.

Merging service records
To merge service records:
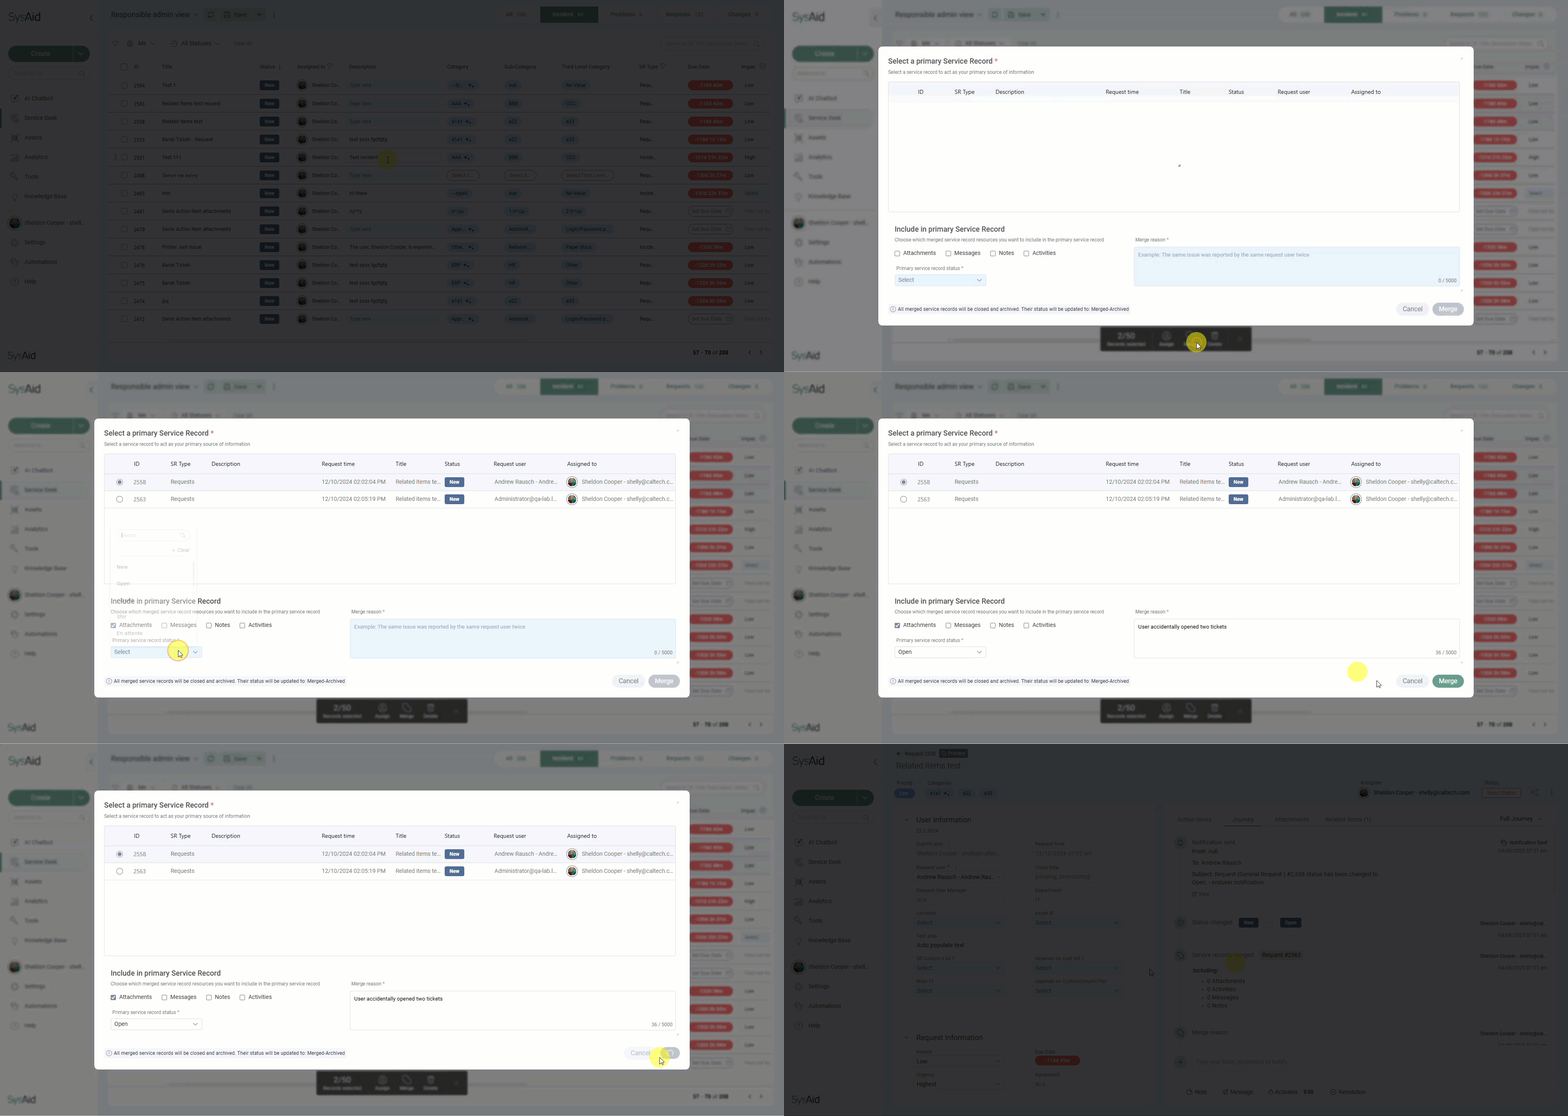
In your SysAid account, select at least 2 service records you’d like to merge.
Click Merge in the bulk action bar at the bottom.

Select the primary service record. This will be the service record you will work with after the merge.
Select which secondary service record assets you’d like to include in the primary service record.
Choose the status for the primary service record.
Fill in the reason for the service records merge.
Click Merge.
Once the merge is complete, you’ll see the primary service record. All the secondary service records will be closed and archived.
The merge details can be found in the Journey tab within the primary service record.
Merge configured in SysAid Classic
If you’ve updated your SysAid account from Classic to Spaces and have the hybrid view available, there are a few things you should be aware of:
Service records merged in SysAid Classic will also appear as merged in SysAid Spaces and vice versa
The merge settings you have configured in SysAid Classic will not apply in SysAid Spaces
Merging Notes is only available in Spaces. Agents will not see the merged Notes in Classic view.
The merging process in Spaces differs from the one in Classic:
In Classic, you select the status of the secondary service records
In Spaces, you select the status of the primary service record