The following page is designed to show you an example of SysAid Change Management in action. For instructions on setting up and using Change Management, please refer to our Change Management and Problem Management Guide, our location guide and FAQ, or to the applicable help page.
Scenario
Your office has been rapidly expanding, with new employees joining almost every week. Lately, users have started complaining that the internet performance is bad, and that they are having trouble accessing all of your cloud applications. You've decided that the time has come to add more internet bandwidth. This is a significant change to your network infrastructure, and according to ITIL best practices, you must follow a predefined change process. You will be using SysAid to manage this process.
Let's get started-- Opening an incident and creating a linked change
You discovered the need to add bandwidth to the network because of the number of incidents submitted by your end users complaining about slow internet speeds. Let's begin the change management process with one of these incidents, as submitted by an end user.
Submitting and incident from the End-User Portal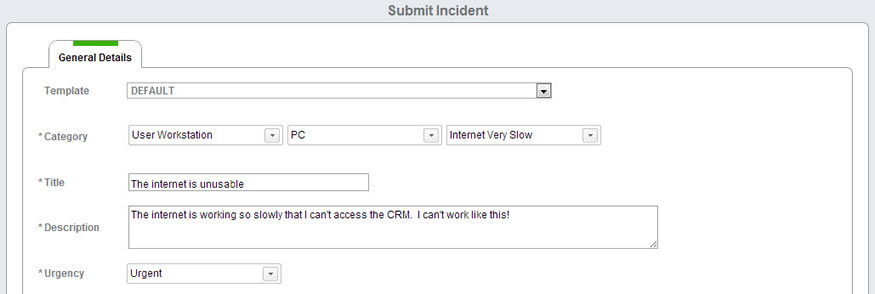
This is not the first incident that you've received about the internet speed. You understand that you have a larger problem here.
Incident complaining about slow internet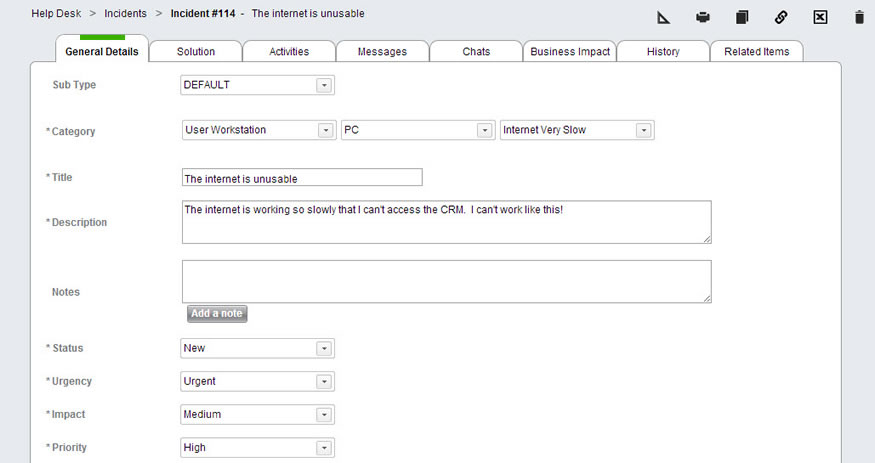
The first thing that you do is you link all the incidents together as parent child, using the incident just submitted as the parent (not shown in screenshots). Next, you create a linked change from the incident*. This is the change that proposes increasing the internet bandwidth.
(*A better alternative would be to link all the incidents to a problem, and then to create the change from the problem instead of from one of the incidents. However, for the purposes of this example, creating the change directly from an incident is more convenient.)
To create the new linked change, you click on the Create a new linked item button on the incident, choose Change Template as the type of item, and select the Normal ITIL Change Process template. You then click Create New to create the linked change.
Creating a linked change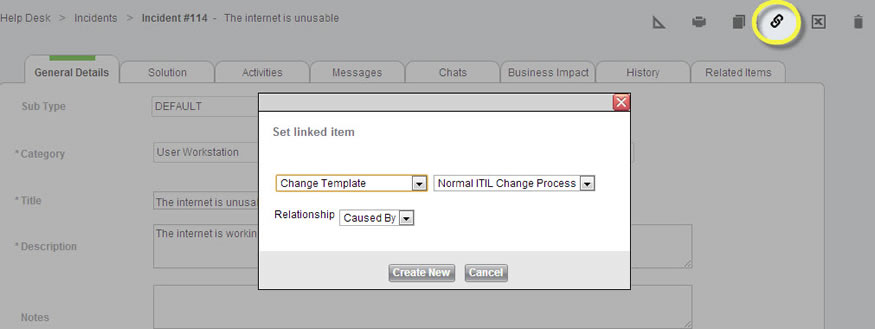
There is now a new change in the service desk. This change is linked to the initial incident. As you can see, the request user and title of the change were taken directly from the incident.
After verifying that all information in the new change is correct, you click OK. Your work on this change is now finished (unless one of the action items is assigned to you). Other members of IT or the appropriate department will participate in the change as it progress.
New change from incident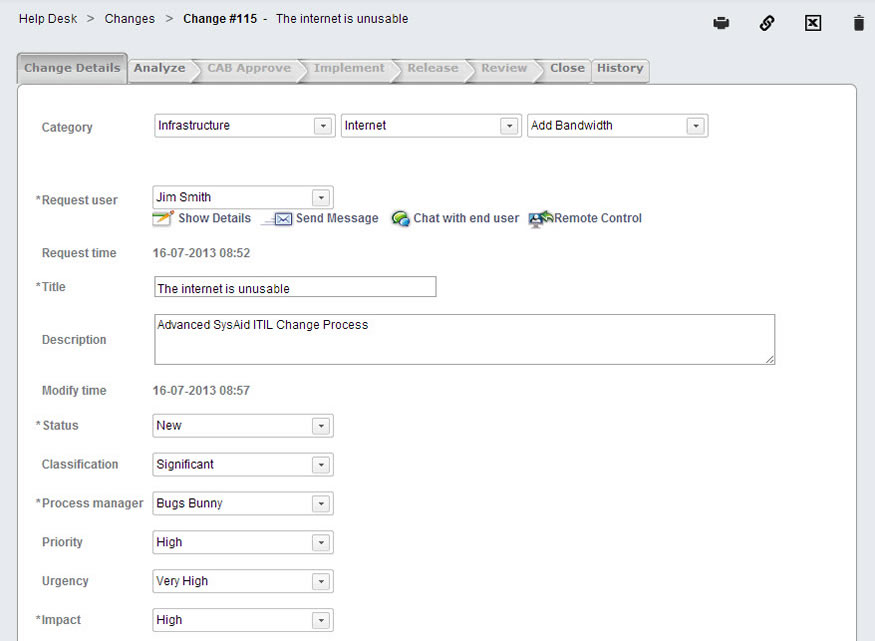
No additional steps are needed on the initial incident. As you can see, the status automatically updates when the change is created. This incident is now very clearly marked as related to a change, and no further work will be done on it.
Status changes on initial incident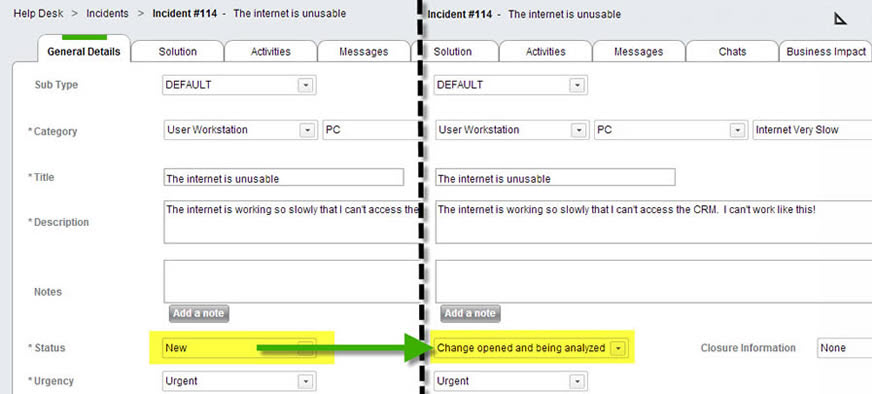
Working on a change
There is now a new change in the service desk. As you can see from the screenshot below, there are many steps in a change, represented by the workflow tabs (upper half) and associated action items (lower half). Typically, completing one action item will open the next action item in the change process. By default, changes will send email notifications to assigned to users of active action items telling them that they need to work on the change. A change is completed when, one by one, the respective assigned to users review their active action items and complete them.
Each action item is different, although there are two main types: process action items and approval action items. Process action items require the assigned to user to complete some part of the change process, such as performing a resource assessment or preparing and attaching back-out plans. Approval action items require the assigned to user to review all data entered into the change and decide whether to approve it or not.
Beginning to work on the change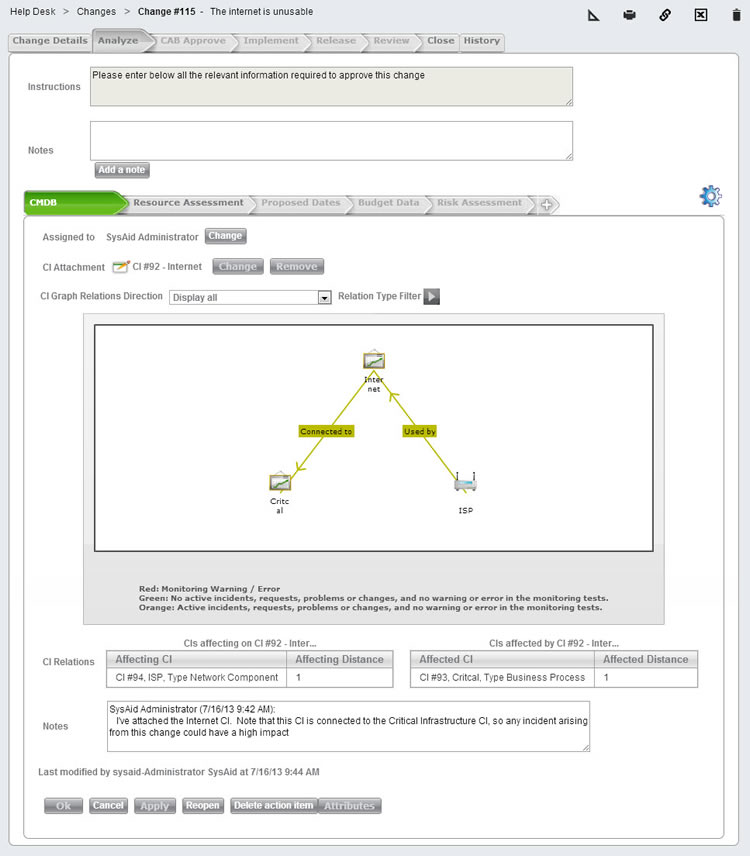
Let's return to our example. You've seen in the screenshot above that SysAid Administrator was the user assigned to update the CMDB to reflect the open change. As you can also see, he's already completed this task. You can tell the task is completed because the action item is highlighted in green. This triggers a notification to the user assigned to the next action item telling that user to begin working on the change. In this way, the change progresses. (Not all action items will be shown in this example.)
Jumping ahead a few steps, Joe receives a notification that he needs to perform a risk assessment on the proposed change. This step is very important, because it's where the change backout plans are attached, and it's where the Projected Service Outage (PSO) is recorded.
Recording the PSO and attaching backout plans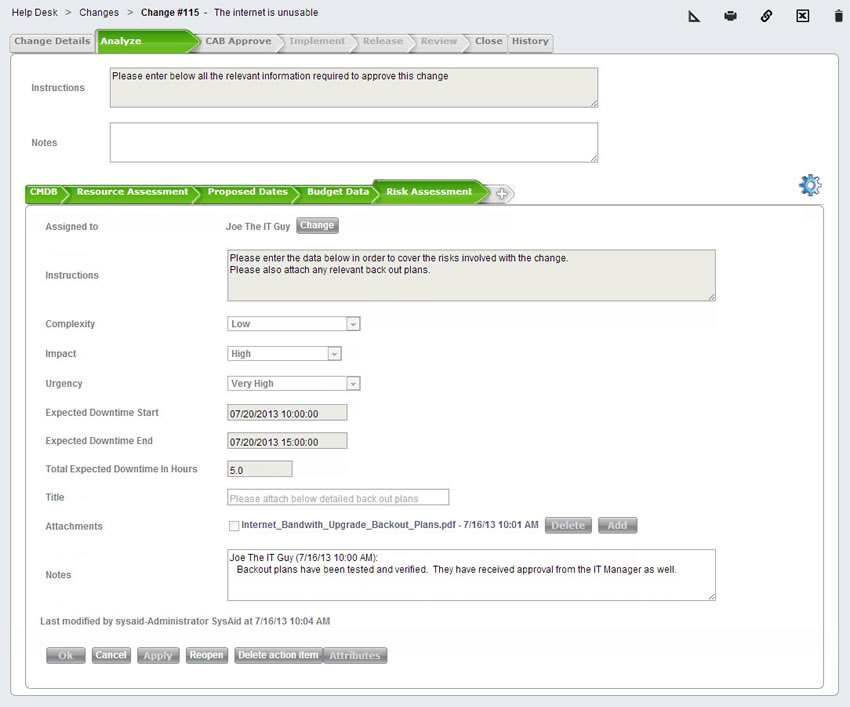
As seen in the screenshot, Joe has indicated when the internet will be down, and he has included a detailed plan in case the bandwidth upgrade is not successful. Joe also posts the PSO in the company news so that everybody will be aware of the outage. He will also send a broadcast from Assets > Asset Management > Online Users 30 minutes before the internet goes down so that any logged in users can save their work and power down (not shown).
Posting a PSO in the company news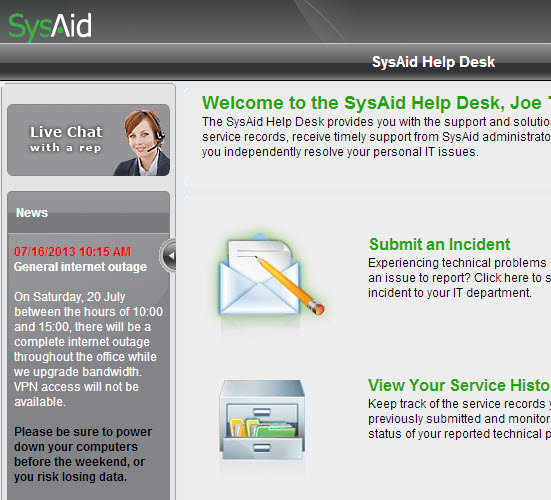
PSOs can also be added to a change as an activity. This causes the PSO to appear on the relevant admins' or end user's calendars. Similarly, a Change's due date is also displayed on the calendar.
The PSO and due date for a change displayed in the SysAid Calendar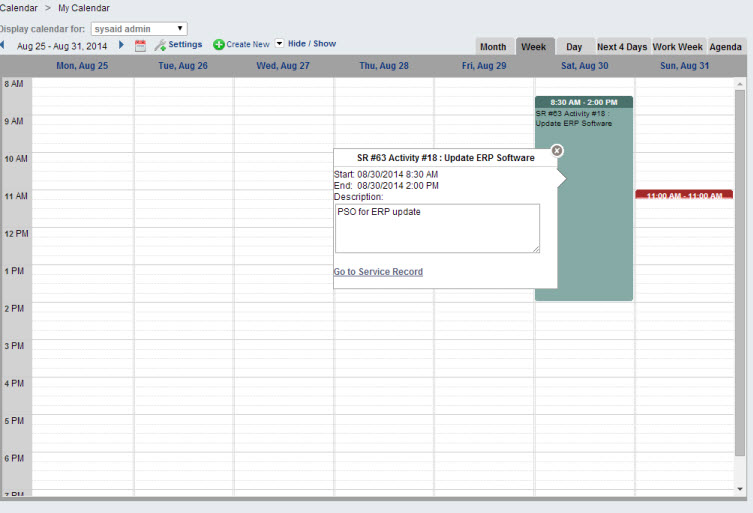
Until now, all action items have been completed by administrators. However, In SysAid, not only administrators can work on changes. End users can be involved in the process as well. An end user is able to participate in a change process from the End-User Portal and can even approve, deny, complete, and reopen a change directly from an email notification. To enable this option, be sure to select the Notification that includes embedded actions in the action item's attributes.
Selecting notification with embedded actions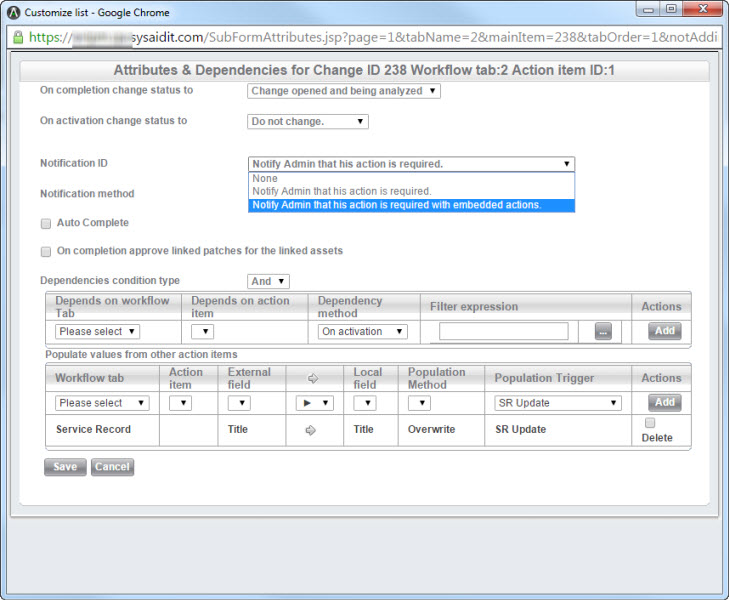
Asking end user for help on action item
As you can see from the email above, CFO Mark Twain has been asked to participate in the change. If Mark already has all the necessary information, he can just click the Approve link in his email notification to approve and complete the action item.
Action item approval/denial confirmation
Alternatively, he can first review all information entered in the change before approving it. In this case he can click the link in his email notification that directs him to the action item, or log in to the End-User Portal.
End user participating in the change process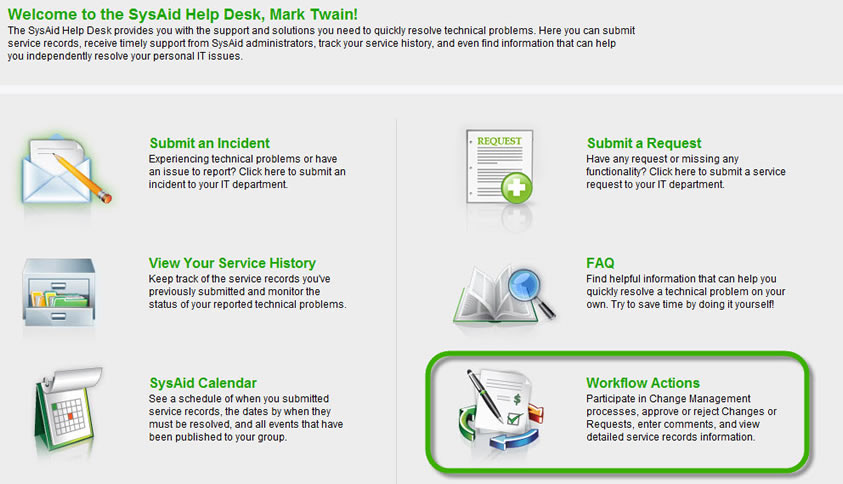
Mark opens his workflow actions, and sees that he has only one open action item. He clicks on it to open it.
End user view of an action item
The action item is in fact a request to approve the change. In order to do this, Mark needs to be able to see the entire change so he knows the details that have already been entered and can make an informed decision. He clicks on the .pdf icon in the top left corner, which opens a .pdf that contains all details for the entire change.
End user working on an action item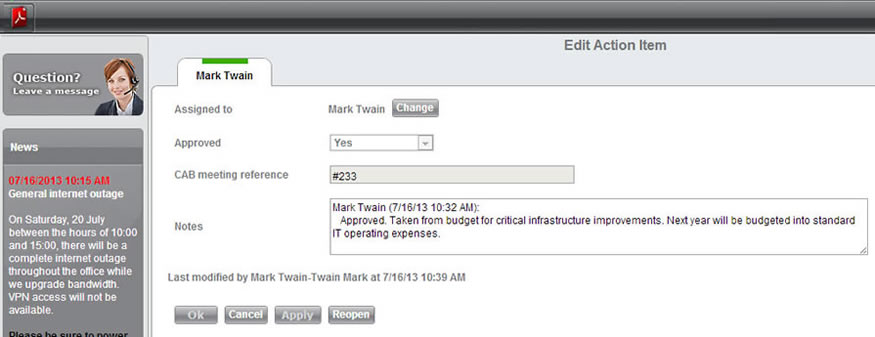
Mark reviews the change from start to finish. There was a CAB meeting yesterday, and he is already aware of the decision to increase the internet bandwidth.
Change overview .pdf
Track 1: Change rejected
Not all changes are approved. Let's continue our example and say that when the change reaches the CIO, he decides to move in a different direction. Rather than increasing internet bandwidth at a substantial cost, he decides to block certain websites that devour bandwidth (such as popular video and music streaming sites). When the change comes for his approval, he rejects it.
Rejecting a change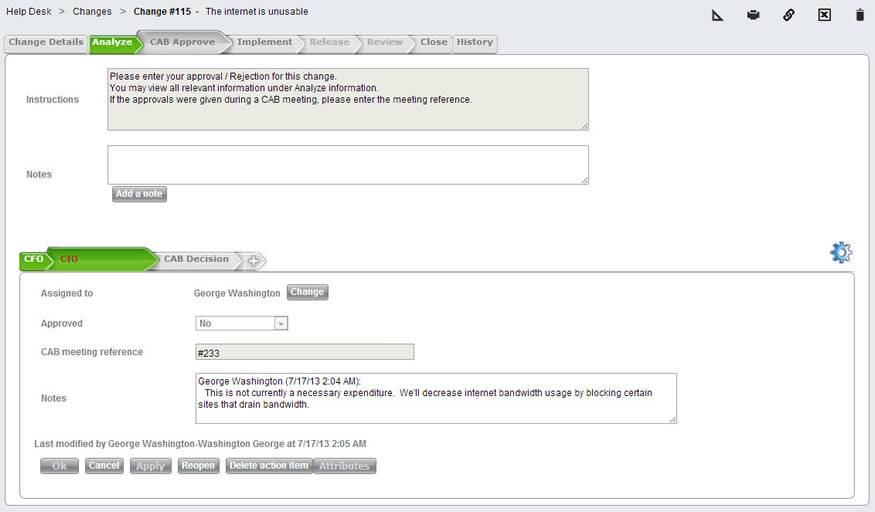
After seeing that the change was not approved, the process manager for this change, Bugs Bunny, changes the status of the change to Change Rejected.
Closing rejected change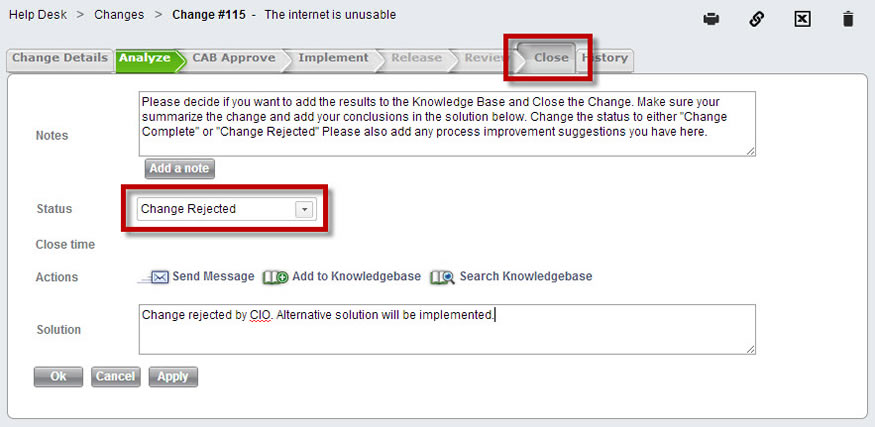
Bugs then updates the original linked incident appropriately. In this case, he might simply create a new linked change that proposes blocking access to particular websites, the direction the CIO has chosen to take.
Track 2: Change approved
Let's take a step backwards and say that instead of rejecting the change, all relevant parties approved it.
Change approved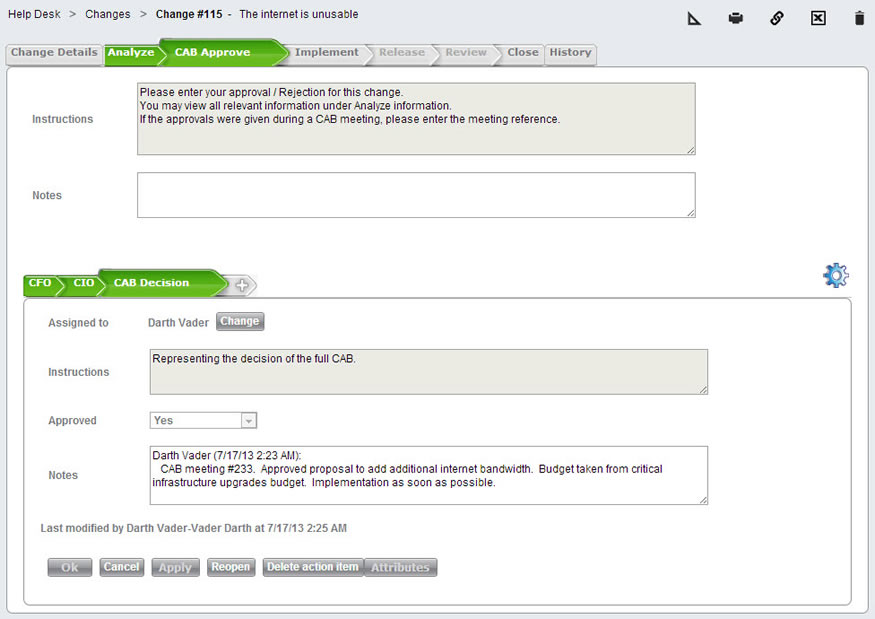
The change now progresses into implementation. One by one, action items open and notify their assigned users that their assistance is required. These action items include contacting the ISP to upgrade bandwidth and verifying that performance issues are resolved.
Reviewing a change to ensure that it was implemented properly and accepted by users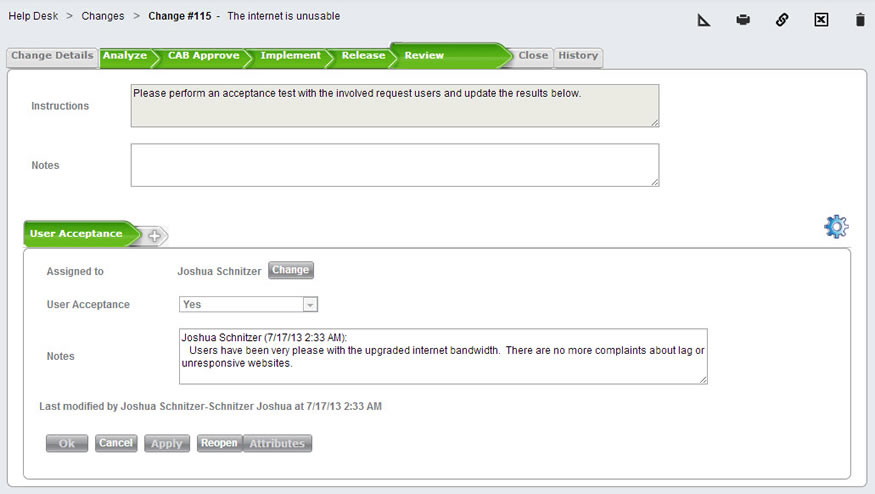
As the users complete the necessary tasks, they mark the action items as completed, signaling the next action items in sequence to open. Eventually, the last action item is complete and the change is ready to be closed.
Finished change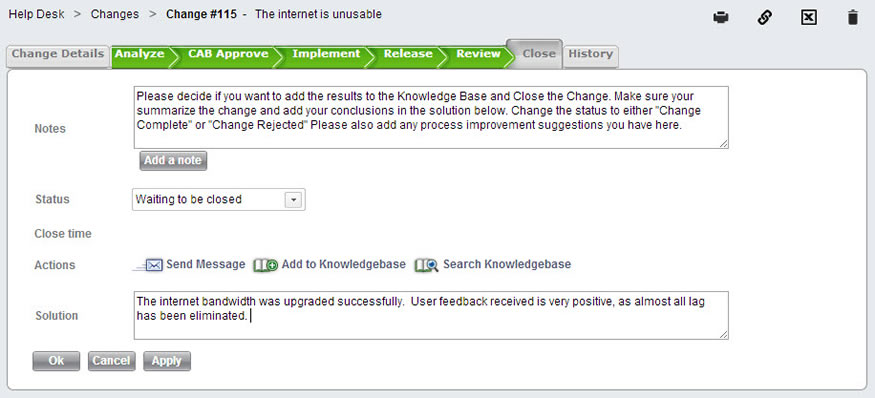
The change has now been completed successfully, and the office's internet bandwidth has been increased. Rather than letting the change management process be an unnecessary hindrance in your IT workflow, you used SysAid Change Management to help you smoothly implement a complicated change affecting all of the users in your workplace.
Each change is different, and for that reason, SysAid allows you to fully customize your change templates to suit your needs. For further information about configuring change management, and for complete user instructions for progressing through a change, please see the change management help files.