Take control of how your data is classified and displayed — by choosing which values your List Fields contain.
Requirements
SysAdmin or Admin permissions
Spaces Service Desk activate and enabled
Admins can customize the composition of their List Fields (in any Entity) by choosing each Field’s values, Keys, Caption (Name), and relevant permissions.
This document describes the customization options available for Field values and how to use them, including specifications for:
Keys
Captions
User Group permissions*
Service Record Type*
Customization Options
The customization options vary for each Field.
Example: Urgency Field has the option to specify User Group permissions, whereas Impact Fields don’t include that option
Add

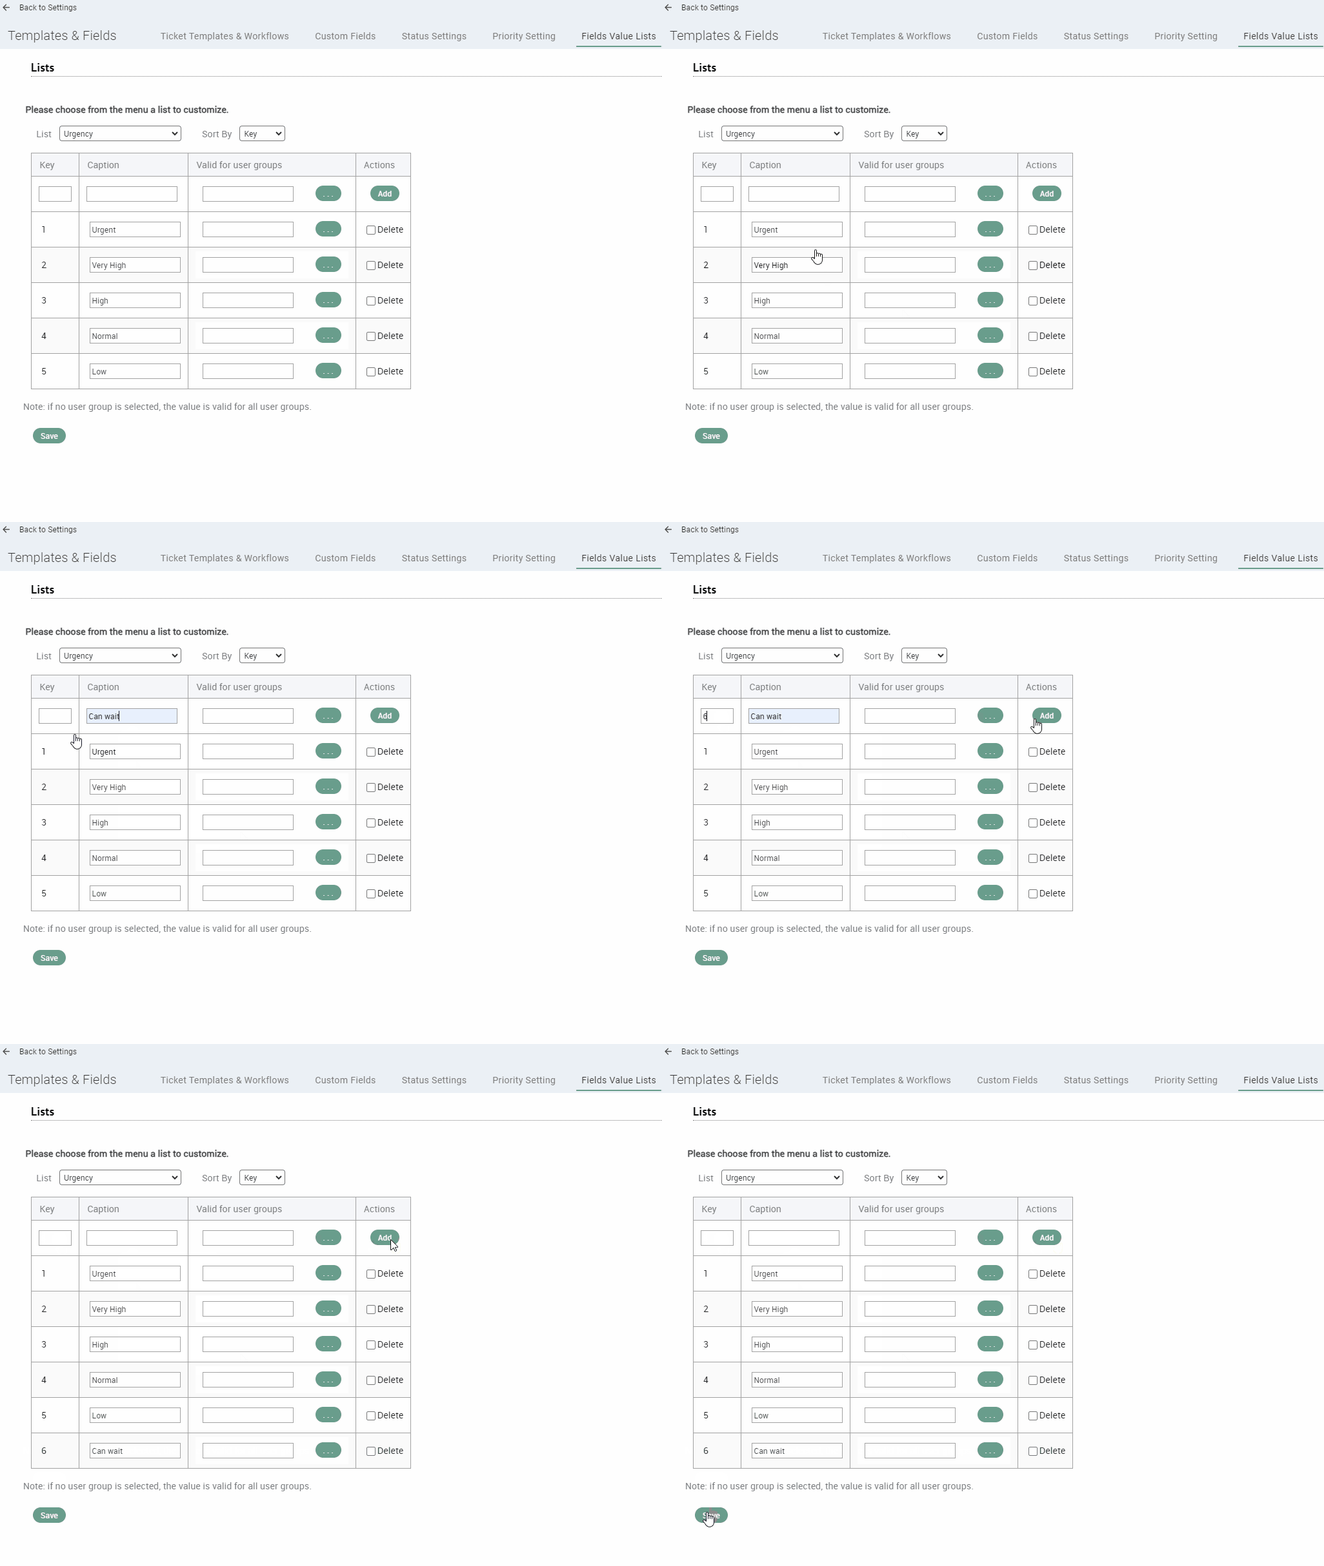
To add a Custom Value to an existing Field, follow these steps:
Select the List to add a custom value to
Create a Caption (value name) for the new value
Add a number to the Key field — this will determine the order of the values in the dropdown
Click Add
Click Save
Rename
To rename an existing Field’s (custom or default):
Click on its Caption Field
Enter the desired name
Click Save
Reorder
To customize the order of the values in the Field’s dropdown, click Sort by to configure whether the list of values is ordered according to Caption or Key
Grant permissions
Each Field value’s default permission is that all User Groups can access it.
To limit Field Value access to designated User Groups:
Click the three dots in the Valid for User Groups column
Check off the desired User Groups (one or more) from the dropdown
Click OK
Change priority color
To change or add colors to the different priorities:
Go to the Fields Value Lists tab.
From the List drop-down menu, select Priority.
Click on the color square that belongs to the relevant priority and select a different color.
Click Save.
Delete
To delete a value from a Field’s list of value options:
Select the Delete checkbox of the desired value
Click Save