The Google Apps integration allows you to sync SysAid with your Google account so you can automatically log in to SysAid whenever you log in to Google.
Requirements
For the integration to work properly, the existing end-users and admins should have their user name set to their gmail address and your SysAid URL must be accessible to outside of your company network. You cannot use the server's IP address as the URL.
You also must be running SysAid 15.2.01 or higher.
You cannot activate this integration if another single-sign on integration has already been enabled for SysAid.
Set up your Client IDs in Google Developers Console
In order for this integration to work, you must first create two Client IDs in the Google Developers Console one ID for your desktop account and another ID for your mobile account.
Only an admin with SysAid Administrator permissions can set up this integration.
Set up your desktop credentials
- Navigate to the following URL: https://console.developers.google.com/project
- Click Create Project.
- Enter a name for your project and click Create.
- Refresh the page, and select your project from the list.
- In the top-left corner, click Google APIs menu icon.
- From the right pane of your API Manager, select Credentials.
- Click Create Credentials.
- From the drop-down menu, select OAuth client ID.
- In the Create Client ID screen, click Configure consent screen.
- In the Email address field, select your email address.
- In the Product Name Shown to Users field, enter "SysAid".
- Click Save.
- In the Application Type area, select Web Application.
- In the Name field, enterSysAid.
- In the Authorized Redirect URL field, enter your SysAid URL (IP addresses not allowed) with the following additional text "/Login.jsp?addonLogin=googleLogin&accountId=ACCOUNTNAME "
For example: if your URL is http://company.ourit.support:8088 and your account name is "Joe", your regular redirect URL is "http://company.ourit.support:8088/Login.jsp?addonLogin=googleLogin&accountId=Joe"
You can locate your SysAid account name in the About page.
- Click Create.
- Copy your Client ID and Client Secret for later use.
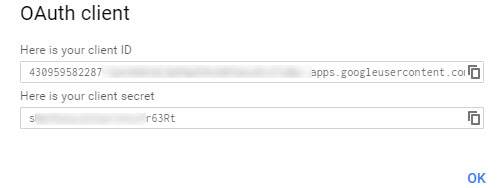
- Click OK.
Set up your mobile credentials
- From the drop-down on the top of the page, select Create a project.
- Repeat steps 3-14 in from the above procedure.
- In the Authorized Redirect URL field, enter your SysAid URL with the following additional text "/mobile/Login.jsp?addonLogin=googleLogin&accountId=ACCOUNTNAME "
For example if your URL is http://company.ourit.support:8088 and your account name is "Joe", your Mobile Client ID's redirect URL is "http://company.ourit.support:8088/mobile/Login.jsp?addonLogin=googleLogin&accountId=Joe" - Click Create.
- Copy your Client ID and Client Secret for later use.
- Click OK.
For further assistance in this process see the help page for Google Developers Console.
Enable Google Apps integration in SysAid
- On the main Third-Party Integrations page, in the Google Apps icon, click
 .
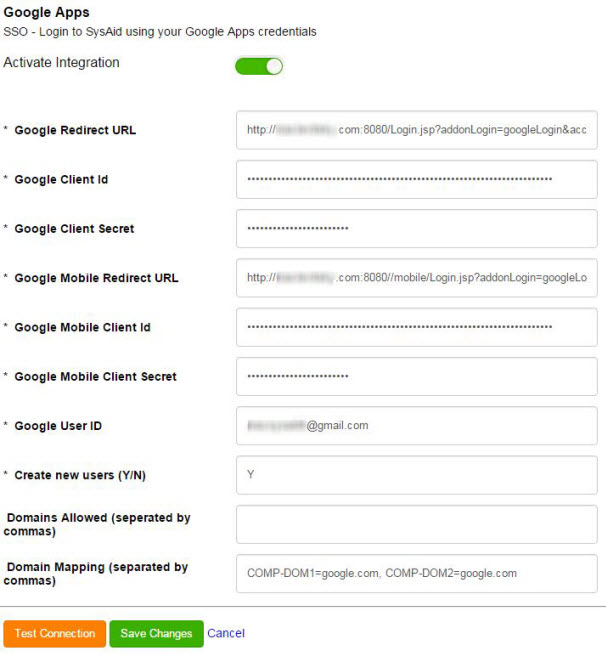
. - Enter your redirect URLs (as described above) in the Google Redirect URL and the Google Mobile Redirect URL fields.
- Copy the information from your Client IDs and your client secrets into the relevant fields.
- Enter the google email address of the integrated user in the Google User ID field. This provides validation control with the Client ID, prior to establishing integration connectivity.
- (Optional) If you want SysAid to create new users with their Google IDs, Enter "Y" in the Create New Users field.Note
SysAid checks gmail accounts against user names of admins and end users in SysAid. If the gmail account is identical to an existing user name or email address, SysAid does not create a new user for that account.
- (Optional)If you entered Y in the previous step, than a SysAid user is generated for anyone with a Google account who attempts to access your SysAid account.
To limit who can access your SysAid account, enter a list of of domains that you want to generate users for, separated by a comma (for example: gmail.com,company.com,sysaid.com).
If a Google account with a different domain attempts to access your SysAid account, SysAid does not generate a user for that account. - (Optional) If you selected to allow SysAid to create new users with their Google IDs, you can replace the Google domain with any name you want in the Domain Mapping field. For example, "MyDomain= MyCompany.com, MyDomain2= MyCompany.com". If you want user names to contain the Google domain, leave this field blank.
- Click the slider to activate the Google Apps integration.
- Click Save Changes.
- Log out of SysAid.
- In the Logout screen, click the Login link.
- If you are not yet logged in to your Google account, log in to the account.
- Click Accept. SysAid opens with the user automatically logged in.