The OneLogin integration allows you to sync SysAid with your OneLogin account so you can automatically log in to SysAid whenever you log in to OneLogin.
For this integration to work, you must be running SysAid 16.1.25 or higher.
Note
Only an admin with SysAid Administrator permissions can set up this integration.
You cannot activate this integration if another single-sign on integration has already been enabled for SysAid.
Set up the SysAid app in OneLogin
- In your OneLogin admin account, navigate to Applications > Add App.
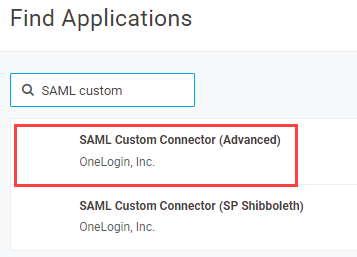
- Use the search bar to search for the term saml custom.
- Select SAML Custom Connector (Advanced).
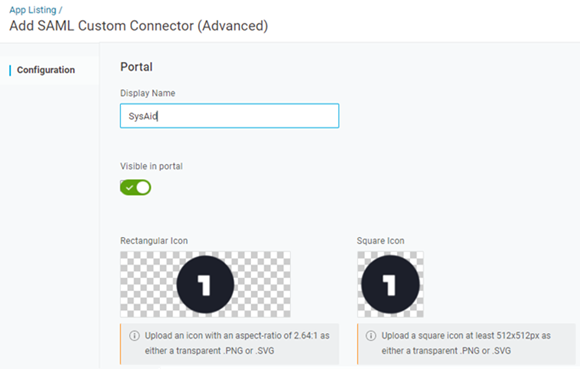
- In the Display Name, enter SysAid.
- Ensure that the Visible in Portal setting is enabled.
- (Optional) Upload an image for the SysAid App icon in OneLogin:
- Select an icon shape (Rectangular or Square).
- Select an image to upload.
- Click Save.
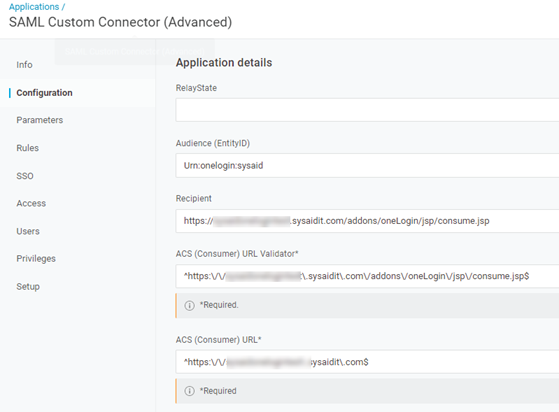
- Enter the following application details in the Configuration tab:
- In the Audience field, enter Urn:onelogin:sysaid.
- In the Recipient field, enter your SysAid account URL with the extension /addons/oneLogin/jsp/consume.jsp appended to it.
- In the ACS (Consumer) URL Validator field, enter ^https://youraccountname.sysaidit.com/addons/oneLogin/jsp/consume.jsp$.
- In the ACS (Consumer) URL field, enter: ^https://youraccountname.sysaidit.com$.
- In the Parameters tab, click
 to add a new parameter:
- Name: User.FirstName
- Value: First Name
- Flags: check “Include in SAML assertion”
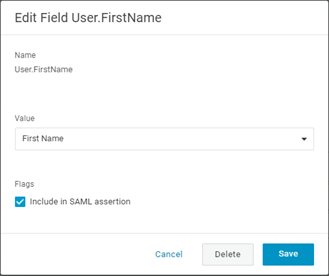
- Click Save.
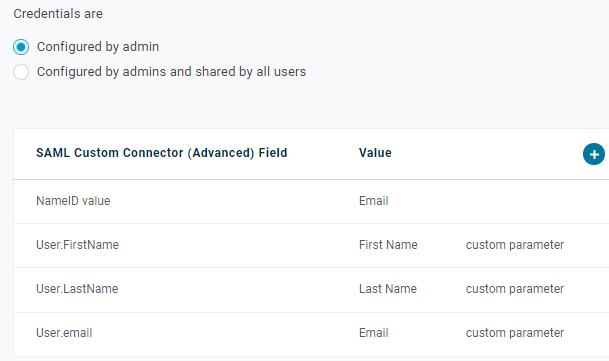
- Repeat the previous two steps to add the following two additional parameters:
- Name: User.FirstName
- Value: First Name
- Flags: check “Include in SAML assertion”
- Name: User.email
- Value: Email
- Flags: check “Include in SAML assertion”
Note
Leave the OneLogin SysAid app open. You will need to access it for the next part of the integration setup.
Configure the integration in SysAid
- On the main My apps page, in the OneLogin icon, click
 .
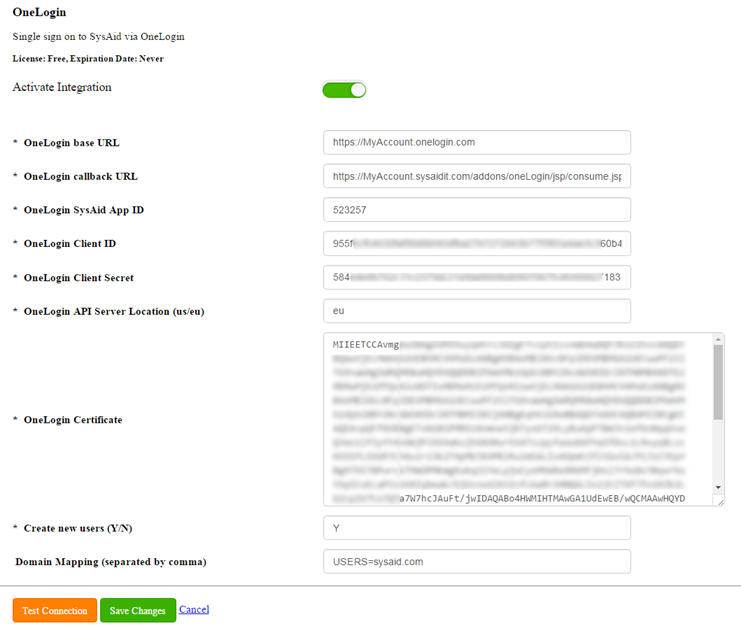
. - In the OneLogin base URL field, enter your OneLogin account URL.
- In the OneLogin Callback URL field, replace the first part of the provided URL (https://MyAccount.sysaidit.com) with your SysAid account URL.
- Enter the OneLogin SysAid App ID:
- In your OneLogin account open the SSO tab.
- Copy the number at the end of the Issuer URL.
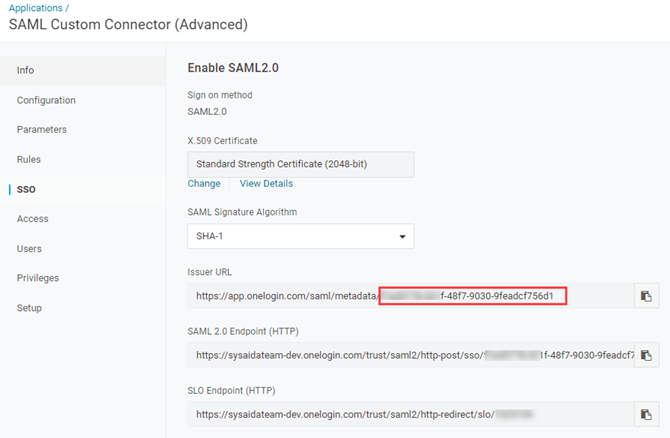
- Back in SysAid, paste the number into the OneLogin SysAid App ID field.
- Enter the OneLogin Certificate:
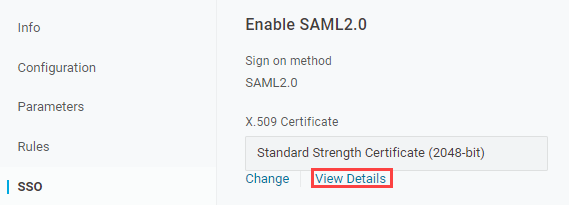
- In your OneLogin account open the SSO tab.
- Under the X.509 field, click View Details.
- Copy the contents of the X.509 Certificate between the Begin Certificate and End Certificate tags.
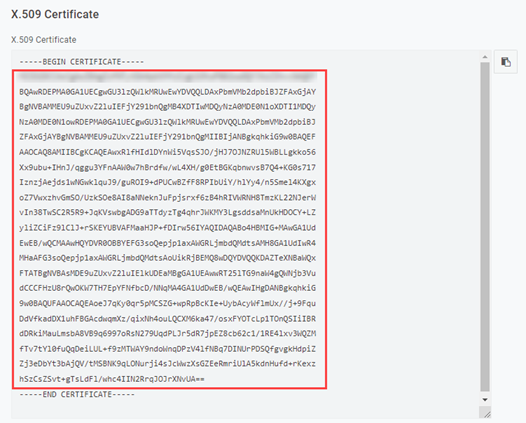
- Back in SysAid, paste the copied content into the OneLogin Certificate field.
- Enter the OneLogin Client ID and Client Secret:
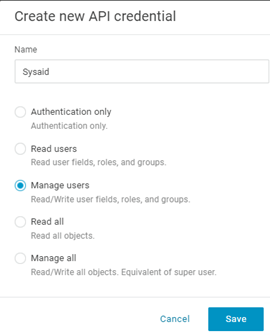
- In your OneLogin account navigate to Settings > API.
- Click New Credential.

- Enter "SysAid".
- SelectManage users.
- Click Save.
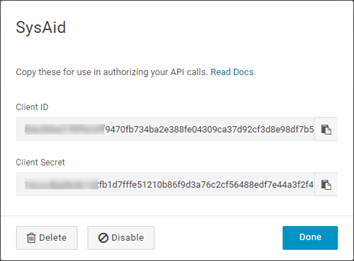
- Copy the contents of the Client secret and Client ID fields and paste them into the corresponding fields in SysAid.
- Click Done.
- Enter the server location parameter:
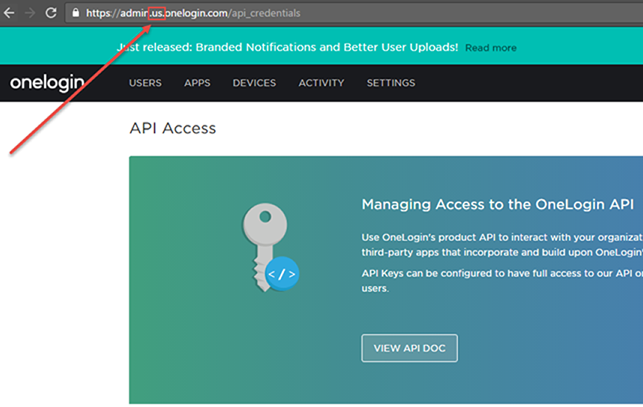
- Check your OneLogin URL to determine if your server location parameter is set to Europe (eu) or United States (us).
- In SysAid, enter the parameter in the API Server Location field.
- (Optional) If you want SysAid to create new users with their OneLogin IDs, Enter Y in the Create New Users field.
Note
SysAid checks the OneLogin accounts against user names of admins and end users in SysAid. If the OneLogin account is identical to an existing user name or email address, SysAid does not create a new user for that account.
- (Optional) If you selected to allow SysAid to create new users with their OneLogin IDs, you can replace the OneLogin domain name with any name you want in the Domain Mapping field. For example, "Onelogin.com= sysaid.com, gmail.com=sysaid.com". If you want user names to contain the user's original domain, leave this field blank.
- Click the slider to activate the OneLogin integration.
- Click Save Changes.
