Edit Workflow Template
- 03 Apr 2023
- Print
- PDF
Edit Workflow Template
- Updated on 03 Apr 2023
- Print
- PDF
Article summary
Did you find this summary helpful?
Thank you for your feedback!
Workflow Designer allows process managers to design, create, and modify processes with simple drag-and-drop functionality, real-time visibility of the process, and new editing capabilities.
Workflow Designer video
New workflow
To add a new workflow tab
- At the end of the workflow, click Add another tab.
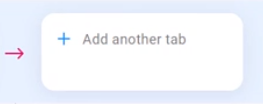
- Enter the tab name.
- Click Add.
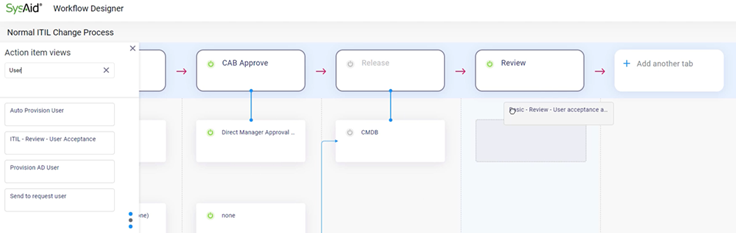
New Action item
To add a new action item
- Click
 to open the side panel.
 - (Optional) You can use the search box to filter the side panel and find the action item you want.
- Select an action item and drag and drop it into the location you want in the workflow.
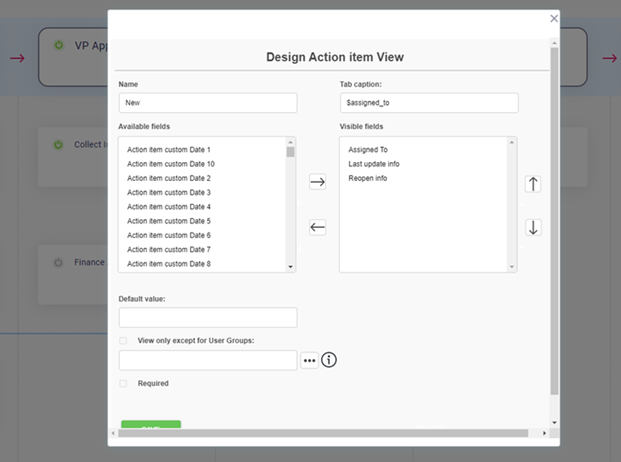
- (Optional) You can also design an action item from scratch by dragging the New Action Item box to the location you want, editing the action item in the screen that appears, and click Save.
Replace action item
- Click to open the side panel.
- Select an action item and drag and drop it into the location you want in the workflow.
- When prompted, click Yes.
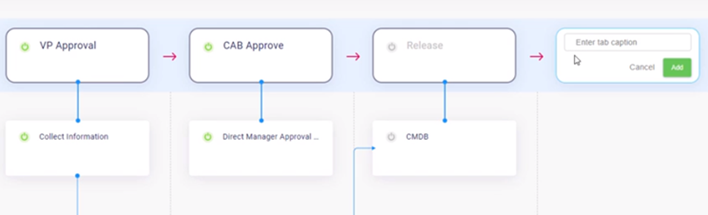
Move an action item or a workflow tab
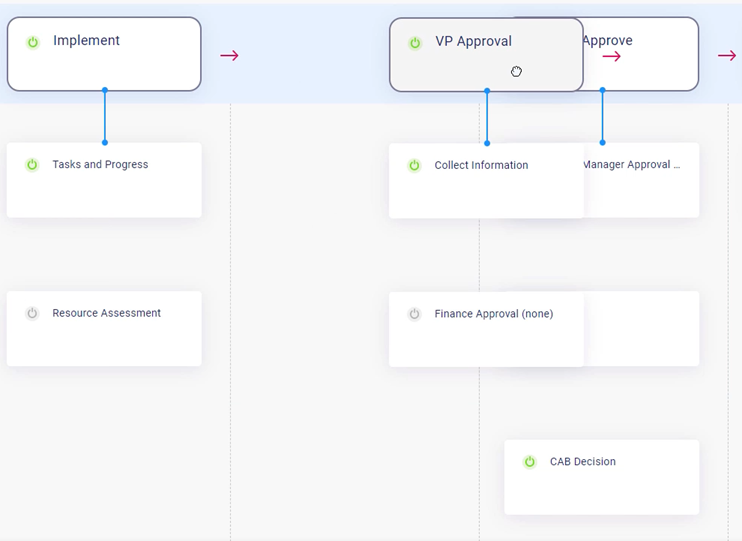
You can rearrange the position of an individual action item or an entire workflow tab. When possible, the dependencies for the action items remain in place even after they have been moved.
- Drag the action item or workflow tab that you want to move to the desired position.
- When prompted, click Yes.
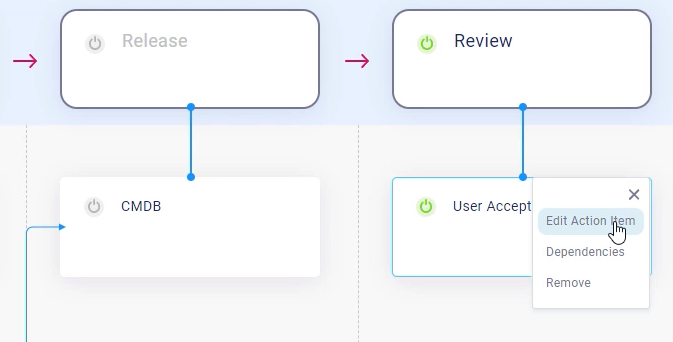
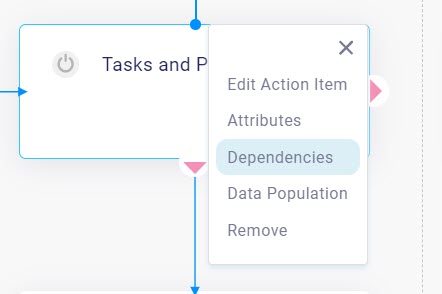
Edit action item
You can edit the fields in an action item.
- Hover over the action item and click
 .
. - Select Edit Action Item.
- Edit the action item in the screen that appears.
- Click Save.
Delete action item
- Hover over the action item and click .
- Select Remove.
- When prompted, click Yes.
Delete a workflow tab
- Hover over the workflow tab.
- Click
 .
. - When prompted, click Yes.
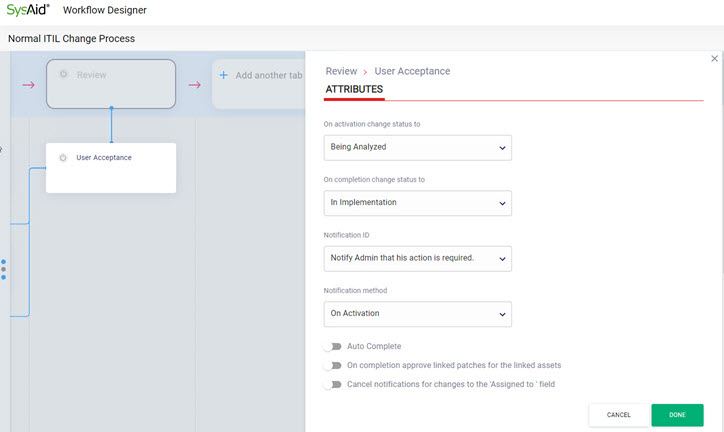
Access action item attributes
You can quickly access an action item's attributes by clicking on the action item. Modify the attributes you want and click Done.
Dependencies
Workflow Designer allows you to easily create dependencies between action items, edit or delete existing dependencies, and add conditions to dependencies.
Create dependencies
You can create simple dependencies in Workflow designer. A simple dependency means that an action item is activated another action item is completed or activated.
To create a dependency
- Hover over the initial action item until the arrow buttons appear on the edge of the action item.
- Click the arrow button and drag it to the action item you want to activate.
- Select if you want the second action item to be activated when the initial action item is activated or when it is completed.
Edit dependencies
- Hover over the action item and click .
- Select Dependencies.
- (Optional) To add further dependencies, click Add Dependency.
- (Optional) To add conditions to a dependency, hover over
 and click Add Condition.
 - (Optional) To add a group of conditions to a dependency, hover over and click Add Groups.
- (Optional) To edit a dependency or a condition, select values from any of the drop-down lists.
- (Optional) To change a statement's operator from AND to OR or back, click the option you want in the statement's
 button.
 - (Optional) To delete a dependency or condition, hover over it and click .
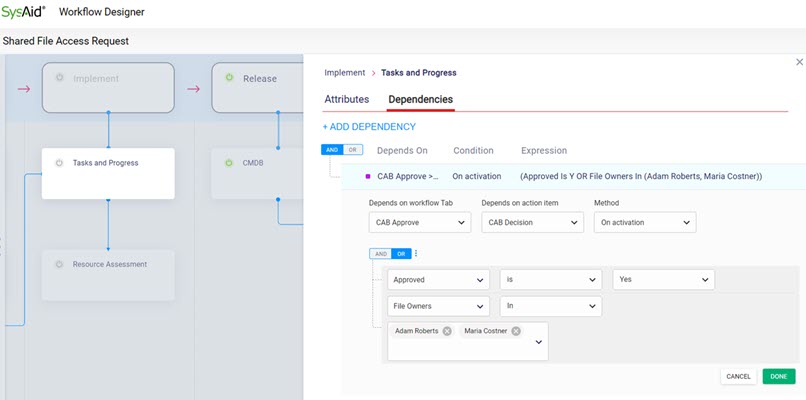
- Click Done
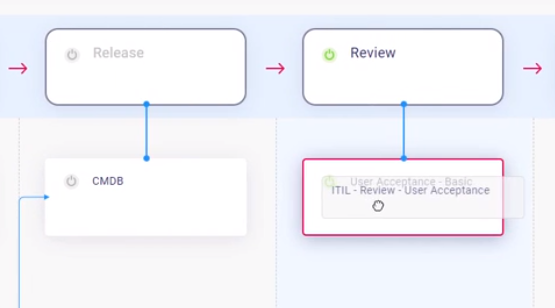
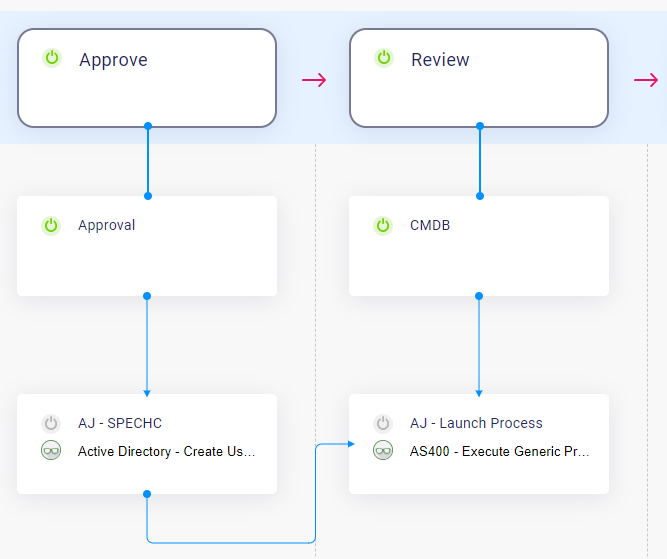
Workflow Designer displays the dependency with an arrow connecting the action item to the other action item that you selected in the dependency dialog.
Automate Joe indicators
Workflow Designer indicates which action items run Automate Joe processes with an Automate Joe icon ( ). You can click the icon to open the processes' parameter mapping window.
.png)