The SysAid AI Agent Builder integrates with Microsoft Entra to give you powerful tools for identity and access management. Once connected, you can use AI Agents to manage group memberships, create users, search for users, reset user passwords, and much more. With ready-made AI Agents or the flexibility to build your own, you can streamline user management tasks and strengthen your organization's security and efficiency.
Setting up the connection
The connection process consists of these main steps:
Opening the Microsoft Entra ID Graph API AI Connection.
Adding the Tenant ID.
Generating the Client ID
Creating a Secret Key
Testing the Connection
Follow these steps to set up and connect your SysAid AI Agent Builder with Microsoft tools using the Microsoft Entra ID Graph API AI Connection.
Step 1: Opening the Microsoft Entra ID Graph API AI Connection
In your SysAid account, go to Settings > SysAid AI Agents> AI Agents Builder.
Search and select the Microsoft Graph API AI Connection in the list to the left.
You’ll see 3 fields to fill in: Tenant ID, Client ID, and Client Secret.
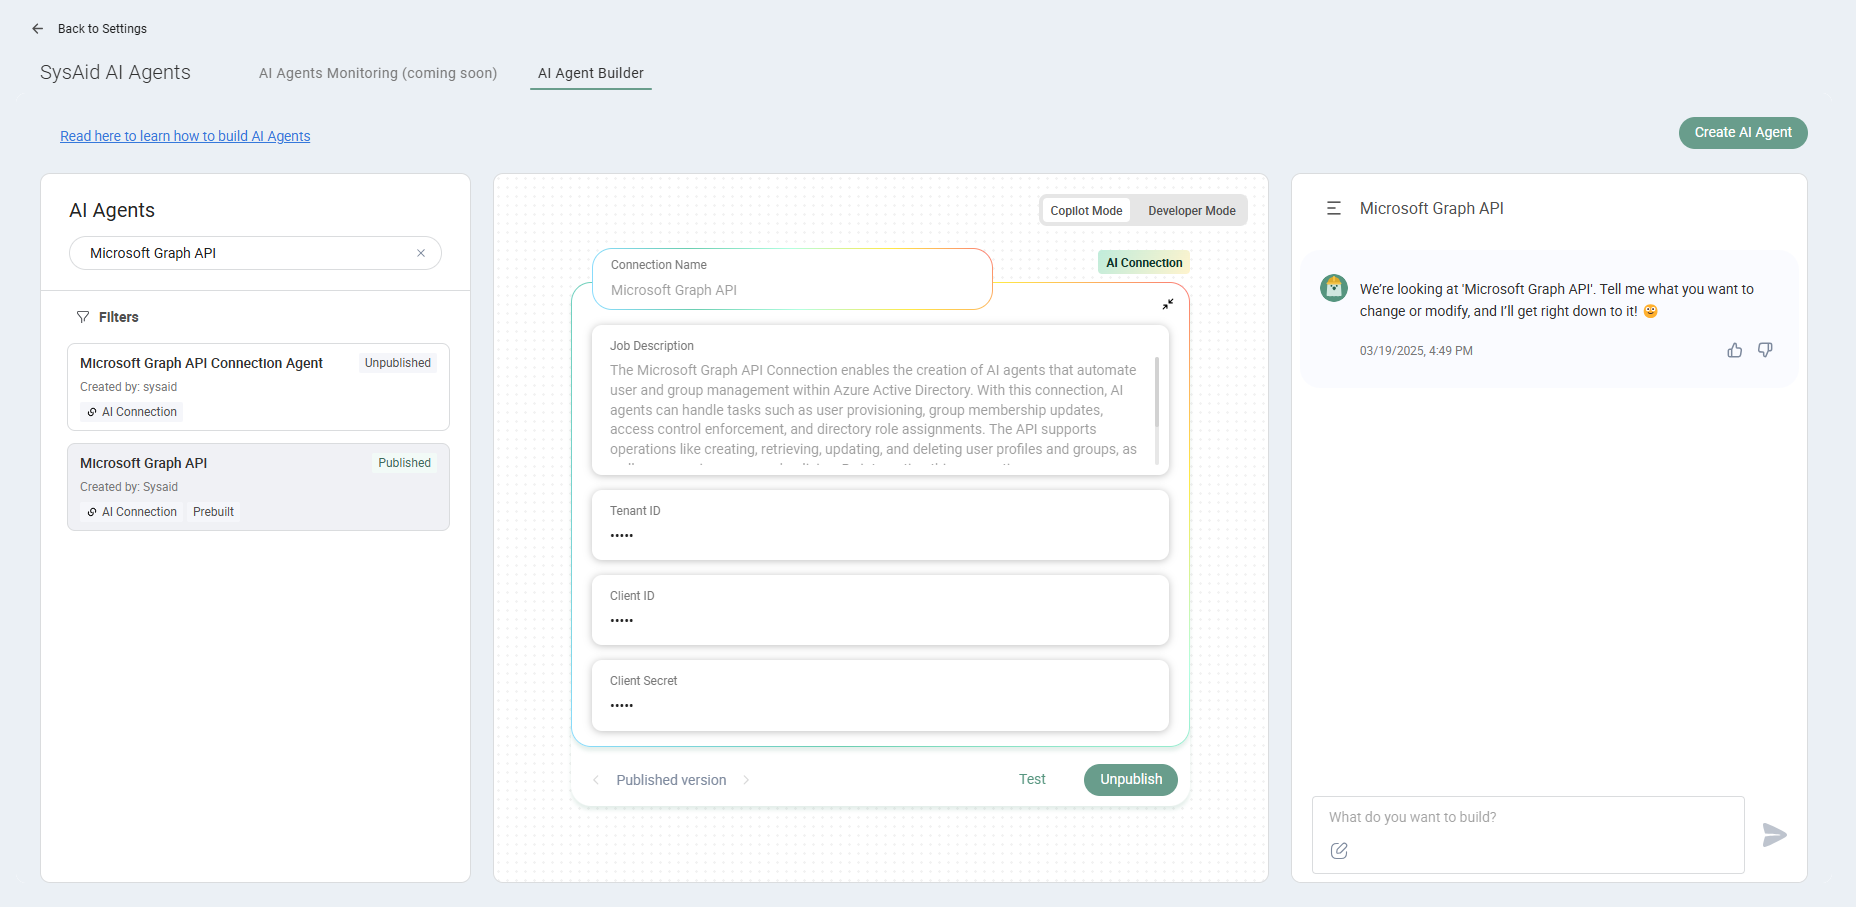
We’ll walk you through finding these details and adding them to the AI Agent Builder to connect it to the Microsoft Graph API.
Keep your SysAid account open in one tab and open a new tab to connect to your Azure portal.
Step 2: Adding the Tenant ID
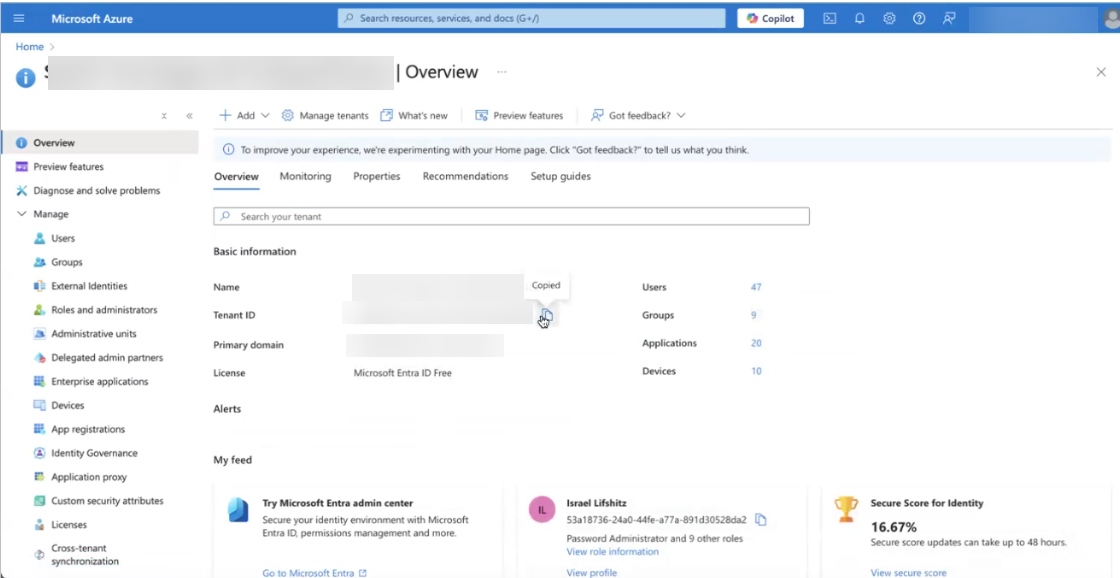
Log in to Azure and navigate to Azure Services.
Select Microsoft Entra ID.
In the Overview section, copy the Tenant ID.
Back in SysAid, paste the copied ID into the Tenant ID field within the AI Connection.
Step 3: Generating the Client ID
In Azure, go to Manage > App Registrations.
Click + New Registration.
Enter a name for your application, for example, "SysAid AI Agent Builder - Entra ID"
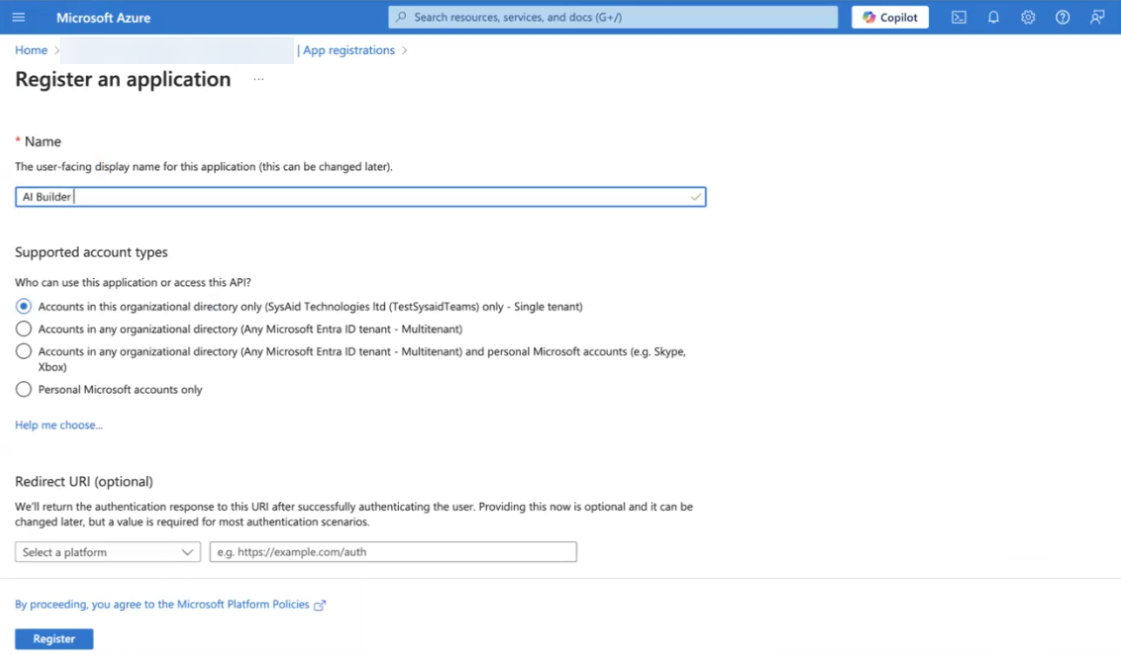
Keep the default settings and click Register.
Scroll down to API Permissions and click + Add a permission > Microsoft Graph > Application permissions.
Add the following permissions from the Application Permissions section:
Directory >
Directory.Read.AllDirectory >
Directory.ReadWrite.AllGroup >
Group.Read.AllGroup >
GroupMember.ReadWrite.All
Please note:
You can select additional permission if you’d like to create custimized AI Agents. For the first list of Microsoft Graph API permissions, go to Microsoft Learns.
Click Add Permission.
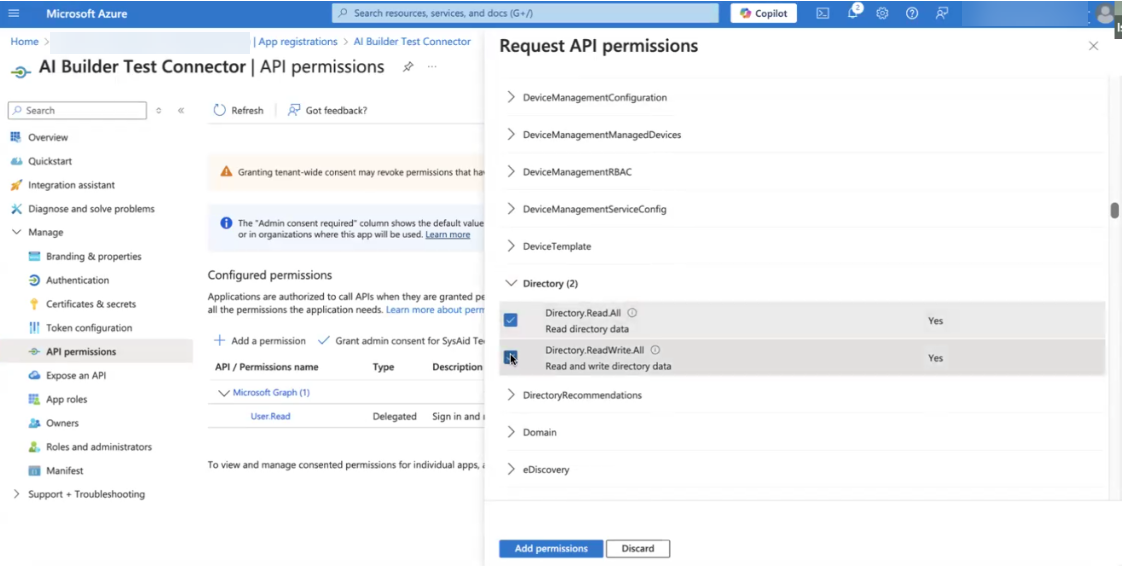
Select Grant admin consent for SysAid to finalize permissions.
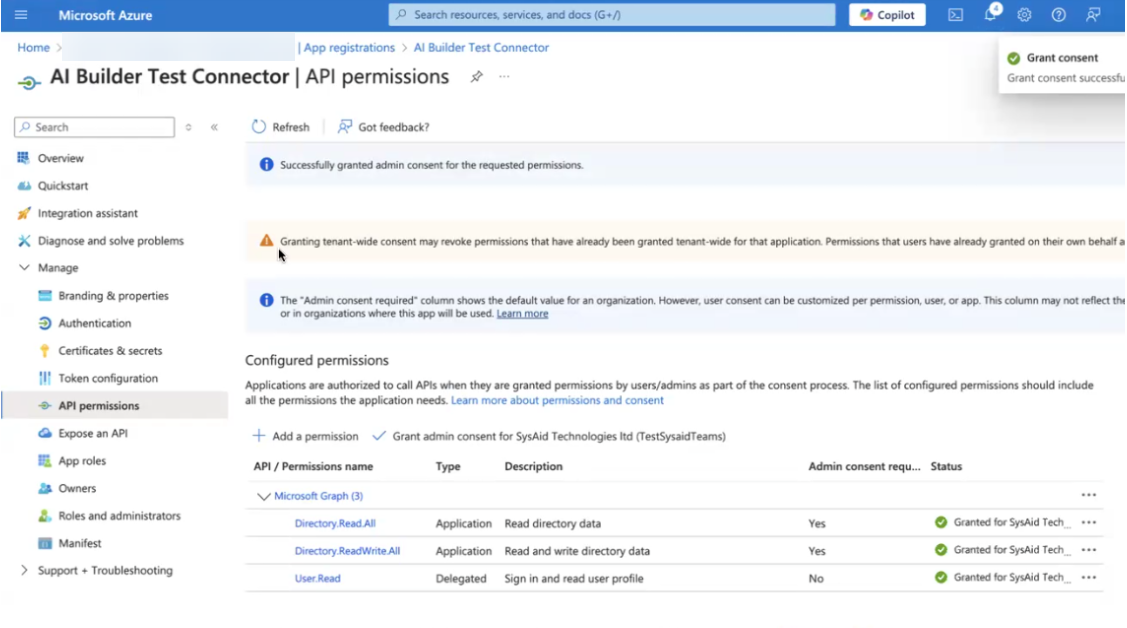
Return to the App Registration section and select the newly created application.
Copy the Application (Client) ID from the Overview section.
Back in SysAid, paste this ID into the Client ID field.
Step 4: Creating a Secret Key
In Azure, go to Manage > App Registration and select the newly created application.
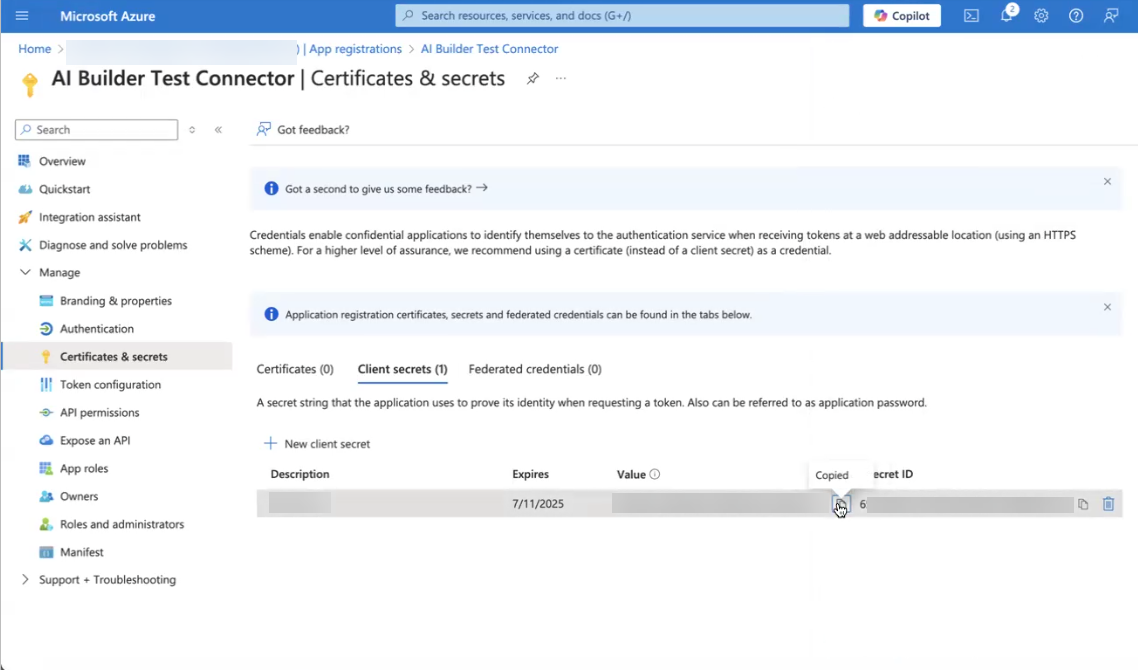
Go to Certificates & Secrets under the Manage menu.
Click + New Client Secret.
Add a description and select an expiration date for the secret.
Click Add to generate the key.
Copy the Secret Value (displayed only once).
Back in SysAid, paste the value into the "Client Secret" field.
Step 5: Testing the Connection
Once the Tenant ID, Client ID, and Client secret are set:
Click on Test in the AI Agent Builder.
Wait for confirmation that the test was successful.
Click Publish.
You are now ready to leverage the SysAid AI Builder’s capabilities to automate workflows and enhance productivity.
Please note:
If the test fails, please recheck the details and try again. If the issue persists, contact support.
Next steps
You can now use the prebuilt AI Agents. To view all available prebuilt AI Agents, see Prebuilt AI Agents Overview.
You can also create your own AI Agent from scratch using the AI Agent Builder. To learn which API capabilities are available for directory objects, go to Microsoft Learn.