Part of SysAid Asset Management, the SysAid Agent is a client-side application that resides on each of your computers and runs quietly in the background (you will not notice any performance differences after it's been installed). Once deployed, the SysAid agent has many benefits:
The SysAid Hotkey
Installing the SysAid Agent enables the SysAid hotkey. Assigned by default to F11, pressing the SysAid Hotkey takes a screenshot of your screen(s) and opens the Self-Service Portal. When submitting a service record in this manner, the screenshot is attached to the service record, thereby allowing the administrator who handles the call to easily see the exact situation where the problem occurred and to see any error messages that appeared on the user's screen.
Automatically import all computers into SysAid
Once you've installed the SysAid Agent on a computer, the agent sends a complete computer profile to the SysAid Server. SysAid then creates an asset record for that computer, complete with full hardware and software details. These details can then be viewed at any time from within SysAid.
Automatically update your computers' profiles
The SysAid Agent communicates regularly with the SysAid Server, and any time a hardware or software change is detected on a computer, the agent sends SysAid a record of all changes. In this way, your computer assets are always recorded in SysAid with the most up-to-date hardware and software details. This is helpful for tracking purposes, including tracking software license compliance.
Perform a remote control session
You can perform a remote control session to any computer that has the SysAid Agent installed, giving you My Desktop to unmanned computers and allowing you to provide remote assistance to users located anywhere in the world. For more information about SysAid Remote Control, please see our full Remote Control Guide.
Enable monitoring of your computers (with the SysAid Monitoring module)
SysAid allows you to monitor network services for your computers and gives a full suite of computer-by-computer monitoring for all of your Windows and Mac-based machines. Consolidate your monitoring and helpdesk software into one with the SysAid Agent and the SysAid Monitoring module. Read more about SysAid Monitoring here.
View online users
The SysAid agent allows you to see which users are logged on to a computer, and you can see a list of all online users under Assets > Asset Management > Online Users . This list allows you to initiate chat and remote control with your users, and to send a broadcast to your users to inform them of any real-time IT events. Read more about the Online Users list here.
Please note:
Patch Management Requirements for Microsoft Windows.
The rest of this guide explains the different methods for deploying the SysAid agent throughout your network.
SysAid Agent System Requirements
Important!
If your anti-virus solution maintains a white list of trusted paths, add the directory "\Program Files\SysAid" to the list. If it keeps a white list of trusted services, add the service "SysAidAgent" to the list.
The minimum requirements for the SysAid agent are:
| Component | Minimum Requirement |
|---|---|
| Computer and processor | 1.5 GHz |
| RAM | 512 MB |
| HD space | 50 MB*** |
| RAM usage | 15 MB |
| Operating system (32-bit or 64-bit) |
|
*.NET Framework 2.0 SP 2 must be installed
** Through a third-party tool. Please contact our support team for more information.
*** To enable Patch Management capabilities, an additional 1.5 GB is required.
To deploy the agent on Linux and Mac computers via the Network Discovery method, SSH with password authentication must be enabled on each Mac that you want to deploy to.
Deploying the SysAid Agent
To take full advantage of SysAid Asset Management, you must deploy the SysAid agent.
You may deploy the SysAid agent in the following ways:
| Supported OS | ||
Method | Windows | Linux | Mac |
Using the built-in Network Discovery tool | X | X | X |
Using the SysAid Administrator Tools | X |
|
|
Using an MSI deployment package | X |
|
|
Using a network login script | X |
|
|
From an asset imported by a WMI scan | X |
|
|
Manually, on a per-machine basis | X | X | X |
Dashboard | X | X | X |
RDS Form | X | X | X |
Each of the following sections discusses a different method of deploying the SysAid agent.
Agent Deployment Plan
Agent Deployment Plans contain all of the information required to deploy or undeploy the agents on a set of assets. You can apply a plan to any of your deployments.
Before Deployment
Before deploying the Agent using the SysAid Deployment Tool, the following ports must be opened between the deploying computer and the target computers: TCP 139, TCP 445, UDP 137, UDP 138, and UDP 8193. After the Agent is deployed, only port 8193 needs to be kept open*. The other ports are only used in the deployment process. You must also ensure that the following three services are running on each computer you are deploying to:
Server (on by default)
Remote Procedure Call (RPC) (on by default)
Remote Registry - To enable the remote registry to Control Panel > Administrative Tools > Services > Remote Registry > Start (verify that the remote registry was started successfully)
*The agent will work if this port is closed, but you will lose certain functionality.
For more information, see the Agent Deployment Plan List.

MSI Deployment Package Using Group Policy
The recommended way to deploy the SysAid Agent throughout your network is via group policy.
When deploying the agent using a group policy, you need to create a configuration file to include your unique parameters. You can create this file using Microsoft Orca (You can access the Orca installer for Windows 8, Windows 8.1, and Windows 10 by downloading the Windows SDK). Agent files are architecture-specific. You must create separate transform files for 32-bit and 64-bit agents.
Please note:
This option is designed specifically for group policy deployment. If you want to deploy the agent manually or via command prompt and script, select the Download SysAid Agent for Windows option in Settings > Network Discovery > Downloads.
To deploy the agent with a group policy using MSI
Navigate to Settings > Network Discovery > Downloads within your SysAid.
Click Download the SysAid MSI deploy package.
Extract the files to a location you want.
Open MS Orca.
From MS Orca, Select File > Open and open SysAidAgent.msi.
Select Transform > New Transform.
On the Tables pane, click Property. You should find the same parameters described above.
Modify the ACCOUNT, SERIAL, and SERVERURL parameters, with the values in the Downloads page in SysAid. The ACCOUNT parameter corresponds to the Account Name field.
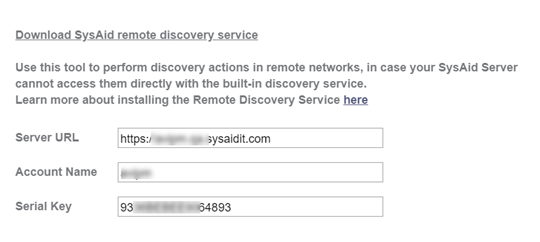
You can also modify the optional parameters in the list below.
Please note:
The following default values are applied, but are displayed as "NULL". It is not necessary to add the default values, and attempts to add them again can lead to user error.
These values are case-sensitive, so ensure that when entering the values, they are typed as they appear below.ALLOWREMOTECONTROL (default value="-1")
ALLOWSUBMITSR (default value="-1")
CONFIRMRC (default value="-1")
ENABLESYSAIDPS (default value="0")
FORMATHOTKEY (default value="F11")
HOTKEY (default value="122")
INTERVAL (default value="30")
LOGLEVEL (default value="0")
RDSNAME (default value=None) *
RDSURL (default value=None)*
SUBMITSRSHORTCUT (default value="SysAid")
SYSTEMPROXYSETTING (default value="-1")
SERVERPROXYADDRESS (default value=None)
SERVERPROXYPORT (default value=None)
SERVERPROXYUSERNAME (default value=None)
SERVERPROXYPASSWORD (default value=None)
ENABLEDVIDEOTICKETE (default value="-1")
Available for versions 18.1.50 and above.
When you finish, click Transform > Generate Transform and save the file as SysAidAgentx86.mst for the 32bit MSI or SysAidAgentx64.mst for the 64bit MSI.
Edit the Group Policy
Now you can use the MSI and MST files to publish the agent using a group policy. To deploy the MSI package with the MST file you created, add the package to the Computer Configuration part in the group policy:
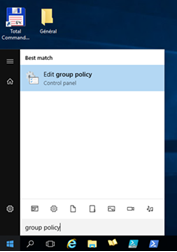
In the Windows menu, search for group policy and click Edit group policy to open the group policy editor.
Expand Computer Configuration > Software Settings.
Click Software installation.
From the Right-Click menu, select Software Installation > New > Package ...
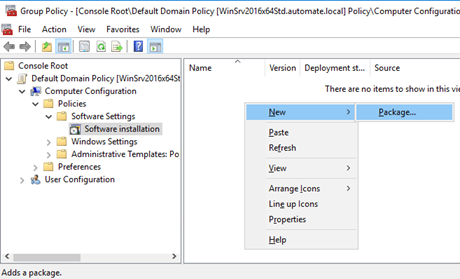
Point to the SysAidAgent.msi file.
Note
It is very important that the path to both the SysAid MSI and MST file not be local or through a network drive. Rather, the path should be through a network share accessible from everywhere in your network and to which everyone has at least Read permissions on.
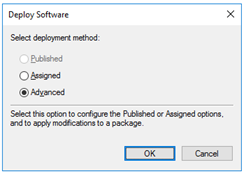
Under Deployment Method, choose Advanced. If you choose another option, you won't be able to apply the MST file you created.
Add a name for the package for easy identification (e.g., SysAid Agent 32).
For 32 bit MSI only : In the Deployment tab, click Advanced, uncheck the option “Make this 32-bit x86 application available to Win64 machines”, and click OK . This prevents the 32 bit MSI from being installed on 64 bit machines.
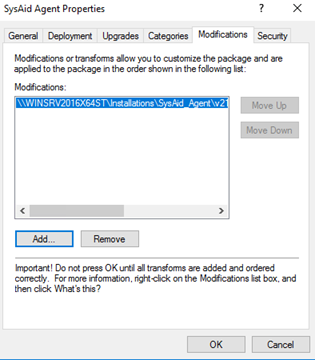
Switch to the Modifications tab and click Add.
Point to the correlating MST file. Again, it is essential to use a UNC to the file (to the network share), rather than a local/network drive path.
Click OK.
Recommended Settings
We recommend you enable three settings in the group policy editor to ensure that the MSI distribution process is smooth and seamless:
While still in the group policy editor, navigate to Computer Configuration > Administrative Templates > Windows Components > Windows Installer.
Right-click Always install with elevated privileges and click Edit.
Select Enable.
Click OK.
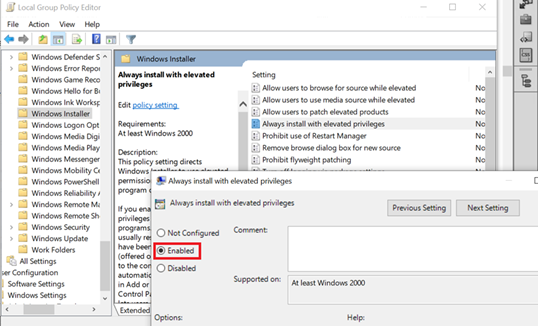
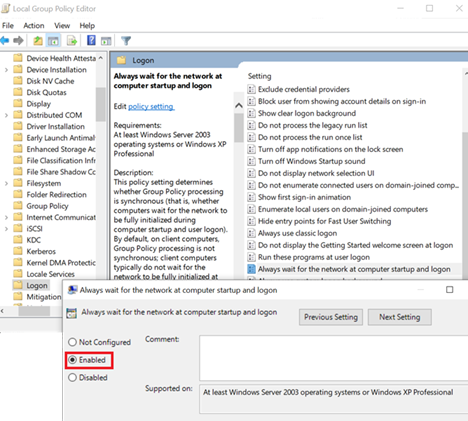
Repeat the process with the following two permissions:
Computer Configuration > Administrative Templates > System > Logon > Always wait for the network at computer startup and logon.
Computer Configuration > Administrative Templates > System > Group Policy > Configure Software Installation policy processing.
Deploy to a Computer Imported From WMI
If an asset has been imported into SysAid from a WMI scan, you can easily deploy the SysAid Agent to that computer. You may do this in one of two ways:
Option 1: Go to Assets > Asset Management > Asset List. Using the checkboxes, select one or more assets with Source = WMI, and click the Deploy Agent icon.
Option 2: Open the asset form for any asset. If that asset was imported from WMI, the Source field will have a link to deploy the agent. Click on it. (If the source field is not displayed on the asset form, you may add it by clicking Design Form.)
Please note:
When SysAid is installed on a Linux machine, the Remote Discover Service (RDS) is required for agent deployments. For more information, see the SysAid Remote Discovery Service Guide.
To install SysAid on a Linux machine through RPM,
Modify Server Parameters (Mac Agent Only)
After you install the Mac agent, you can modify its server parameters.
To change the server parameters
On your Mac computer, open Applications and select SysAid Settings.
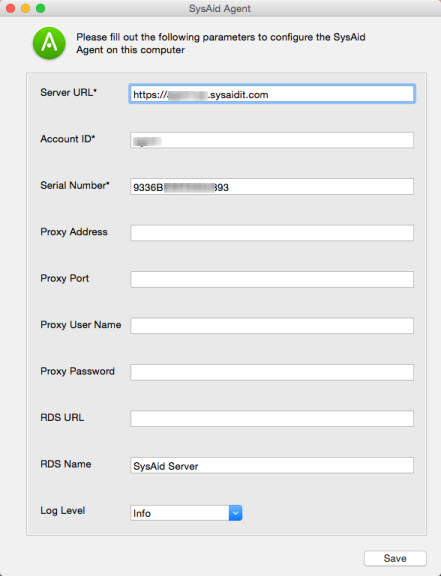
Edit the server parameters.
Click Save.
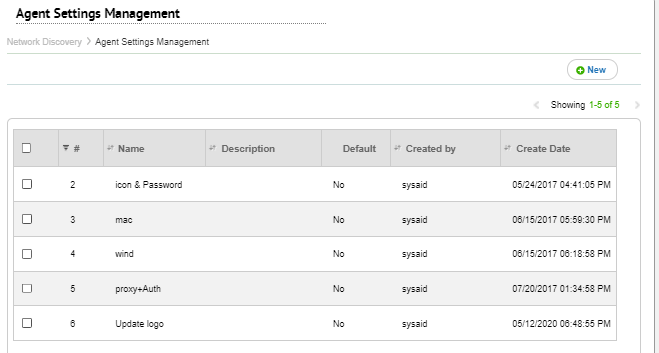
Agent Settings Management
Agent Settings Management allows you to store Agent Settings configurations that you can then apply to your agent deployments.
For more information, see the Agent Settings List.
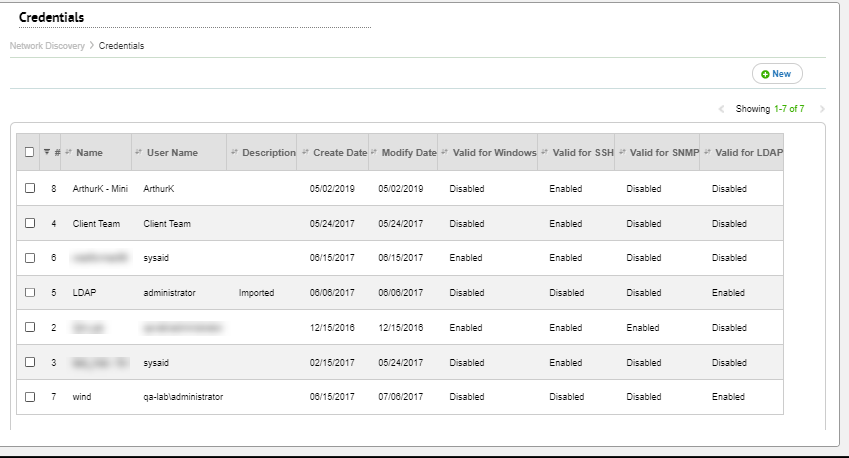
Credentials Management
Credentials Management allows you to store Agent Settings configurations, which you can then automatically apply to your agent deployments. Predefined asset credentials are required for all Agent deployments on those assets.
For more information, see the Credentials List.
Post Deployment
Once you've deployed the Agent to your computers, SysAid collects full hardware and software information for these computers. You can view this information from Assets > Asset Management > Asset List by clicking on any computer in the list. (Note that it can take up to five minutes after deployment before computers begin to appear in the Asset list.) You also have access to all SysAid agent functionalities described in the introduction to this guide.
Please consult the Getting Started Guide for an overview of what SysAid Asset Management offers you, and consult this page for an in-depth explanation of all SysAid Asset Management capabilities.
Troubleshooting
You can use the SysAid Agent Healthcheck Utility to perform a set of tests on most of the basic functionalities of the agent and provide a report with the tests' results. Customers who are experiencing issues with the agent deployment, communication, upgrades, etc., can run this utility before contacting support to uncover information regarding the agent's environment.
Healthcheck tests include:
Communications with the SysAid server
Communications with SysAid RDS
Communication Ports on Windows Firewall
Required software
more...
Click here to download SysAid Healthcheck.